the feed
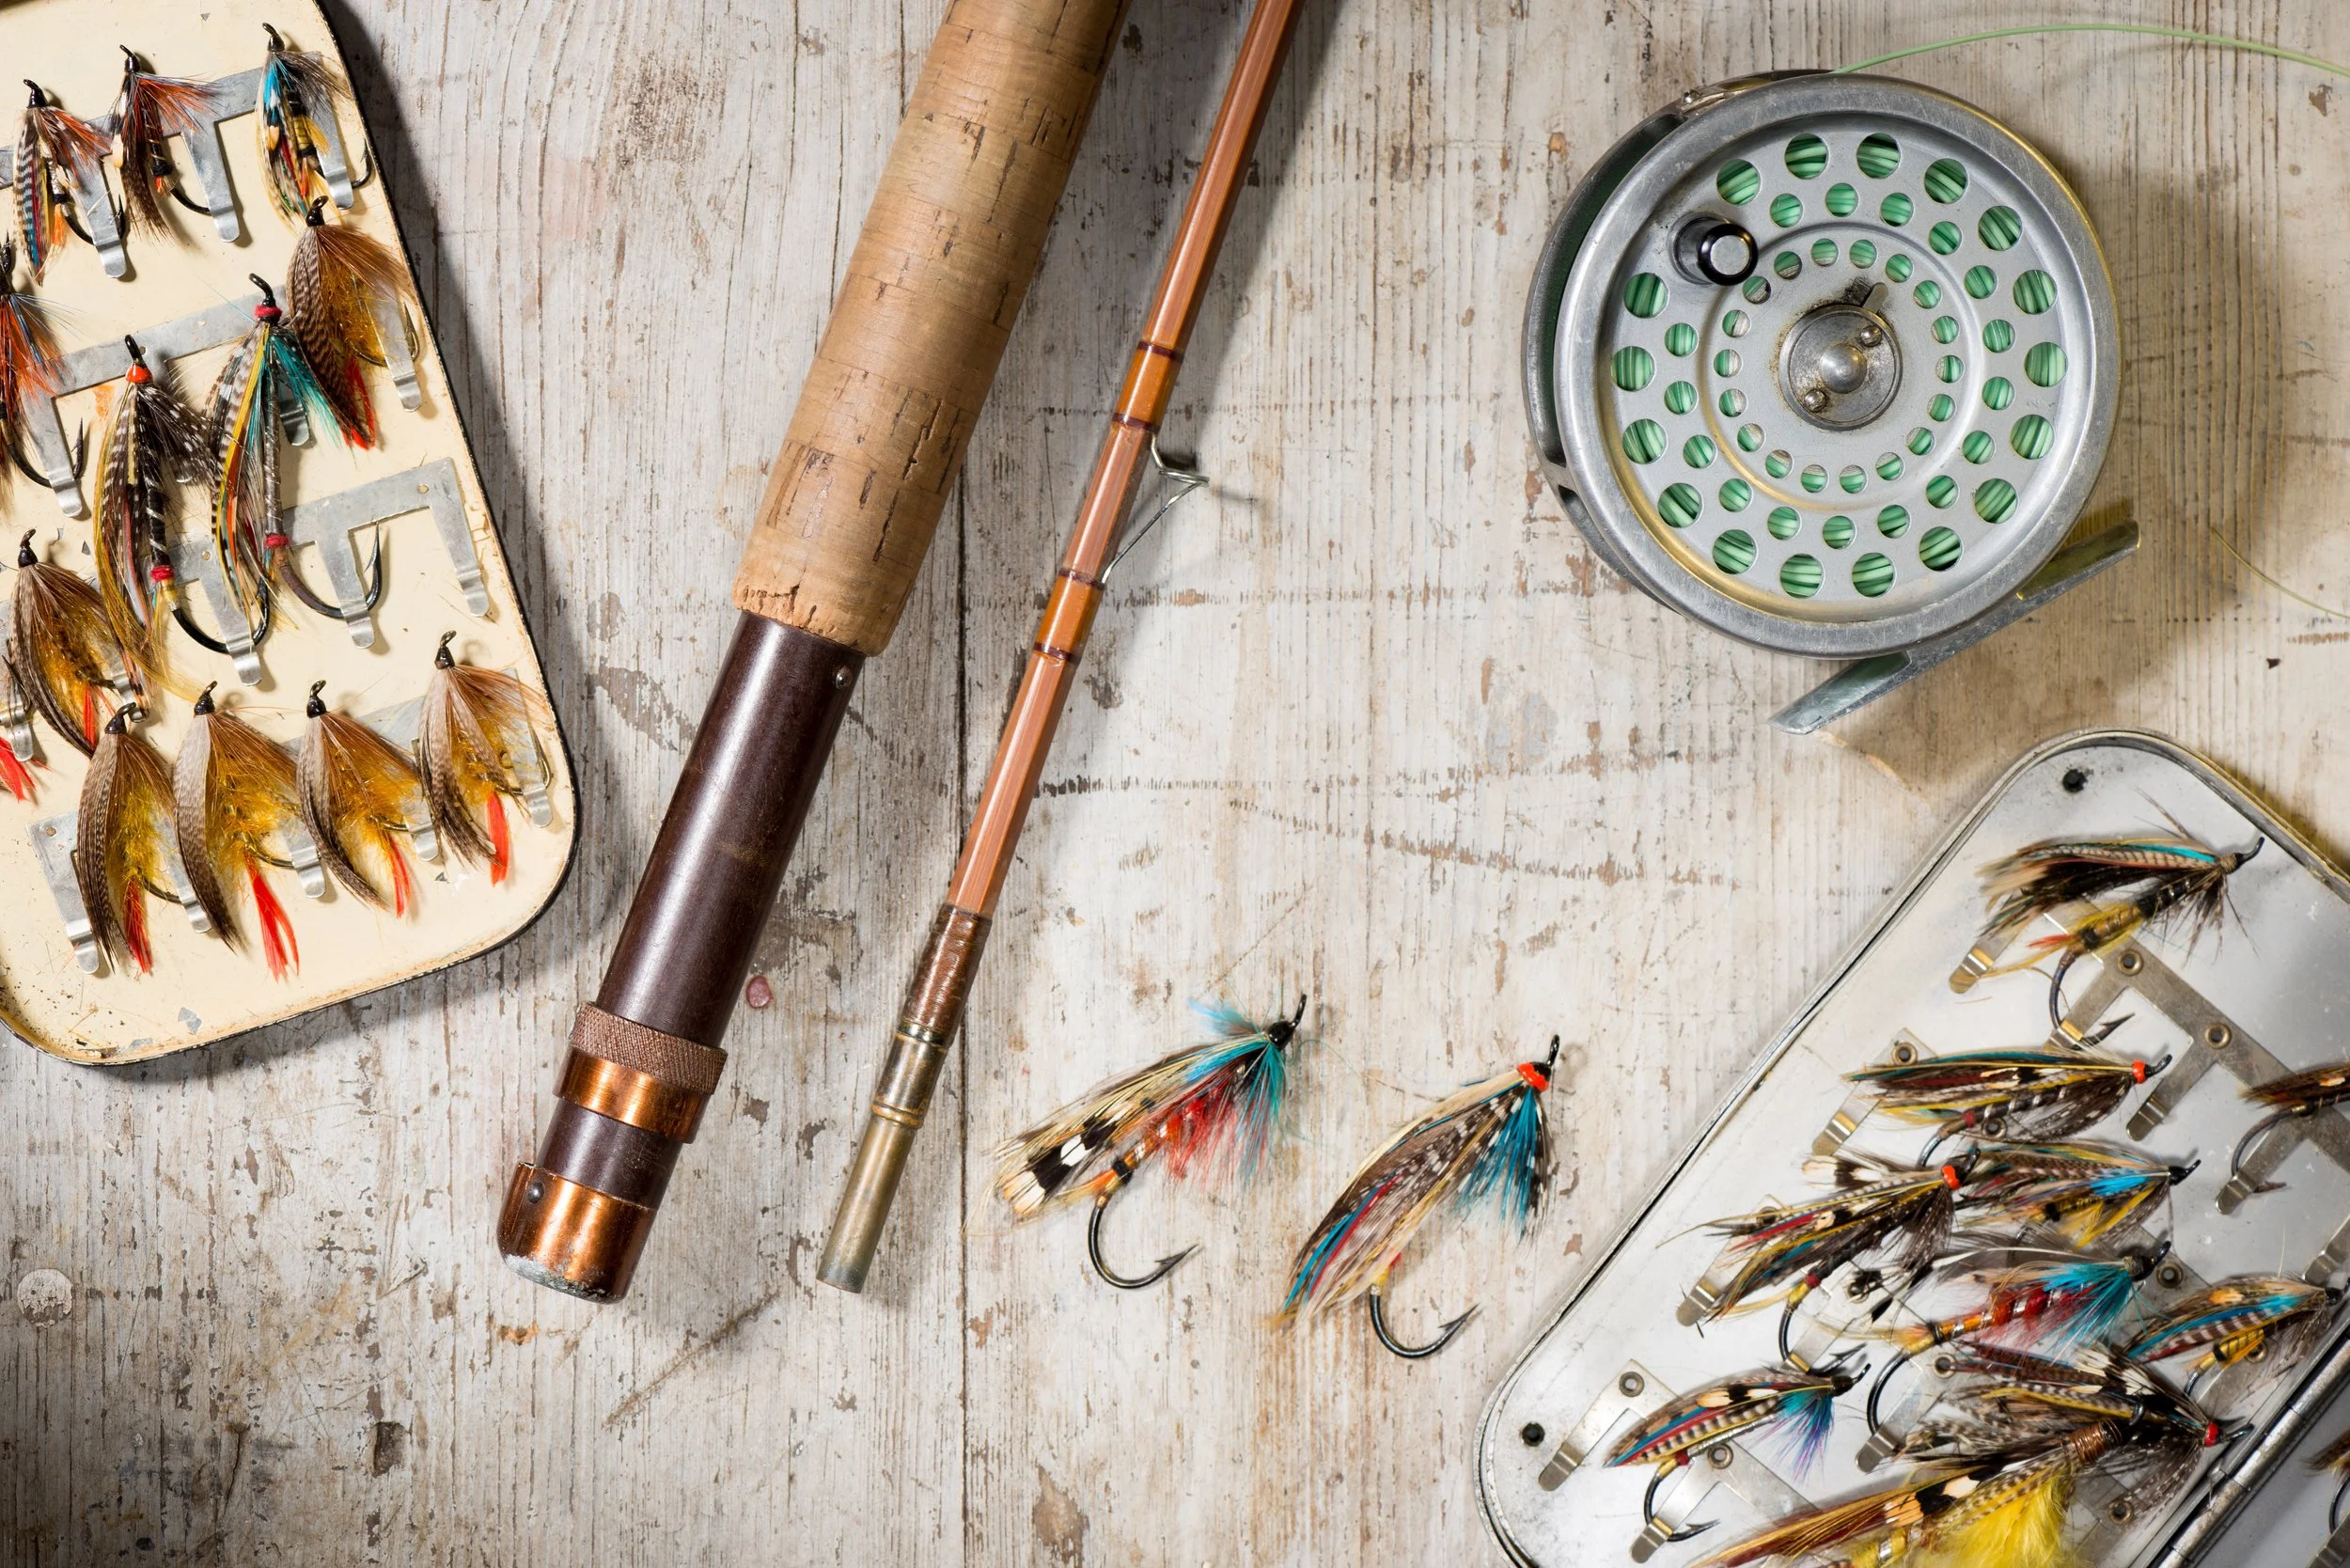
Fly Fishing Terms You'd Better Know
The first thing to know about fly fishing is that you will always be learning. It's part of the beauty of the sport. Always refreshing old ideas, picking up new tricks, and slowing down to let in some knowledge.
The first thing to know about fly fishing is that you will always be learning. It's part of the beauty of the sport. Always refreshing old ideas, picking up new tricks, and slowing down to let in some knowledge. I have scoured the internet and a couple of books to pull out all of the terms that I can think of to compile into this list. In all honesty, it was a practice of learning myself.
A
Anadromous Fish: Fish that are born in freshwater, migrate to saltwater to grow, and return to freshwater to spawn, such as salmon and steelhead.
Arbor: The center part of a fly reel where first backing and then line is wound (see Large Arbor, Standard Arbor, Mid-Arbor).
Arbor knot: A knot used for tying backing to the arbor of the fly reel.
B
Back Cast: In fly fishing, casting is a back-and-forth motion of the rod and line that allows you to place your fly where you’d like. The back cast is when your rod and line are behind you.
Backing: An added braided line that connects the reel’s spool to the fly line. Since fly lines average 75-115 feet in length, the lines require backing for those adrenaline-charged times when a large fish runs out all of the regular fly line.
Barb: The backward facing projection cut into a hook.
Barbless: Barbless hooks are either manufactured without a barb or the barb is squeezed down using hemostats or pliers. ‘Going barbless’ makes it easier to remove a hook and minimizes the handling and potential damage to a fish you intend to release.
Beadhead: A style of fly utilizing a bead immediately behind the hook eye. Some beads help a fly sink, but others are floaters.
Blank: A hollow rod is called a blank. It has no guides, ferrules, or reel seat. Fly rods are produced by wrapping sheets of fiberglass and graphite material around a carefully tapered steel rod (called a mandrel).
Blood Knot: The most widely used knot for tying two pieces of monofilament with similar diameters together; the best knot for construction of a knotted tapered leader.
Break off: A break off is that heartbreaking moment when an unusually strong or large fish snaps the line, typically due to an undersized tippet or worn leader, or a poorly tied knot.
Butt section: 1) the thicker end of a tapered leader that is tied to the fly line and 2) the last section of a rod, at the end of the handle.
C
Caddis: One of the three most important aquatic insects imitated by fly fishers – the other two being mayflies and midges – found worldwide in all freshwater habitats. The adult resembles a moth when in flight; at rest, the wings are folded in a tent shape down the back. The most important aquatic state of the caddis is the pupa, which is its emerging stage (see Larva, Pupa, and Emerger).
Cast: This is the motion you make when you collectively 'throw' a fly rod, reel, and line. There are different types of casting for different fishing applications. (See Back Cast, Overhead Cast, River Load Cast, Roll Cast, Water Tension Cast).
Casting arc: The path that the fly rod follows during a complete cast.
Catch and release: A practice within fly fishing intended as a technique of conservation. Fish should be fought quickly and never allowed to tire to the point of exhaustion to prevent injury or death. After capture, the fish is unhooked using wet hands – or no touching if possible – and forceps and returned to the water as quickly as possible. If necessary, resuscitate by pointing the fish's head upstream into the current and waiting until it swims off under its own power.
Chironomid: A scientific name for the members of the Diptera family of insects commonly known as midges. In the pupae stage, they typically appear to be small aquatic worms. In addition to caddis and mayflies, one of the most important insects in a trout's diet.
Click Drag (or Click & Pawl Reel): A mechanical system on a fly reel used to slow down or resist the pulling efforts of a fish, so as to slow the fish down and tire it to the point where it can be landed.
Clinch Knot: A universally used knot for attaching a hook, lure, swivel, or fly to the leader or line; a slight variation results in the Improved Clinch Knot, which is an even stronger knot for the above uses.
Cone Head: Same as a beadhead, but the bead is cone-shaped.
Covering (or Delivery): Used to describe the action of casting the fly to a fish or into a promising-looking area of water.
Current Seam (or Seam): Current seams are formed by the nature of current flow. Usually, the middle of a river or stream contains the fastest flow with its edges having slower flows due to friction with the bank and the streambed obstacles. A stream channel’s curvature redirects its heaviest flow away from the remainder of the stream creating current seams.
D
Damselfly: An important still water aquatic insect most commonly imitated in the nymphal form, with hatches usually occurring in early to mid-summer. Adult looks similar to a dragonfly but smaller and folds its wings along its back when at rest.
Dead Drift: A perfect float in which the fly is traveling at the same pace as the current, used in both dry fly and nymph fishing (see Mending Line and “S” Cast).
Delivery (or Covering): Used to describe the action of casting the fly to a fish or into a promising-looking area of water.
Disc Drag: A mechanical system on more expensive fly reels intended to efficiently slow and tire a fish that is taking line. Resistance is created between discs that apply pressure as line is pulled from the reel. Different from the click drag, the disc drag is smoother and less likely to create a sudden stopping resistance that will break the line.
Dorsal Fin: The fin on the back of a fish, sometimes divided into two or three partly or entirely separate sections.
Double Haul: In this cast the fly fisher quickly pulls and releases the line on both the back cast and the forward cast. It is used to create greater line speed, enabling the caster to reach farther or cut through wind.
Double Taper (DT): A standard fly line design in which both ends of the line are tapered, while the greater portion or “belly” of the line is level. An excellent line for short to moderate-length casts and for roll casting, but not as well suited for distance casts.
Drag: (1) An unnatural motion of the fly caused by the effect of the current on line and leader. Drag is usually detrimental, though at times useful – such as imitating the actions of the adult caddis. (2) Resistance applied to the reel spool to prevent it from turning faster than the line leaving the spool (used in playing larger fish).
Drag-Free Drift: This is accomplished when you minimize the effect of the current flow on the fly. This is equally important when fishing dry flies or nymphs. Trout are more likely to take food moving at the same speed as naturals being carried by the current and may even be spooked by flies moving too fast or too slow.
Drift: Four types of drifts: Straight upstream from you, upstream and across from you, downstream and across from you, straight downstream from you (see Fishing the Drift).
Dropper: A practice of fishing two flies at the same time, often one on the surface and a second underwater. A classic combo like the ‘Hopper-Dropper’ features a dry fly grasshopper pattern with a small nymph or emerger pattern tied off the bend of the hook. A dropper effectively doubles your chances of finding which type of insect and imitation fly the fish are keying on.
Dry Fly: Any fly fished upon the surface of the water, usually constructed of non-water-absorbent materials. Dry flies are most commonly used to imitate the adult stage of aquatic insects.
Dry Fly Floatant: Chemical preparation that is applied to a dry fly to waterproof it immediately before use; may be a paste, liquid, or aerosol.
Dun: (1) First stage in the adult mayfly’s life cycle, usually of short duration of 1 to 24 hours. This is the stage most often imitated by the dry fly. (2) A darkish gray-blue color that is very desirable in some fly tying materials.
E
Eddy: An area of water that is less turbulent than the surrounding currents, often found at the edges of a current or where two streams converge.
Elbow Control: The concept of maintaining a consistent level with your elbow during the overhead and roll casts. By holding your elbow in a steady plane, you can achieve a tight, wind-cutting loop that accurately delivers the line to your target. This is facilitated by adopting a proper stance that allows your upper body to pivot freely, ensuring a constant elbow position.
Emerger: Referring to aquatic insects, the term "emerging" describes the phase when a nymph reaches the water's surface and transforms into an adult. The emergence of the nymph is a crucial period for fly fishers to imitate, as it represents a significant food source for fish.
F
False Cast: A fundamental fly fishing cast used to adjust line length, change direction, and dry off the fly. This cast involves continuously moving the line backward and forward without allowing it to touch the water or ground (see Casting Arc, Back Cast, and Forward Cast).
Ferrule: A collar that connects the sections of a fly rod. One section fits inside another in an overlapping manner at the ferrule, providing the connection between rod sections.
Fingerling: A small and immature fish, such as a juvenile trout.
Fishing the Drift: The process of fishing from your target point to where you plan to pick up the line for the next cast. By strategically positioning yourself during the initial cast, you can achieve a longer drift, maximizing your chances of enticing a fish.
Fish Ladder: A series of interconnected pools constructed alongside a river obstruction, like a dam, to enable salmon and other fish to swim upstream.
Floatant: A water-resistant salve, cream, or substance used to help flies, leaders, and fly lines float on the water's surface.
Floating Fly Line: The most versatile type of fly line that remains buoyant throughout its length (see Double Taper, Level, Shooting Head, Weight Forward).
Fluorocarbon: Tippet or leader material with near-invisibility underwater, quick sinking properties, and minimal light reflection on the water's surface, making it harder for fish to detect.
Fly: An artificial lure hand-tied to resemble natural insects or baitfish, designed to attract fish. Flies incorporate various natural and synthetic materials secured onto hooks.
Fly Casting: The technique of presenting a fly to a target using a fly rod and fly line, involving various casting methods (see Back Cast, Forward Cast, False Cast, Roll Cast, "S" Cast, and Shooting Line).
Fly Line: Specially designed line for fly fishing, consisting of a tapered plastic coating over a braided Dacron or nylon core. Fly lines are available in different tapers and styles, including floating, sinking, and sink-tip lines (see Double Taper, Shooting Head, Weight Forward, Sink-tip, and Floating Fly Line).
Fly Pattern: Also known as a "recipe," it refers to the predetermined arrangement of materials and the arrangement of parts that make up an artificial fly.
Fly Reel: A reel used in fly fishing to hold the fly line.
Fly Rod: A specialized fishing rod designed for casting a fly line. Fly rods differ from other types of rods in that the reel is attached at the butt of the rod, with the rod handle always positioned above the reel. Fly rods typically have more line guides than other types of rods of the same length. They are available in various lengths, commonly ranging from 7 to 9 feet. Materials used in fly rod construction include bamboo, fiberglass, and graphite.
Fly Tying: The process of handcrafting fishing flies using threads and a combination of natural and synthetic materials.
Forceps: Hand-operated medical instruments widely used in fly fishing to remove flies from a hooked fish's mouth. These instruments, also called hemostats, feature smooth or lightly serrated jaws with a ratchet-locking mechanism to securely hold the hook until released.
Forward (or Power) Stroke: In fly fishing, the forward cast or stroke refers to the motion of propelling the rod and line in front of the caster towards the target. To execute a powerful forward stroke, maintain a consistent plane with your forearm, wrist, upper arm, and shoulder throughout the cast. Drive the entire arm forward, loading the rod, until the rod tip reaches the ten o'clock position. Then, allow the rod tip to drift down slightly while releasing the line with your non-casting hand, propelling the line toward the target (see Power Stroke).
Forward Taper: (see Weight Forward).
Foul Hook: To accidentally hook a fish anywhere other than in its mouth.
Freestone: A type of river or stream characterized by a significant gradient, resulting in medium to fast-moving water. While the upper sections of a freestone stream may be spring-fed, the majority of its flow comes from run-off or tributaries. Due to the swift current, the growth of weeds or vegetation is limited, resulting in a "Free Stone" bottom. Freestone streams are generally less fertile than spring creeks, with smaller and less diverse populations of aquatic insects. The faster water and fewer insect populations make trout in freestone streams more opportunistic feeders.
Fry: The initial stage of a fish's life after hatching from an egg.
G
Gel-spun polyethylene: A synthetic fiber with exceptional thinness, suppleness, slipperiness, abrasion resistance, and strength. This material is often used as braided fly line backing when a large amount of backing is required and reel space is limited.
Graphite: The most widely used material for constructing fishing rods today. Graphite offers an ideal balance of weight, strength, and flexibility, making it the preferred choice for rod building.
Gravel Guards: Flaps attached to each leg of waders that hook over wading boots, providing additional security for the waders and preventing debris from entering the boots. Modern waders often feature built-in gravel guards with elastic bottoms and hooks to keep the wader legs in place.
Grip: The handle of a fly rod made of cork rings shaped in various styles, including cigar grip, full-wells grip, and half-wells grip. To grip the rod properly, locate the balance point by resting the rod on the edge of the index finger with the reel pointing downward. The balance point is usually about 1/4 to 1/2 inch back from the front of the cork grip on most rods.
H
Hatch: An occurrence where a significant number of flies of the same species are present.
Haul: A technique of pulling the fly line with the non-casting hand to increase line speed and achieve greater casting distance. The haul is particularly effective during line pickup (see Double Haul).
Headwaters: The upstream section of a river before its main tributaries join it. Typically, the headwaters are narrower and have lower flow compared to the main section of the river.
Hemostat: A clamp or forceps used by fly fishermen to remove flies from the mouths of trout.
Hook: The fundamental component on which a fly is tied. Hooks are made of steel wire and come in different designs, including bronzed, cadmium-coated, and stainless. The choice of hook style depends on the type of fly being tied. Hook sizes range from tiny to large and are standardized based on the gap or gape, which is the distance between the hook shank and the hook point.
Hook Keeper: A loop of thin wire built into the shaft of a fly rod near the grip. The hook keeper securely holds the fly while it is still attached to the line, preventing the loss of the fly to streamside foliage and grasses when moving to the next fishing spot.
I
Imitative Flies: Flies tied to closely resemble specific insects. These imitative flies are highly effective when targeting finicky trout in clear, fertile, slow-moving streams with abundant populations of aquatic insects.
Impressionistic Flies: Flies tied to loosely suggest a variety of insects or insect families. These impressionistic flies are often most effective in streams with medium to fast-moving water and less dense populations of aquatic insects.
Improved Clinch Knot: One of the most widely used fishing knots, providing a reliable method for securing a fishing line to a hook, lure, or swivel.
Indicator (or Strike Indicator): A floating object placed on the leader or end of the fly line to indicate when a fish takes the fly or to track the drift of the fly. Strike indicators, made of materials like floating putty, poly yarn (treated with floatant), foam, or rubber, are especially useful when nymph fishing with a slack line.
K
Knotless Tapered Leader: A fly fishing leader made entirely from a single piece of monofilament, without any knots or sections of different diameter materials.
Knotted Leader: A fly fishing leader constructed by knotting together sections of different diameter leader material, resulting in a tapered leader. The most common knots used to construct such leaders are the Blood Knot and Surgeon's Knot (see Blood Knot, Surgeon's Knot, Leader, Tapered Leader, Leader Material).
L
Large Arbor: Compared to the narrow arbor of a standard fly reel, the large arbor reel has a wider diameter in the line-holding area. This design difference significantly increases the line retrieve rate, allowing fly fishers to quickly strip off long lengths of slack line for casting and retrieve line efficiently when playing a fish or changing fishing spots. The larger coils of line from a large arbor reel also contribute to smoother casting with fewer tangles. Additionally, the drag system of a large arbor reel works more effectively, as the effective spool diameter remains nearly constant while the fish pulls out line.
Larva: The immature and aquatic stage of caddis and certain other insects. Many caddis larva species construct a protective covering of fine gravel or debris during this stage. Larvae are bottom-dwelling and do not swim.
Lay Down (after the pick-up): A fly fishing cast executed with a single back cast. After lifting the line from the water, a back cast is made, followed by a forward cast that allows the line to straighten and settle on the water, completing the cast (see Pickup).
Leader: The section of monofilament line between the fly line and the fly. Leaders are usually tapered to deliver the fly gently and away from the fly line. (see Knotted Leader, Knotless Tapered Leader, Turn-over, and Monofilament).
Lie: Areas in a river or lake where fish reside. Optimal lies are typically found outside the main current, providing cover from predators or offering an abundant supply of insects and other food sources.
Line Weight: The weight of the first 30 feet of a fly line determines the line weight of a rod or reel. This standardized measurement system ensures proper matching of fly lines to rods of different flexibilities. Line weights are not linear; for example, the first 30 feet of a #6 weight line weighs 160 grains, while the first 30 feet of a #3 weight line weighs 100 grains.
Loading the Rod: When executing a forward or backward cast, the weight of the line bends the rod, storing the energy necessary for the subsequent cast.
Loop to Loop: A connection method between a fly line and a leader, achieved by creating a loop at the end of the leader using a Perfection Loop knot and attaching it to a loop at the end of the fly line. Loop-to-loop connections are sometimes used between a leader and a tippet.
M
Matching The Hatch: The practice of selecting an artificial fly that closely resembles the color, size, shape, and behavior of natural insects that fish are feeding on at a specific time. During a hatch, when fish become selective, it is crucial to choose flies that mimic the predominant insects to increase the chances of success.
Mayfly: Found in cold or cool freshwater environments, mayflies are the most commonly imitated aquatic insects worldwide. Many dry fly and nymph patterns are designed to imitate these insects. Mayflies spend approximately one year in the nymph stage and only one to three days as adults. The adult mayfly has one pair of upright wings, giving it the appearance of a small sailboat.
Mid-Arbor: Referring to the size of the area on a reel that holds the fly line, a mid-arbor reel is an intermediate option between a standard arbor reel and a large arbor reel. A mid-arbor design provides a balance of line capacity, rapid retrieve, and reduced line coiling compared to a standard arbor reel.
Minimizing Stream Current Drag: By mending the line, which involves throwing a loop of line into the drifting line, the angler can minimize the effect of current drag. This technique helps the line move at the same speed as the current, reducing unwanted drag. The appropriate mends may include upstream, downstream, or a series of "S" mends, depending on the cast and drift situation.
Mending Line: A method used after the line is on the water to achieve a drag-free float. It involves flipping or making a series of flips with the rod tip, creating a horseshoe-shaped bow in the line. This technique slows down the line's drift if mended upstream or speeds it up if mended downstream. For example, when casting across the flow of the stream and facing faster current on the angler's side, an upstream mend is necessary to slow down the line's drift downstream. This allows the line to better match the speed of the fly in the slower water on the far side of the main current.
Monofilament: A supple and transparent nylon filament used in various types of fishing. It is available in different breaking strengths and diameters and is commonly used in fly fishing (see Breaking Strength).
N
Nail Knot: A method of attaching a leader or butt section of monofilament to the fly line and attaching the backing to the fly line. This knot is commonly tied using a small diameter tube, such as a section of a plastic coffee stirrer, instead of an actual nail.
Narrow Loop: As the fly line travels through the air, it should form a narrow loop to minimize wind resistance. A narrow loop resembles the letter "U" turned on its side and is achieved by using a narrow casting arc.
Nymph: The immature form of insects. In fly fishing, the focus is primarily on the nymphs of aquatic insects, as they serve as a vital food source for fish.
Nymphing: The method of fishing with imitation nymph patterns, typically weighted flies and added split-shot on the leader, to target fish actively feeding on nymphs. When observing trout in riffles or shallow areas of a river, anglers wearing polarized glasses may spot the flash of a feeding trout attempting to dislodge nymphs from rocks or swiftly moving to take naturals drifting with the current.
O
Open Loop: The characteristic cast where the loop "opens" as it moves through the air. An open loop is often caused by an excessively wide casting arc, resulting in increased wind resistance and decreased accuracy.
Overhead Cast: The classic fly rod cast commonly associated with fly fishing. It is used for presenting a variety of fly types, including nymphs, streamers, wet flies, and dry flies. The basic overhead cast consists of five parts: Pause, Pickup, Back Cast, Power or Forward Stroke, and Shooting the Line.
P
Palming: The technique of gently applying the palm of the hand against the spool edge of a fly reel to help slow down the release of line when fighting a large fish.
Pause: The moment just before starting the pickup. Allowing a brief pause gives the river current a chance to straighten the line below the angler, making the pickup easier. The angler can strip some line toward themselves and hold it in their non-casting hand in loose coils or larger coils at their feet if making longer casts. This retrieved line will be used for shooting toward the target.
Pectoral Fins: The pair of fins located just behind the head of a fish.
Pelvic Fins: The pair of fins on the lower body of a fish, also known as ventral fins.
Perfection Loop: A knot frequently used to create a loop in a piece of monofilament, often found at the butt end of a leader for loop-to-loop connections.
Pickup (and Lay Down): This part involves lifting the fly line off the water by moving the hand, wrist, forearm, and upper arm in an upward arc. Then, bending the elbow and initiating a backward motion with the wrist, forearm, and upper arm while rotating at the shoulder. This motion picks up the line and initiates the back cast over the angler's shoulder (see Lay Down).
Polarized Sunglasses: Sunglasses equipped with polarized lenses that block incident light or glare, enabling anglers to better see beneath the surface glare of the water. Polarized sunglasses are an essential accessory for fly anglers to improve their ability to spot fish.
Pool: A section of a river or stream characterized by slower currents and increased depth, providing fish with protection from predators and a place to rest from swimming against heavier currents, particularly during spawning migrations.
Presentation: The act of casting the fly on the water and offering it to the fish. The objective is to present the fly in a manner similar to the natural insect or food form being imitated. There is a wide variety of presentation techniques, which vary with each fishing situation.
Pupa: The transition stage between the larva and adult of an insect. In fly fishing, caddis pupa are particularly important.
R
Reach Cast: A casting technique used to add extra slack in the line, particularly when fishing downstream, to achieve a more natural drift.
Redd: A depression scooped in the sand or gravel of a riverbed by spawning trout or salmon as a spawning area.
Reel Seat: A mechanism on a fly rod that securely holds the reel in place, typically using locking metal rings or sliding bands.
Retrieve: The act of bringing the fly back towards the angler after the cast. The retrieve can be done in various ways, but it's important to keep the rod tip low and pointed straight down the line.
Riffle: A section of the river with quickened water flow over smaller rocks or gravel, usually located at the head or tail of a pool. Riffles can be productive fishing spots, especially when using two-fly rigs or nymphs.
Riparian: Pertaining to anything related to, inhabiting, or situated on a riverbank, often used in the context of ownership and fishing rights.
Rise: The pattern created by a trout as it takes a fly. Different rise forms, such as sipping rise, jumping rise, and tailing rise, indicate specific feeding behaviors of the trout.
River Load Cast (or Water Tension Cast): A casting motion or technique that utilizes the current of the river to load the fly rod. By pointing the rod down towards the water and making a sidearm motion against the current, the force of the river's current and the angler's motion generate rod load.
Rocks: Obstructions in the river, such as large rocks, provide breaks in the current and offer cover for fish. Fish often hold in front of or behind rocks to feed and conserve energy.
Rod Flex: The manner in which the fly rod bends during the cast, particularly during the acceleration phases. Rods can be categorized as tip-flex, mid-flex, or full-flex based on where they primarily bend.
Roll Cast: A fundamental casting technique used in fly fishing. It can be employed for short to medium distances and is often used to pick up the line from the water's surface. A properly executed roll cast can deliver small dry flies to large nymphs.
Run: A section of the river where the water flows between a bank and a rock or between two rocks. Runs can vary in speed from fast to slow. Trout often hold against the side of rocks in runs.
S
"S" Cast: A casting technique used to introduce deliberate and controlled slack into the line, primarily to achieve a drag-free float and in conjunction with mending line (see Drag, Dead Drift, Mending Line).
Scud: A small crustacean resembling a freshwater shrimp, commonly found in trout waters and serving as a significant food source for trout. It is particularly prevalent in spring creeks.
Seam (Current Seam): (see Current Seam)
Seam Water: The area where two different currents converge, typically one slower and one faster. This area is ideal for holding trout, as they can stay in the slower flow and dart out into the faster current to feed. Look for seam water near islands or where large rocks divert part of the main flow.
Sea-run: Trout that hatch in freshwater, migrate to the sea to mature, and return to freshwater to spawn are known as sea-run trout. Species such as browns, cutthroats, and rainbows exhibit this behavior. Rainbow trout in the Pacific Northwest and Great Lakes are well-known examples, often referred to as steelhead.
Setting the Hook: The action of pulling the hook into the fish's mouth to secure a solid connection. The amount of force required for a successful hook set varies depending on factors such as hook size, fish species, and leader strength. Anglers often make the mistake of striking too hard when targeting trout and warm water fish, and not hard enough when pursuing salmon and saltwater fish.
Shank: The elongated and straight section of the hook between the eye and the bend.
Shooting Line: The technique of extending the length of the fly cast by releasing additional fly line (usually held in the non-casting hand) during the forward/presentation part of the cast. This method enables anglers to false cast with a shorter line and shoot a longer line when making the final forward cast. It is particularly useful for achieving longer casts with minimal effort.
Shooting Taper (ST or Shooting Head): A type of fly line with a short, single-tapered design, primarily used for longer casts with minimal effort. Shooting heads allow anglers to switch between different line types (floating, sinking, sink-tip, etc.) by quickly interchanging the head sections. They are commonly used for salmon, steelhead, and saltwater species but can be applied in various fly fishing scenarios.
Sink Rate: The speed at which a sinking fly line descends in the water column. Fly lines are available in different sink rates, ranging from very slow to extremely fast.
Sink-Tip Fly Line: A type of floating fly line where only the tip portion sinks. It is available in various lengths, such as 4-foot, 10-foot, 12-foot, 15-foot, 20-foot, 24-foot, and 30-foot sinking tips. The 10-foot sink-tip is the most commonly used and practical in many fishing applications. Sink-tip lines are valuable for all types of fly fishing, especially when fishing wet flies or streamers.
Sinking Fly Line (S): A fly line that fully submerges beneath the water's surface. The entire length of this type of line sinks, allowing anglers to target fish at different depths.
Sipping Rise: A subtle rise form exhibited by trout, resembling the circular waveform created by dropping a rock into a pool of water. This rise pattern often indicates the presence of a large feeding trout, particularly during dawn or dusk feeding times.
Spawn: The reproductive behavior of fish, during which females deposit eggs (referred to as spawn) on various surfaces, while males release milt to fertilize the eggs. This process ultimately leads to the hatching of fry.
Spey: A specialized casting technique that utilizes two-handed rods and a modified roll cast. It originated on the Spey River in Scotland, from which it derives its name.
Spinner: The egg-laying stage of a mayfly. While not as significant to fly fishers as the dun stage (see Mayfly and Dun), it still plays a role in the insect's life cycle.
Spool: The rotating component of a fly reel that holds the backing and fly line. Additional spools can be purchased for reels, allowing for quick changes between different types of lines to match fishing conditions.
Spring Creek: A creek or stream that receives its water from underground aquifers or springs, rather than relying on glacier/snow melt or surface runoff. Spring creeks feature consistent flows of pure, clean water throughout the year, with minimal temperature fluctuations compared to traditional creeks and rivers. This stability is due to their underground water sources.
Stalking: The act of stealthily approaching a fish to avoid startling or disturbing it.
Stance: The position of the angler's feet during casting. The foot on the casting side should be positioned about 45 degrees behind the lead foot, with shoulder-width spacing. For right-handed anglers, the right foot is positioned back, while left-handed anglers position their left foot back. This stance allows for easy twisting and rotation of the body during the cast. Standing with feet parallel restricts the body's mobility and limits casting accuracy and distance.
Steelhead: A migratory form of rainbow trout that spends part of its life in the ocean before returning to freshwater to spawn.
Stonefly: An important aquatic insect and a significant food source for trout in all stages of its life cycle. Stonefly nymphs can live for one to three years, depending on the species. Most stonefly species hatch by crawling to the shoreline and emerging from their nymphal cases above the water's surface. Adult stoneflies have two pairs of wings that fold flat along their backs when at rest. Stoneflies typically require rocky streambeds with good water quality.
Streamer: A type of fly designed to imitate various baitfish species that freshwater and saltwater game fish feed on. Streamers are typically larger and often heavily weighted flies that sink quickly and mimic the swimming motion of baitfish. Streamer patterns are effective for targeting larger trout that rely on baitfish for their caloric intake. These patterns can entice strikes from fish that may not respond to smaller dry flies.
Strike: The attempt made by a fish to eat a fly, whether successful or not. The term "strike" also refers to the angler's movement of the rod to set the hook.
Strike Indicator: (see Indicator)
Stripping Line: The action of retrieving the fly line by pulling it in through the fingers instead of winding it onto the reel.
Surgeon's Knot: An excellent knot used to join two lengths of monofilament, even when they have different diameters.
T
Tag (or Tag End): These are the remaining one or two lengths of tippet after tying a knot. In the case of a blood knot, intentionally leaving one tag end longer allows for the attachment of a dropper fly above the terminal (or point) fly.
Tail: The portion of the fly usually made from fine feathers or hair located at the end of the hook. The tail often imitates the legs of an insect or the pupal shuck still attached to emerging caddis or mayflies. Adding a tail to a fly provides motion and a lifelike appearance.
Tailing Rise: When fish feed in shallow water, their caudal fin is often exposed, creating a tailing rise. This behavior is an exciting discovery and usually indicates the possibility of attracting strikes by presenting the appropriate fly.
Tailwater: The section of a river or stream located downstream from a large man-made dam. Tailwaters, especially those originating from bottom-discharge dams, are renowned for their productivity and relatively cold, temperature-stable water conditions.
Tapered Leader: A leader made of monofilament material specifically designed for fly fishing. The back or butt section of the leader has a diameter nearly as large as the fly line, gradually tapering to a smaller diameter at the tip end (see Knotless Tapered Leader, Knotted Leader, and Tippet).
Terrestrial: Terrestrials refer to land-based insects that often serve as food for fish, particularly during warm summer months or windy conditions. Dry-fly anglers particularly enjoy fishing with terrestrial patterns, such as grasshoppers (hoppers), as they attract large, voracious trout.
Tight Loop: A term synonymous with a narrow loop (see Narrow Loop). It refers to a tightly formed loop in the fly line during the cast, which enhances accuracy and efficiency.
Tip Section (or Tip Top): The topmost section of a fly rod, characterized by its smallest diameter and furthest distance from the rod grip.
Tippet: The end section of a tapered leader, typically with the smallest diameter, where the fly is tied. When your tippet becomes damaged on rocks or logs during fishing, or if a section is lost due to an errant back cast in trees, it is advisable to replace the tippet. Carry multiple spools of tippet with varying diameters and breaking strengths to quickly match the remaining diameter of your fly leader.
Trout Unlimited: A nonprofit organization dedicated to the conservation and enhancement of trout fisheries, with a particular emphasis on wild trout.
Turn Over: The action of the fly line and leader straightening out at the completion of the cast. Proper turn over ensures accurate presentation and effective delivery of the fly to the target.
U
Undercurrent: The flow or current of water occurring below another current or beneath the water's surface.
Unloading the Rod: The process of the rod unbending and releasing its stored energy, transferring it back into the fly line during the cast.
Upstream: In the direction against the current of a river or stream.
Upwind: Moving or positioned into the direction from which the wind is blowing.
W
Wader Belt: An adjustable belt secured near the upper part of chest waders to prevent water from entering, especially crucial in case of a fall to avoid filling the waders with water.
Waders: Available in various styles and constructed from different waterproof fabrics, waders are categorized into two main types: boot foot and stocking foot. Boot foot waders have built-in boots, allowing you to easily slip them on and go. Stocking foot waders require the use of separate wading shoes, which generally offer better support and traction.
Wading Boots (or Shoes): These specialized boots are designed to be worn over stocking foot waders. They feature soles made of felt or rubber, and many can be equipped with studs for enhanced traction.
Wading Staff: A walking stick specifically adapted to provide stability for fly anglers while wading in fast or deep water. Some wading staffs are foldable and can be conveniently stored in a fishing vest pocket until needed.
Water Tension (or River Load) Cast: (see River Load Cast)
Weight Forward Line (WF): A fly line that is easy to cast due to its weight being concentrated in the forward section. Unlike a double taper line with a level middle section, a weight forward line quickly tapers down from the rear of the forward section to a thin diameter running line. This design allows it to shoot through the rod guides with minimal resistance, resulting in increased casting distance. Weight forward lines are highly versatile and suitable for various fly fishing applications.
Wet Fly: Any fly intended to be fished beneath the water's surface; nymphs and streamers are examples of wet flies. It is also a traditional fly tying style characterized by soft, swept-back hackle and a wing that sweeps backward. Wet flies are considered predecessors to nymphs and streamers.
Wet Fly Swing: A common presentation technique used when fishing with wet flies, particularly popular among steelhead anglers. It involves imitating the swimming motion of mayflies, emerging caddis, and small fish.
Wind Knot: An overhand knot unintentionally formed in the leader due to poor casting, significantly reducing its breaking strength.
X
'X': When combined with a number, the letter 'X' denotes the measurement of leader material diameter, such as "4X". A lower number indicates a larger tippet diameter, correlating with increased breaking strength. Consequently, delicate 7X tippet has a much smaller diameter and significantly lighter breaking strength compared to sturdier 2X tippet.
Z
Zinger: A retractable device used to suspend essential items, such as nippers, from a fly vest. It allows easy access to the tools while keeping them out of the way when not in use.

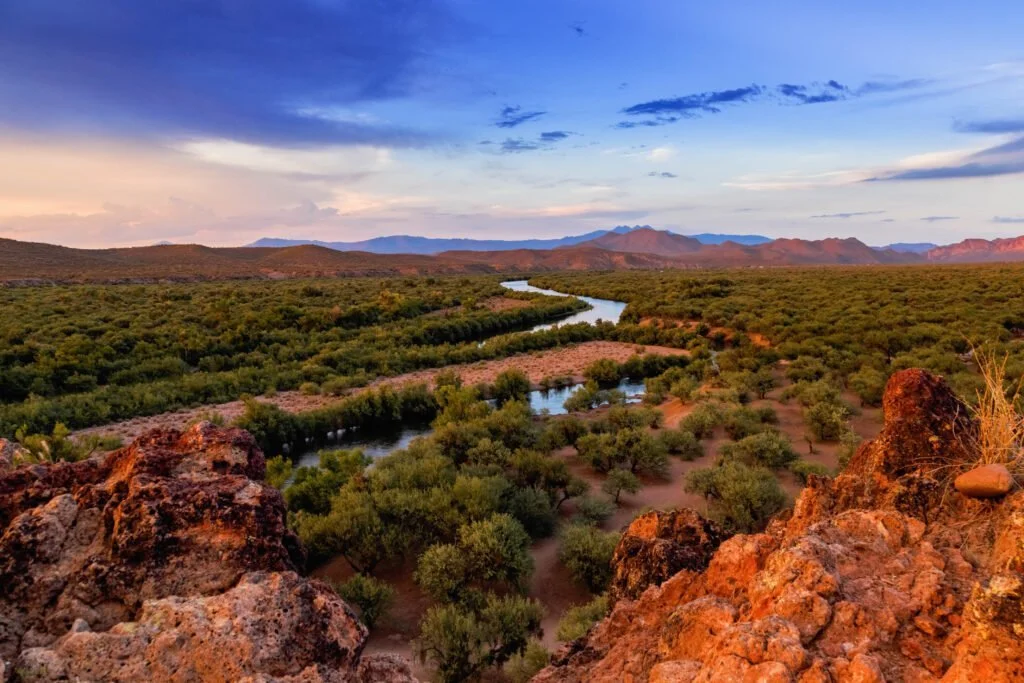
Did You Know You Can Fly Fish in Arizona? The 7 Best Places
Here are the 7 best spots for fly fishing in Arizona: Lee's Ferry, Salt river, Silver Creek, Oak Creek Canyon and more. With Maps!
The southwest region of the United States is rapidly gaining popularity for relocation, attracting people from around the world with its appealing weather, job opportunities, and a plethora of outdoor activities. While many know the fantastic opportunities for mountain biking, hiking, climbing, and skiing (yes, we have skiing in the desert!), the quality fisheries often go unnoticed. Whether you're in search of bass in expansive lakes or keen on hiking through backcountry streams for trout, the fishing in the southwest should not be underestimated.
When it comes to the best fishing in the southwest, Arizona deserves to be at the top of the list. With its mountain streams and vast freshwater lakes, the state offers a variety of angling experiences that will satisfy the desires of many anglers. Here is a list of the 7 best places for fly fishing in Arizona, complete with maps for easy navigation:

LEE’S FERRY AREA OF THE COLORADO RIVER
Situated on the Colorado River near Page in Northern Arizona, Lee’s Ferry is an unsurprising top choice for those familiar with the state. This tailwater fishery stretches over 15 miles downstream from Lake Powell to the northern Grand Canyon. The proximity to the canyon, along with consistently clear and cool water at around 50 degrees F, makes it an excellent destination. The stunning red sandstone cliffs accompany anglers as they seek out wild rainbow trout. This intriguing river offers a diverse range of features such as riffles, gravel bars, and deep pools, making it a dream come true for fly anglers.
The fishing remains active year-round, with summer being the busiest due to the cool water. During late fall and winter, rainbow trout engage in spawning activities, providing an opportunity for sight fishing. However, fishing can be challenging in spring due to the snow melt around Lake Powell. For the best access to the Colorado River in Arizona, head to Lee’s Ferry, especially during the offseason to avoid crowds.
When it comes to fly gear, nymphs are highly effective, particularly midge flies in cream or red colors that imitate larvae, pupae, and adults. While occasional mayflies, stoneflies, and caddis flies can be found, sticking to midges in sizes 14-20 generally yields good results. A 5 or 6-weight rod is recommended for this river, along with a 7 to 9-foot leader for nymphing, including an indicator.
SALT RIVER ARIZONA – RAINBOW TROUT HAVEN
Merely 25 miles from Phoenix, the Salt River offers a convenient fishing spot for those on winter holidays. This tailwater flows below the Saguaro Lake and provides cold water sourced from the lake's depths. While most of the river supports rainbow trout, it's primarily a stocked stream with some holdovers. The fishing conditions can be tough during dry years with lower flows, but when the watershed receives sufficient rain, it becomes highly productive.
Trout fishing in the desert might not be the first thing that comes to mind, but the Salt River defies expectations. Among the popular fishing spots on the Salt River are User's Water Recreational Area, Coon Bluff, Goldfield, and Phon D. Sutton. It's advisable to give the fish some time to settle after stocking by avoiding immediate visits.
Fly fishing gear for the Salt River includes a 4 or 5-weight rod, a 7 or 8-foot leader for nymphing, and a 9 to 12-foot leader for dry fly fishing. Various hatches occur throughout the year, such as Blue Winged Olives, Tricos, Blue Quills, and caddis flies. During summer, ants, grasshoppers, and beetles become prevalent. When struggling to find fish in winter, using a midge fly as a searching pattern can be effective. Recommended flies include Blue Winged Olive, Elk Wing Caddis, and English Pheasant Tail.

OAK CREEK – A PICTURESQUE TROUT PARADISE
Oak Creek, running through Oak Creek Canyon in Sedona, offers one of the most visually stunning fishing experiences on this list. This beautiful and clear trout stream transports anglers to an idyllic setting, making it easy to forget they are in the heart of Arizona. Trout in Oak Creek are stocked from the Page Springs Fish Hatchery, and while the water warms up near Grasshopper Point, the trout survive throughout the year.
Oak Creek boasts a diverse population of rainbow, brown, and brook trout, with brook trout being primarily found in the North Fork due to the higher elevation. Pocket water and riffles abound in this stream, but it's important to be aware of fishing regulations, as certain sections between Junipine Resort and the West Fork Trail require single hook, barbless, and catch-and-release practices. For fishing locations, the West Fork is likely the most productive spot, known for its wild brown trout fishing accessible via a hike, which lends a secluded mountain stream ambiance. Starting at Grasshopper Point is another option, with a suggestion to eventually work one's way to the West Fork. Oak Creek offers plenty of water to explore beyond these spots, with the North Fork meeting the West Fork at Cave Springs, and the river flowing through Sedona before joining the Verde River.
Fly fishing gear for Oak Creek involves a 4 or 5-weight rod, as it is a true trout stream that requires careful selection of spots and reading of the water. Challenges await even the most experienced anglers, but the rewards are plentiful. Flies such as small Blue Winged Olives (size 20), Caddis flies, Sedges, and imitations of freshwater shrimp during specific hatches can prove effective.

BLACK RIVER – SEEKING SERENITY IN THE WHITE MOUNTAINS
For those seeking respite from the heat of Phoenix, the Black River in the White Mountains near Show Low, AZ, provides an excellent escape. Stretching 114 miles, this river holds various fish species and presents a beautiful landscape even if catching fish proves challenging. Similar to Oak Creek, the Black River experiences reduced water levels in late summer and fall. The upper sections of the river are home to Apache Cutthroat, a prized fish for many anglers in the southwest. The lower section boasts smallmouth bass and brown trout. Most areas of the river are accessible via forestry roads, and fishing is best during spring, summer, and fall.
Caution must be exercised when casting, as the surrounding bushes can lead to frustration if not careful.
SILVER CREEK – A CATCH-AND-RELEASE GEM
Located in Northern Arizona near Show Low, Silver Creek is a two-mile stream owned by the Arizona Game and Fish Department, ensuring ample access for anglers. While wading can be challenging, fishing from the banks is productive. Silver Creek is known for hosting Apache and Rainbow trout, including some impressively sized specimens. Catch and release regulations are in effect from October to March 31st, allowing for an opportunity to experience the larger trout Arizona has to offer. A 4 or 5-weight rod is suitable for this creek, and a major fight should be expected when targeting the large fish.
Recommended flies include Blue Winged Olives, blood midges, and leech streamer patterns.

EAST CLEAR CREEK – A SMALL STREAM TROUT HAVEN
Situated near the Mogollon Rim in Payson,AZ, East Clear Creek is a small but ideal trout fishery that branches off from the Little Colorado River. Access to the creek is best found via forest roads along Highway 87. Fishing around Kinder Crossing and gradually moving downstream is recommended. The creek offers a mix of wild rainbow and brown trout, with riffles, deep pools, and numerous runs throughout its course. Hatches on Clear Creek include BWOs, Tricos, Little Black Caddis, and Sedges. A smaller 4 or 5-weight setup is suitable for navigating the tight spaces of Clear Creek. Anglers will find themselves challenged by this beautiful mountain stream.

BRIGHT ANGEL CREEK – BREATHTAKING SCENERY + TROUT FISHING
A list of Arizona's top fly fishing destinations wouldn't be complete without mentioning the Grand Canyon. Bright Angel Creek, located in the North Rim, is not easily accessible but rewards those who make the effort. A seven-mile hike along the South Kaibab Trail, involving a 5,000-foot elevation change, leads to the creek from the South Rim. The stream hosts wild rainbow and brown trout measuring between 12 and 18 inches. Effective techniques include using BWOs and nymphs to fish the pocket water. Any easily packable rod is suitable for this remote creek.
BIG BONITO CREEK – TROUT AND BASS FLY FISHING
Located in Apache Country, Big Bonito Creek holds bass, rainbow, brown, and Apache trout. This 11-mile stream requires a permit from the Apache Tribe to fish and is accessed via reservation roads Y40, 55, and 70. These roads are mostly dirt, so it's important to consider your vehicle's capabilities. Some hiking may be necessary to access the creek, which is filled with boulders and offers successful pool fishing. Trout ranging from 14 to 16 inches and smallmouth bass can be found in the lower sections. A 6-weight rod is recommended for those targeting both bass and trout. Poppers and larger streamers are effective for bass, while trout can be enticed by streamers, BWOs, blood midges, and other patterns. Fishing on Big Bonito Creek is best from May to October, with slower fishing during hot weather.
Fly Fishing Clubs in Arizona:
For those seeking a community of fellow fly fishing enthusiasts, two notable clubs in Arizona are:
Payson Flycasters: Located near the Mogollon Rim, this club provides an excellent option for anglers interested in exploring Northern Arizona. More information can be found on their website.
Arizona Flycasters: This club is based in Phoenix and offers a great opportunity for individuals in the greater Phoenix area to learn about fly fishing in Arizona. For more details, visit their website.
Fly Fishing Guides and Other Fishing Resources in Arizona:
Fly Fish Arizona: This guide service offers trips to various locations across Arizona. Their website provides further information.
Orvis: centrally located in the valley right off of Camelback. This store has everything you need to complete your outfit and kit. But the most valuable thing are the staff members. They are super knowledgeable, incredibly friendly, and stoked to give you some insight Beta on where to go what to fish, when to go, etc..
Arizona State Parks and Trails: The official website of the State of Arizona offers information on where to fish, stocking schedules, and fishing regulations. Visit their website for more details.

My Fly Fishing Setup
This is the staple setup that I use for 95% of all my fly-fishing trips. I may change it up based on where I am headed and what I am fishing.
Fly Rod/Reel Combo(s):
Redington Path Fly Rod Combo Kit with Pre-Spooled Crosswater Reel, Medium-Fast Action Rod. 5 wt 9 ft. Buy on Amazon | Buy at Bass Pro Shop
Orvis Clearwater Fly Rod Outfit - 5,6,8 Weight Fly Fishing Rod and Reel Combo Starter Kit with Large Arbor Reel and Case. Buy on Amazon | Buy at Bass Pro Shop
Clothing:
Pants: Orvis Jackson Quick-Dry Pant | Kuhl Renegade Rock Pant
Shirts: Arc'teryx Cormac Hoodie | Patagonia Capilene Cool Daily Hoodie | Free Fly Men's Bamboo Lightweight Hoodie
Footwear: Chaco Z/2 Classic Sandals | Simms Flyweight Access Wading Boots | Simms Flyweight Neoprene Wet-Wading Socks
Packs and Bags:
Backpack: Gregory Zulu 65 | Gregory Alpaca Duffel 45
Fishing Pack: Orvis Sling Pack | Orvis Chest/Hip Pack
Accessories:
Umpqua River Grip Zing/Nipper/Hemo | Yellowstone Fly Goods Fly Agra Floatant | Orvis Superstrong Plus Tippet | Orvis Leaders | Nomadix Bandana Towel | Nomadix Poncho Towel |

Top 10 Fishing Waders Of 2023
The Top 10 best waders of 2023 - from affordable entry-level options like Frogg Toggs Hellbender, to high-end favorites such as Orvis PRO.
Looking for the best fishing waders? We've got you covered with our top-ten picks, ranging from entry-level options to midrange performers and high-end favorites. Check them out below:

Frogg Toggs Hellbender Stockingfoot Chest Waders are a popular choice for anglers and outdoor enthusiasts. They are designed to keep you dry and comfortable while wading in water.
Made from durable and breathable four-ply nylon fabric
Stockingfoot design with built-in neoprene booties
Adjustable elastic suspenders for a secure and comfortable fit
Large front pocket with a water-resistant zipper for convenient storage
Reinforced knees for added durability and protection
Integrated gravel guards to prevent debris from entering boots

Redington Crosswater Waders are another popular choice among anglers and outdoor enthusiasts. These waders are designed to provide comfort, durability, and reliable waterproofing.
Durable three-layer nylon fabric for reliability
Stockingfoot design with neoprene booties for a customized fit
Adjustable suspenders for personalized comfort
Flip-out pocket with YKK zippers for convenient storage
Reinforced knees for enhanced durability
Integrated gravel guards to keep debris out of boots
Versatile for various water activities, including fishing and fly fishing
Cabela's Premium Breathable Stockingfoot Waders offer a combination of comfort, breathability, and durability.
Breathable fabric for comfort and moisture management
Stockingfoot design with neoprene booties
Adjustable elastic suspenders for a personalized fit
Multiple pockets, including a large front pocket with a water-resistant zipper
Reinforced knees and seat for durability and protection
Integrated gravel guards to prevent debris from entering boots
Versatile and suitable for fishing, hunting, and general outdoor use
Proven Simms durability for long-lasting performance
Breathable and comfortable waterproof fabric construction
Convenient storage options, such as chest pockets and reach-through hand-warming pockets
Built-in gravel guards to keep debris out of boots
Anatomically engineered stockingfeet for a comfortable fit
Versatile attachment options for additional pockets or accessories
Lightweight design for enhanced mobility
)
Orvis Clearwater Waders: With a wide range of sizing options, these waders ensure an optimal fit, catering to different body types and preferences.
Value-priced, full feature men's wader
Modern fit to eliminate traditional wader bulk
Opposing side-release buckles allow for waist-high conversion
External storage pocket with stretch panel
Kangaroo-style handwarmer pocket
Anatomical neoprene booties with integrated neoprene gravel guards
Belt included
Redington Sonic-Pro Waders: Combining a classic design with an excellent fit, these waders provide both style and functionality for your fishing adventures.
L.L.Bean Kennebec Stockingfoot Waders: Delivering an excellent price-to-value ratio in the midrange category, these waders offer a balance of affordability and performance.
Simms G3 Guide Stockingfoot Waders: Considered the best all-around Made in America waders, these are a favorite among anglers who value exceptional quality and craftsmanship.
Orvis PRO Waders: With a price under $600, these waders offer a premium experience without breaking the bank, making them a top choice for serious anglers.
Patagonia Swiftcurrent Expedition Waders: Standing out with their outstanding overall performance, these waders are not only top-notch in functionality but also feature the best logo in the market.
Whether you're a beginner or a seasoned angler, our list has a pair of fishing waders to meet your needs. Choose the one that suits your budget and preferences, and get ready to enjoy comfortable and successful fishing trips! Check out our recent list of our favorite ultralight trout fishing rods.

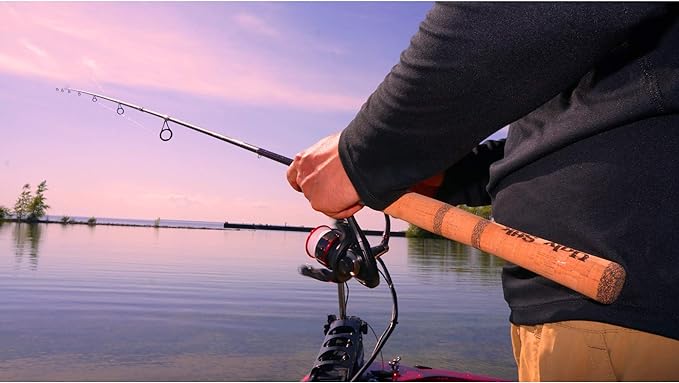
The 7 Best Ultralight Rods for Trout Fishing in 2023
An ultralight rod is crucial for trout fishing enthusiasts. Here are my picks for the Top 7 Ultralight Rods for 2023.
If it ain't ultralight, it ain't right!
Trout fishing requires the right equipment to snag the best fish, and having an ultralight rod is crucial. These rods provide exceptional sensitivity, accuracy, and maneuverability, enabling you to detect every bite, make precise casts and feel every fiber of that fight! I mean, that's part of why we are here, amiright?!
We have thrown together the top 7 ultralight rods for trout fishing, each offering a perfect balance of lightweight strength and finesse.

Okuma Celilo Ultra-Light Spinning Rod
This is my personal choice and what I use for most trips. The Okuma Celilo Ultra-Light Spinning Rod is a budget-friendly option that doesn't compromise on quality. This rod features a sensitive graphite blank and a responsive tip for precise control. The ultra-light power allows for delicate presentations and enhances the fighting experience with smaller trout. Whether you're a beginner or an experienced angler, the Okuma Celilo is a reliable and affordable choice.

St. Croix Trout Series Spinning Rod
The St. Croix Trout Series Spinning Rod stands out with its premium SCII graphite construction, providing excellent strength and sensitivity. Its lightweight design allows for all-day fishing without fatigue, while the moderate-fast action enables precise presentations. With a range of lengths and power options, this rod is ideal for various trout fishing techniques.

G. Loomis Trout & Panfish Series Spinning Rod
Renowned for their exceptional craftsmanship, G. Loomis delivers another gem with their G.Loomis Classic Trout Panfish Spinning Rod. Made with high-quality graphite, this rod offers superb sensitivity, making it easier to detect subtle strikes. The fast-action taper provides excellent casting accuracy, giving anglers an edge in challenging trout fishing scenarios.

Fenwick HMG Spinning Rod
The Fenwick HMG Spinning Rod is a classic choice for trout enthusiasts. Constructed with a blend of carbon fiber and fiberglass, this rod strikes a perfect balance between sensitivity and durability. Its lightweight design ensures fatigue-free fishing, while the fast action delivers impressive casting distance and accuracy. With its sleek aesthetic and reliable performance, the Fenwick HMG is a top contender.

Shimano Stimula Spinning Rod
Shimano is a brand synonymous with quality, and their Stimula Spinning Rod is no exception. Built with a responsive graphite composite blank, this rod offers excellent sensitivity and a fast-action taper. The lightweight construction and comfortable grip make it an excellent choice for long hours of trout fishing. The Shimano Stimula combines affordability with outstanding performance.
Ugly Stik 6'6" Elite Spinning Rod, Two-Piece Spinning Rod
The Ugly Stik 6'6" Elite Spinning Rod is another fantastic option for trout fishing enthusiasts. With its two-piece design, this rod offers excellent portability without sacrificing performance. Made with a combination of graphite and fiberglass, it provides the optimal blend of strength and sensitivity. The Ugly Stik Clear Tip technology enhances sensitivity while ensuring the rod's durability. Whether you're casting from the shore or drifting in a kayak, this rod delivers the lightweight power and precision necessary for successful trout fishing.

Cadence Spinning Rod, CR5-30
The Cadence Spinning Rod, CR5-30, is a fantastic addition to our list of the best ultralight rods for trout fishing. Crafted with 30-ton graphite, this rod delivers exceptional sensitivity and responsiveness. The lightweight design ensures fatigue-free fishing, allowing you to spend hours on the water. The fast-action tip provides excellent casting accuracy and the power necessary to handle larger trout. With its high-quality components and impressive performance, the Cadence CR5-30 is a top contender for trout enthusiasts seeking a reliable and sensitive ultralight rod.
Enhancing your trout fishing experience can be achieved effortlessly with the right equipment. Our expertly curated list of seven ultralight rods is guaranteed to deliver an exceptional balance of lightweight power and sensitivity, ensuring you a more successful and enjoyable fishing trip.

Salt River Fishing Report - June 26, 2023
Fishing report for the lower salt river on June 26 2023
Salt River, Mesa, AZ - Blue Point recreation area, June 26, 2023
Pretty solid day for trout fishing just upstream of the bridge. We arrived at 6 AM and had a fish on the line on my first cast. We fished until about 10 AM and caught seven fish between the two of us. I mainly stayed near the overhead line And floated the current downstream. I was using various types of power bait dough on a sliding sinker rig with a barbless treble hook. I caught six out of the seven of those fish. The trout ranged in size from 8 to 14 inches. All of them were beautiful rainbows most likely all stocked My friend tried multiple different rigs, mostly using a drop shot variation, but didn’t have as much luck. We believe his weight was too heavy and he kept getting gnarled up in the grass beds.
As expected around nine 9:30 AM the float traffic started to pick up and the fish started to slow down. We did mess around with my fly rod but didn’t see any action on it. We couldn’t do much casting because of how much the float traffic was flowing.
Water temp: 56 | Air temp: 89-95

The Gear I used:
- Rod: Okuma Celilo Graphite Lightweight Ultra Light Freshwater Rods, CE-S-662ULb (link)
- Reel: Okuma C-30-CL Ceymar Spinning Reel (link)
- Line: SpiderWire Stealth Braid Fishing Line Hi-Viz 20lb (link) | Seaguar Tatsu 6lb leader (link) | Barrel Swivel size 12 (link) | Treble Hooks Size 10 (link)
- Bait: Berkley Powerbait - Corn (link) | Berkley Powerbait - Garlic (link)
- Clothing: Free Fly Men's Bamboo Lightweight Hoodie (link) | Free Fly Men's Breeze Pant (link) | Chaco Mens Z/1 Classic (link)
- Other Gear: KastKing BlowBak Tactical Fishing Sling Tackle Storage Bag (link) |

About the Salt River
Nestled amidst breathtaking landscapes, the Salt River offers an abundance of trout and an opportunity to hone your angling skills. In this article, we'll delve into the ins and outs of Salt River trout fishing, covering the best locations, essential techniques, and valuable tips to help you reel in the big ones.
- Exploring the Salt River:
The Salt River, known for its stunning beauty and crystal-clear waters, is a haven for trout. It meanders through serene valleys, gorges, and canyons, creating an idyllic backdrop for fishing enthusiasts. From the upper reaches to the lower stretches, the river presents various fishing opportunities, making it an appealing destination for anglers of all skill levels. - Prime Fishing Spots:
While the Salt River offers abundant fishing spots, a few locations stand out for their trout population and angler-friendly conditions. Cast your line at the scenic Sycamore Creek or try your luck at the Lower Salt River, known for its trophy-sized rainbow trout. Other promising areas include the Salt River Canyon, where you can enjoy fishing while surrounded by stunning canyon walls. - Techniques for Success:
Successful trout fishing in the Salt River demands a combination of skill and strategy. Consider using lightweight fishing gear, such as a 4-6 weight rod, to maintain finesse and precision. Match your flies to the prevalent insect hatches, as trout in this river are known for their selective feeding habits. Popular fly patterns include Adams, Elk Hair Caddis, and Blue-Winged Olives. Remember to perfect your presentation and drift techniques to entice these wily fish. - Valuable Tips for Anglers:
a. Time your fishing trips: Early mornings and late evenings often yield the best results as trout are more active during these periods.
b. Practice catch and release: Help preserve the trout population by practicing responsible fishing. Return your catch to the river, ensuring its continued growth and sustainability.
c. Pack essential gear: Don't forget to bring waders, polarized sunglasses, sunscreen, and insect repellent to make your fishing excursion comfortable and enjoyable.
Conclusion:
For passionate anglers seeking a memorable fishing experience, the Salt River is a treasure trove of trout fishing opportunities. Its scenic beauty, coupled with an abundance of trout, makes it a must-visit destination. Armed with the right techniques and tips, you can maximize your chances of landing that prized catch. So, pack your gear, head to the Salt River, and embark on an angling adventure that will leave you with unforgettable memories. Keep checking back here for updated fishing reports around the valley.

A Blend of Comfort and Style: FreeFly's Latitude Pant Shines!
The Latitude Pant is made from eco-friendly materials, including a blend of organic cotton and recycled polyester.
I recently had the pleasure of trying out FreeFly's Latitude Pant, and I must say, they killed it! These pants have quickly become a staple in my wardrobe and for good reason. Not only are they incredibly comfortable, but they also boast a stylish design that seamlessly merges fashion with functionality.
First and foremost, the comfort level of the Latitude Pant is off the charts. Crafted from a blend of premium materials, these pants feel like a dream against the skin. The fabric is soft, lightweight, and breathable, allowing for maximum mobility and ensuring I stay cool even on hot summer days. Whether I'm lounging at home, running errands, or embarking on an outdoor adventure, the Latitude Pant never fails to provide unparalleled comfort.
The fit of these pants is equally impressive. FreeFly has managed to strike the perfect balance between a relaxed and tailored look. The slim, tapered leg design gives them a modern and flattering silhouette, while the elastic waistband with an adjustable drawstring provides a customizable fit that accommodates different body types. I appreciate the attention to detail that FreeFly has put into the construction of these pants, ensuring they fit perfectly and stay in place without feeling restrictive.
One of the standout features of the Latitude Pant is its versatility. These pants effortlessly transition from casual wear to activewear, making them suitable for a wide range of activities. Whether I'm going for a hike, practicing yoga, or simply lounging at home, the Latitude Pant adapts to my needs without compromising on style. The minimalist design, clean lines, and subtle logo placement make them easy to pair with various tops, creating countless outfit possibilities.
Durability is another aspect where the Latitude Pant shines. Despite multiple wears and washes, these pants have held up remarkably well. The high-quality construction and attention to detail are evident in every stitch, ensuring they withstand the test of time. Additionally, the fabric is resistant to pilling and fading, maintaining its pristine appearance even after prolonged use.
Lastly, I must commend FreeFly for their commitment to sustainability. The Latitude Pant is made from eco-friendly materials, including a blend of organic cotton and recycled polyester, reducing its environmental impact. It's reassuring to know that while I enjoy the comfort and style of these pants, I'm also supporting a brand that prioritizes sustainability.

In conclusion, the Latitude Pant from FreeFly is a true gem. It combines comfort, style, and versatility effortlessly, making it a must-have addition to any wardrobe. Whether you're seeking the perfect lounge pants or reliable activewear, these pants deliver in every aspect. FreeFly has truly outdone itself with this exceptional offering, and I highly recommend the Latitude Pant to anyone looking for the ultimate blend of comfort and style!
test 2
test
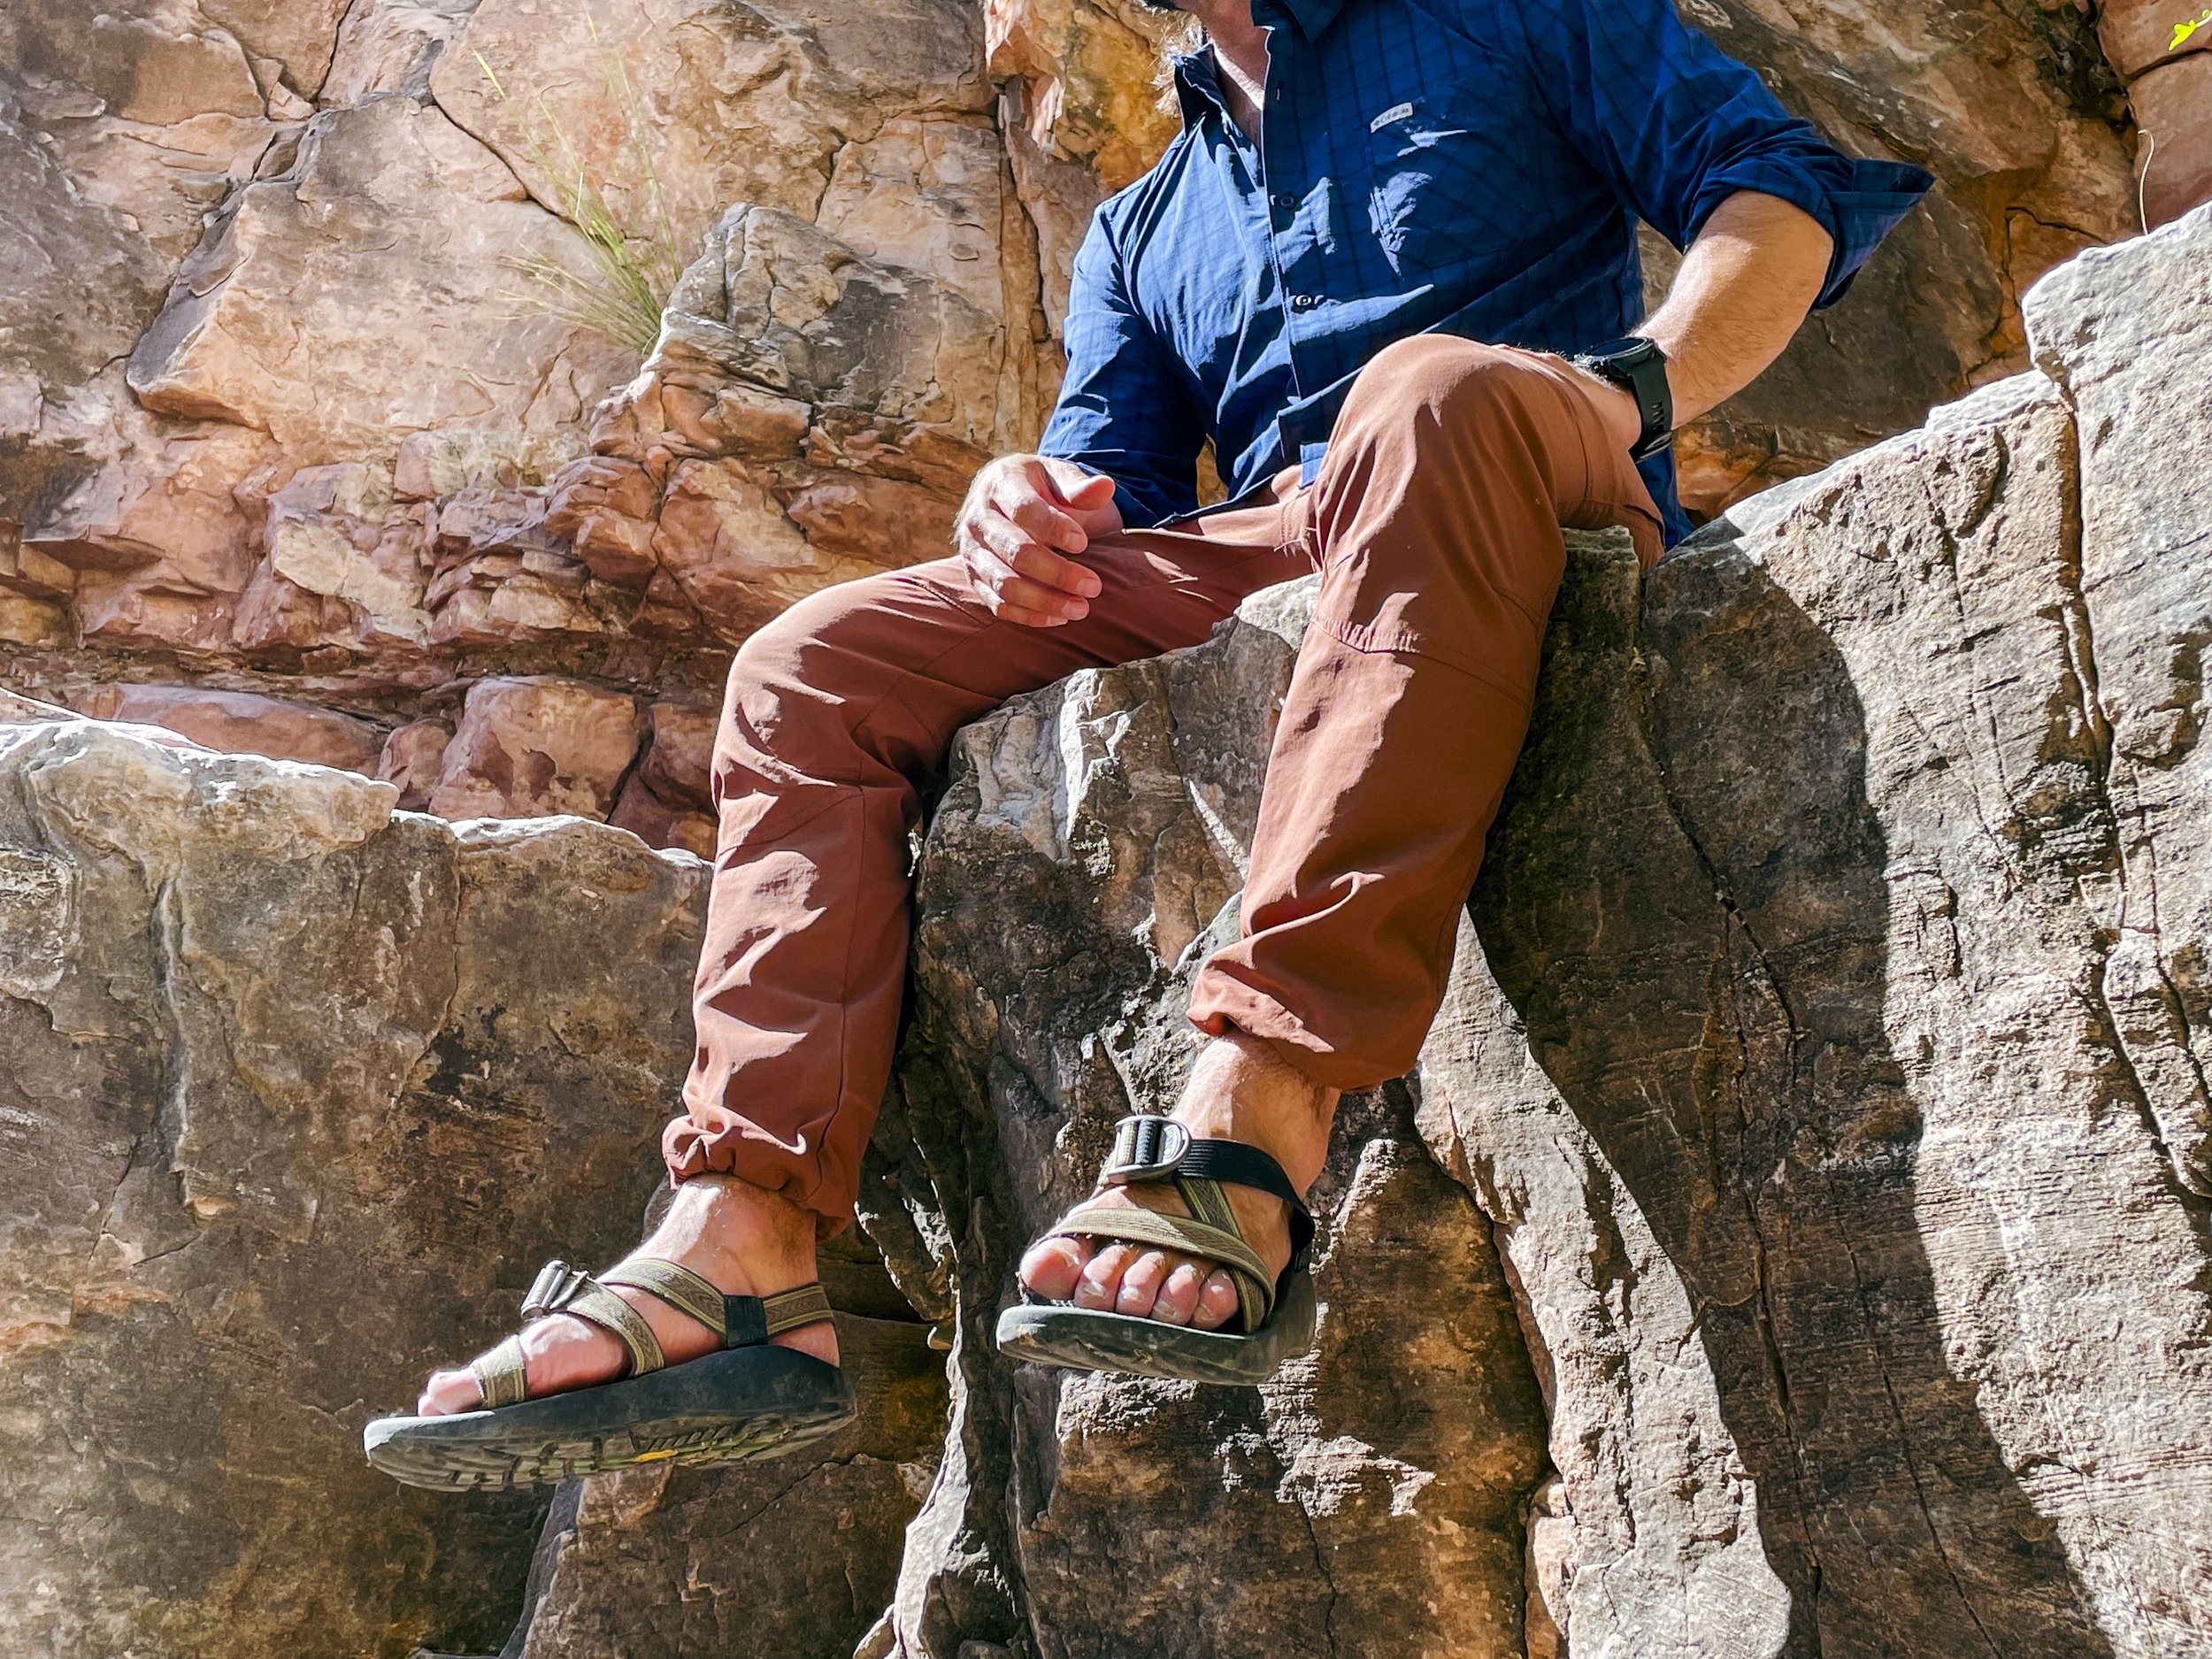
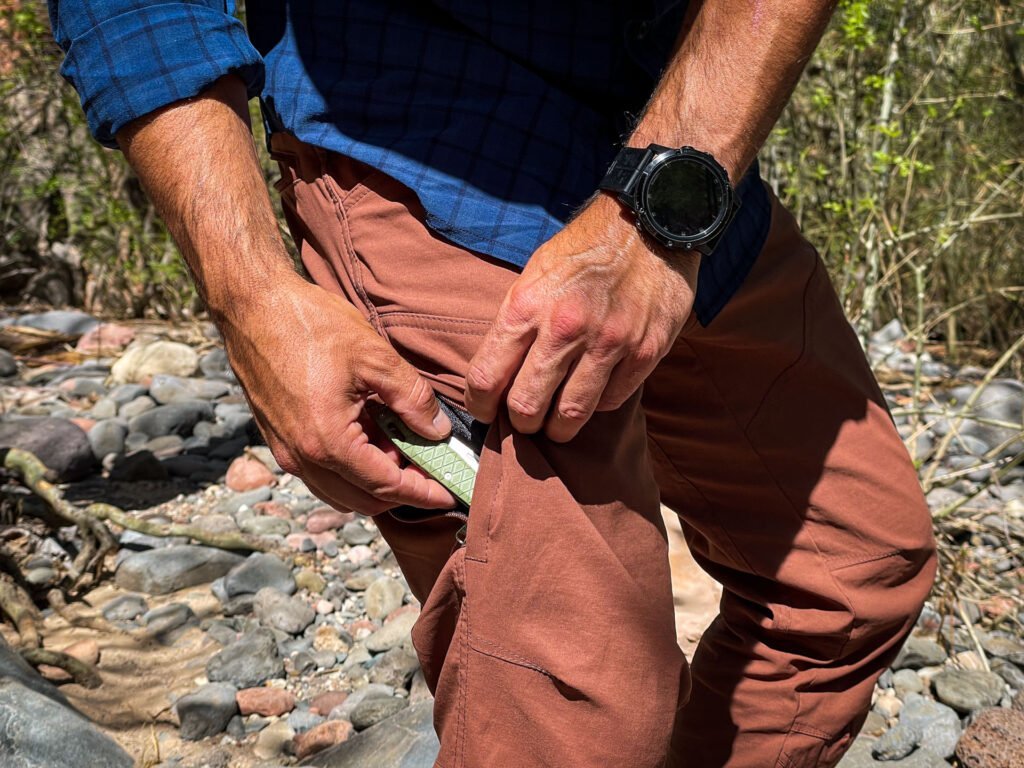
Kuhl Renegade Rock Pant Review
Kuhl Renegade Rock Pants - Lightweight, breathable, and durable. Are these the perfect adventure and everyday pants?
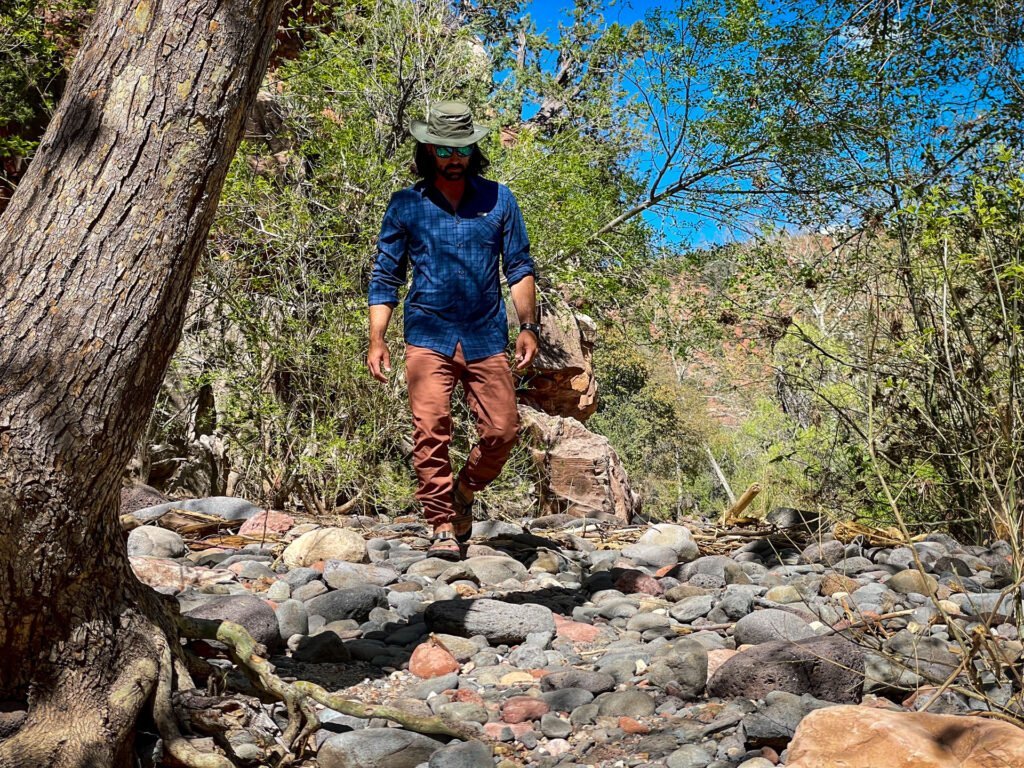
Living in the Arizona desert, I need pants that can take a beating without making me overheat.
IIt seems like most things out in the desert were designed to try to poke, scratch, or sting you. I am always on the search for the magic pant combination of protection and keeping cool - not an easy combo for a fabric to pull off. A few months ago I picked up a pair of Kuhl Renegade Rock Pants and think I may have found my new adventure/everyday pant.
(This post contains affiliate links. If you use these links to buy something we may earn a commission. Thanks! - Full Disclosure: I received this product in exchange for an honest unbiased review.)

Lightweight and breathable fabric
Starting from the top: the fabric. These pants rock for the dry heat of Arizona because they are made from a lightweight and breathable material that dries quickly. Listen, I am going to sweat. There's no way around that. The key is to minimize the discomfort and not add any additional heat factors like heavy fabrics. Kuhl even integrated some vented pockets that you can leave open to allow some airflow. I'll talk more about some of the rad features as we go. I wear these guys all day, for multiple days and they never lose their shape or fit. I can stay out in the sun for long periods of time thanks to the UPF 50+ protection. Bonus!

Elastic drawcord at the bottom hem
The magic is in the details. The Renegade Rock Pant has an elastic drawcord at the bottom hem. This lets you cinch them up for more freedom of movement on rough ground and style points. You can leave them undone for better air circulation when the temperature rises. I can't tell you how stoked I am about this! For work days, I leave the hem uncinched so it lays over the top of my show. When hiking or climbing, I cinch it up so there's no drag. Bonus: these look fab with my Chacos!


Fun factoid: these pants are available in 2 fits: Klassik and Tapered. The Klassik Fit is for those who like more of a roomy fit. The Tapered Fit Chino is a slimmer fit and my personal preference. For me, the tapered fit is spot on.
It is roomy enough to breathe without feeling like I'm swimming, but slim enough to still be very stylish and comfy.
Pocket design and options
For all of you pocket lovers out there, the Renegade Rock Pant has you more than adequately covered. In fact, there are 8. Yes, 8. I personally don't carry a lot in my pockets. It's nice to know that they are there if and when I may need them. I try to keep as little weight in my pants as possible. I usually only carry my phone in my front right pocket or slip it into the side leg pocket.
Inseam length options
When standing straight up, I top out at 5'8" on a good day, excluding hair. I have a longer torso, but shorter legs. Finding pants that don't bunch up even with a 30" inseam is a challenge. The Renegade Rock Pants are available in a 28" inseam option for certain colors. Heck to the Ya! This is pretty much unheard of in hiking pants. At least in my experience.

Long-lasting quality and durability
Finally, the long-lasting quality of these pants is noteworthy. They can take a beating on the trail and still look brand new at the end of the day. I have worn these every day, all day for work projects where I am walking 10 miles, constantly crouching, lifting heavy things, and climbing ladders and walls. They perform. I have even hand-washed these in a pinch and was able to wear them the next day since they dry so quickly. Just for reference, I am a professional photographer specializing in hotels and resorts which means I travel all over the world and work in ever-changing environments.

Kuhl Renegade Rock Pant for the Win
I think I can say with confidence that the Kuhl Renegade Rock Pants are one of the best hiking pants I've ever owned. I would definitely recommend them to any adventurer. What's not to love: they are super lightweight, the fabric is ultra-breathable, you can choose the fit, they have 8 pockets, a cinched hem, incredibly durable, they don't lose their shape after multiple wears, and they look super good! Kuhl smashed it with these pants!
Kuhl Renegade Rock vs Prana Brion
Last year, I wrote a review raving about the Prana Brion Pant. I still love these pants, but the main drawback to these was the weight. I find them to be too hot. The Kuhl Renegade Rock Pant edged out the Brion in a couple of areas:
breathability from the ventilated pocket openings
cinched bottom hem
keep their shape better than the Brion after multiple uses

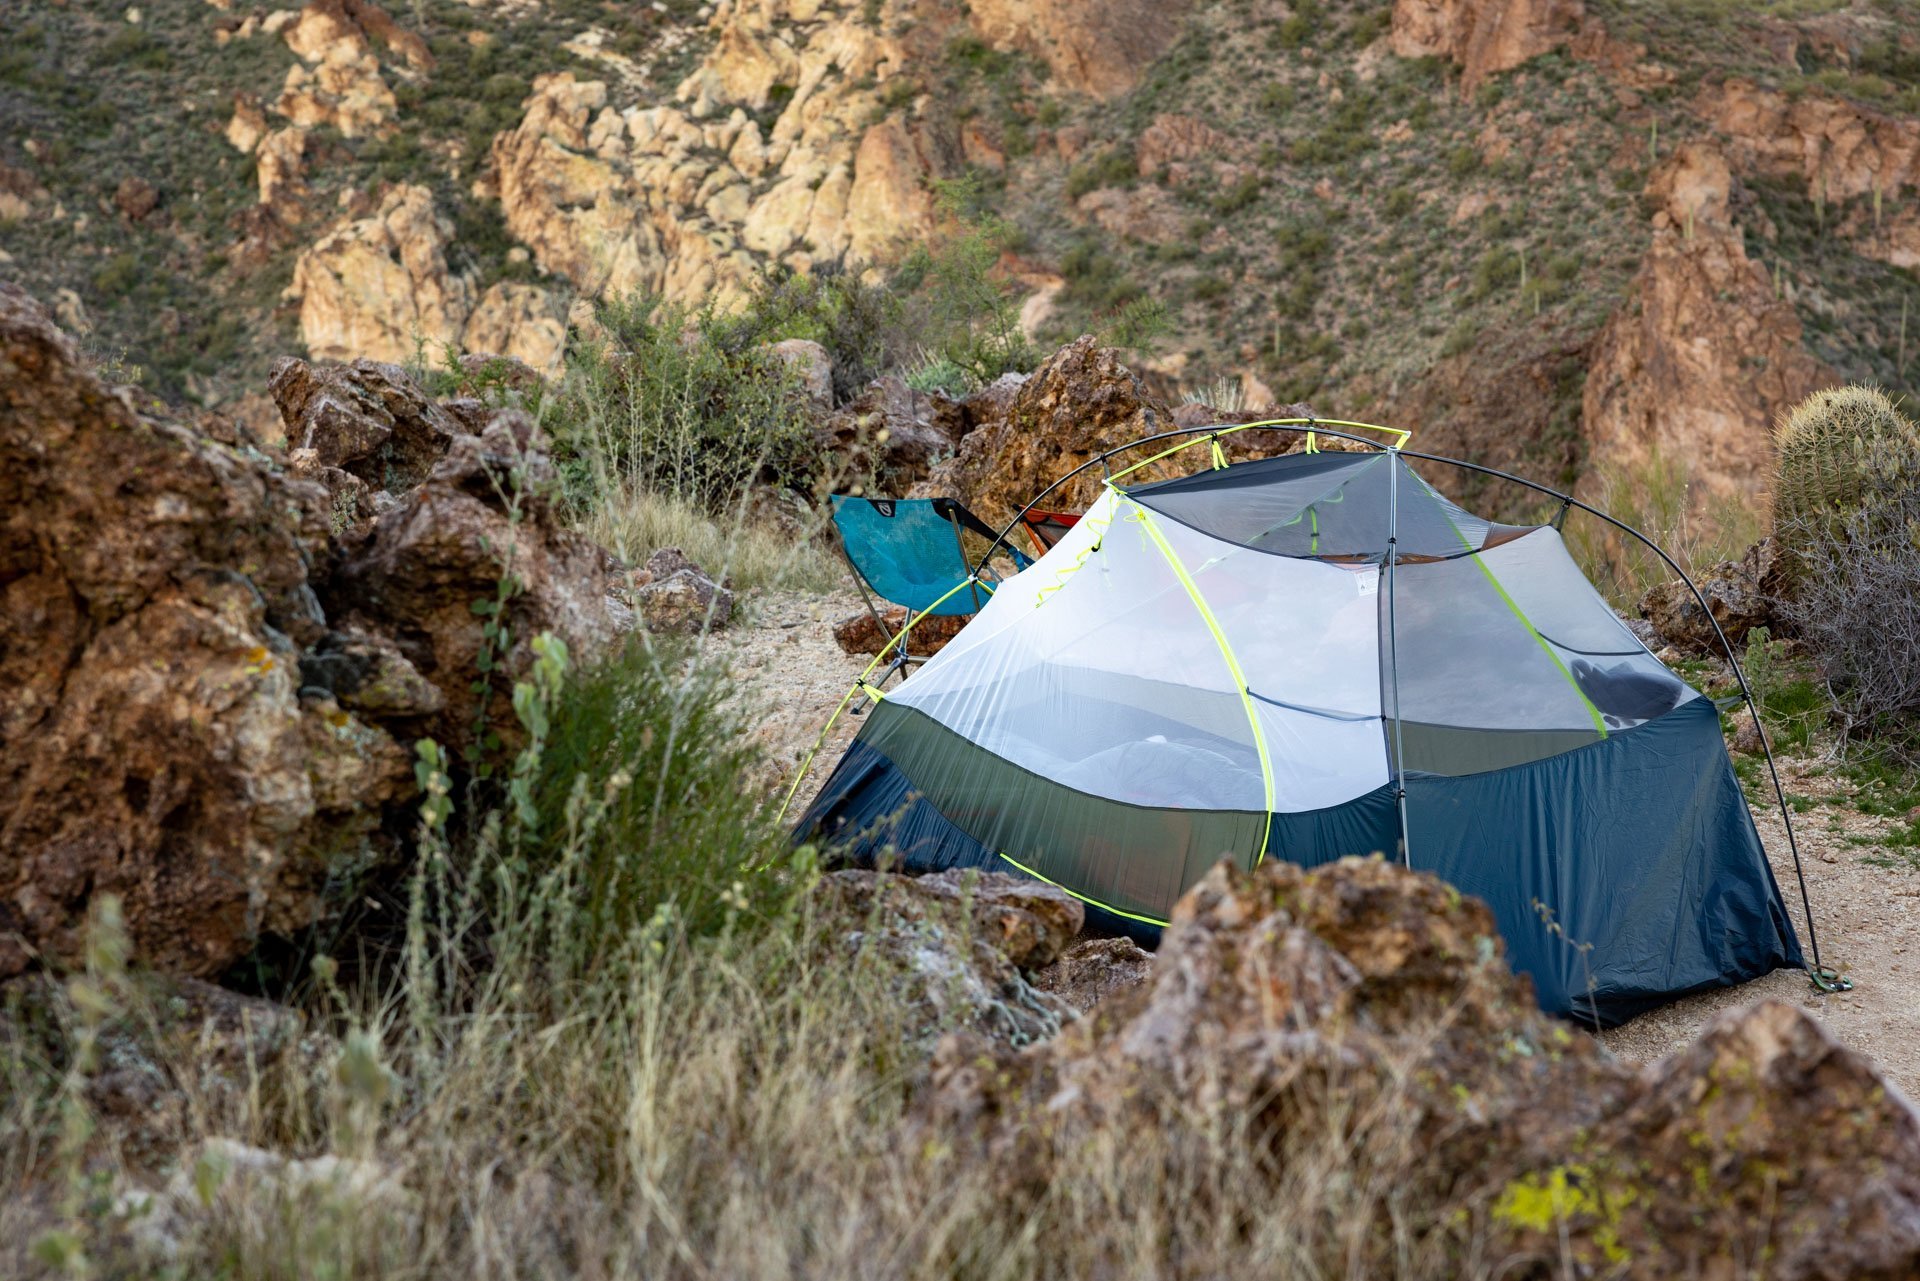
Nemo Dragonfly Osmo 2P Bikepack Tent - Lightweight & Durable
The Nemo Dragonfly Osmo 2P tent is light and durable, with excellent ventilation and waterproof protection - perfect for bikepacking.
The Nemo Dragonfly Osmo 2P Bikepack Tent is an awesome option for those gnarly souls getting into bikepacking. But, let me just throw this out there - this tent is also an excellent choice for backpackers. I will get into the details more as we go. It is lightweight, weighing in at 4.1 pounds, made with durable, high-quality materials and loaded with weatherproof features to ensure comfort on the trails.

Features of the Nemo Dragonfly Osmo 2P Bikepack Tent:
(Almost) Ultralight: With a trail weight of 4.1 pounds, the tent is lightweight, making it light enough to carry along on bikepacking and backpacking trips, but I wouldn't consider that to be ultralight. Especially if you pin it up against the Hornet 2P. (More on that later)
Spacious Interior: Ample space is available to fit two people, as well as additional gear storage. Especially if you take advantage of the vestibule areas, clever pocket designs and use the gear tray.
Simple Setup: With color-coded poles and grommets, the tent can be assembled with ease even in low-light conditions.
Durability: Crafted with 15D ripstop nylon and floor fabric, it is sure to remain secure against wear and tear as well as any potential damage from weather conditions. If you plan on camping in wet weather or on rougher terrain (read: the desert), you should definitely pick up the footprint.
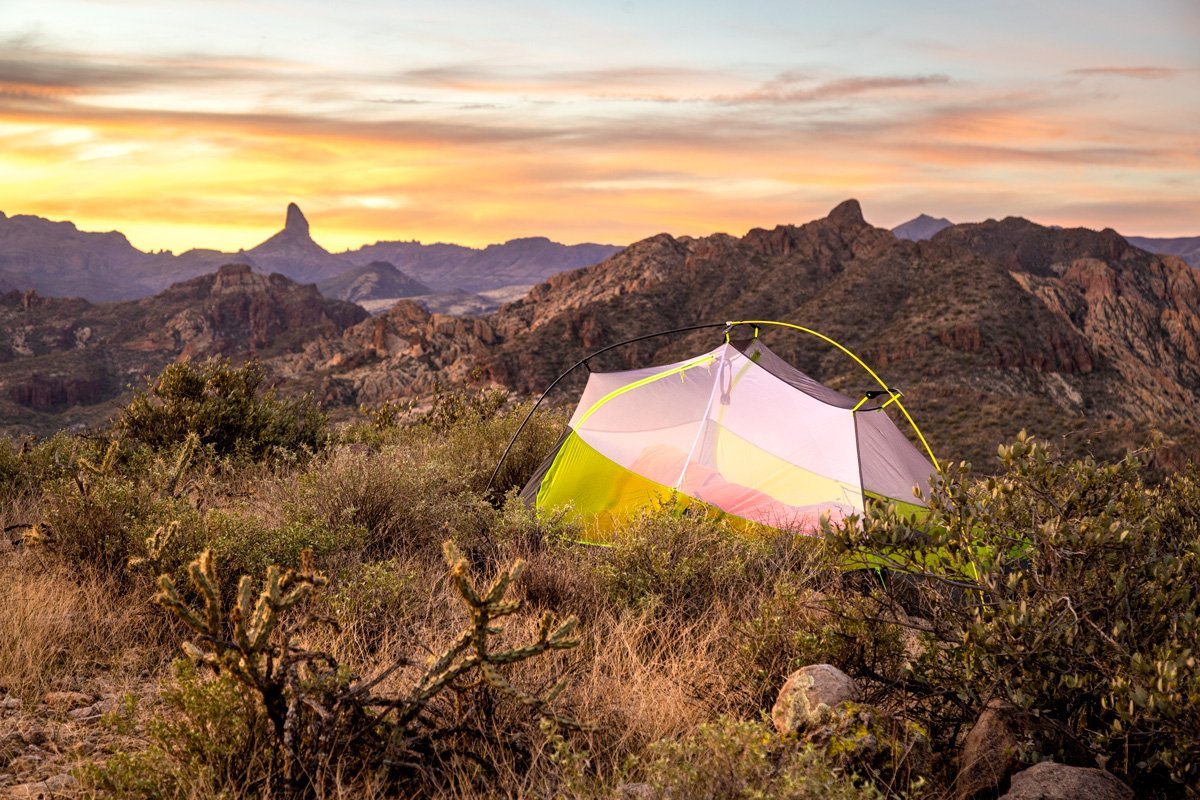
Ventilation: For comfortable temperatures in warmer weather, it has large doors and mesh panels to guarantee great ventilation. The Dragongfly tent body uses a white mesh for privacy around the sides, and black mesh to make sure you can see the night star up above.
Bikepacker-Friendly: Its compact design fits easily in a pannier or bikepacking bag, perfect for the avid cyclist. There are built-in straps on the carrying bag giving options for varying ways of mounting it to your bike.
Accessories: The Nightlight Pocket allows your headlamp to illuminate the inside of your tent, diminishing the presence of blue light to create a soft and consistent ambiance. Equip your vestibule with Landing Zone's waterproof, removable storage tub for extra protection of your gear from dirt and moisture.
Sustainable: This tent is created with recycled materials, making it an eco-friendly choice for outdoor enthusiasts. Win for Mother Earth!

Specifications of the Nemo Dragonfly Osmo 2P Bikepack Tent:

The Nemo Dragonfly Osmo 2P Bikepack Tent is an awesome choice for bikepackers in search of a lightweight, long-lasting tent that is able to endure any kind of weather. It is designed to be set up quickly and its sustainable materials make it a sensible choice for individuals seeking to make minimal environmental impact while enjoying the great outdoors. It's loaded with features, super easy to set up, has some special design features for mounting to a bike, a low profile colorway and a viable option for backpackers as well!

View through the door of Nemo Dragonfly Bikepack Osmo 2P
How Does it Stack up Against the Nemo Hornet 2P
If you've been following along on this site, you know that I am a huge fan of the Hornet 2P. I have used that tent more than any other tent I have ever owned, in many different weather conditions and climates. It's the jam. I will be honest, the first time I set up the Osmo, I knew that this was likely going to replace my Hornet. Why? It's completely freestanding which is something that I love, especially living in the desert where oftentimes the ground is incredibly hard.
The 2 tents are very similar in size and shape, but the Osmo is built to be a bit more durable and easier to setup, breakdown, and carry. However, it comes at the price of weight - not much, but noticeably heavier. So, if you are a stickler for keeping those grams down, the Hornet would be better suited for you.
I built this comparison table so it’s easy to see the differences side by side. I put the spec in BOLD when it is the winner. It’s a pretty tight battle, so choosing which tent works best for each person is going to be a personal preference.

Nemo Dragonfly Bikepack Osmo 2P without rainfly
Nemo Hornet Osmo 2P without rainfly
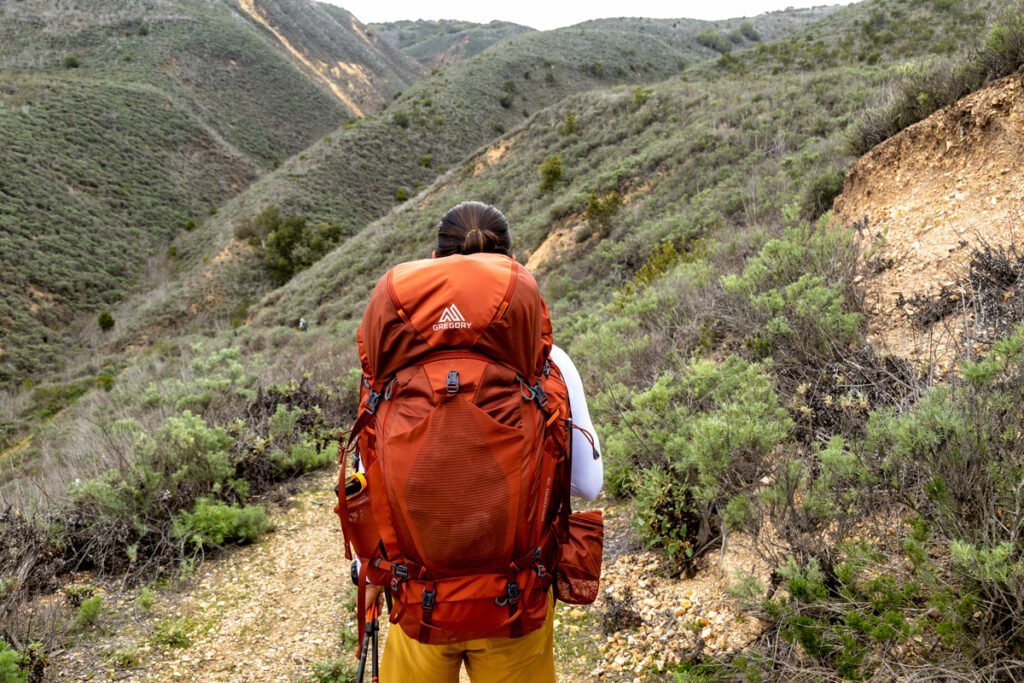
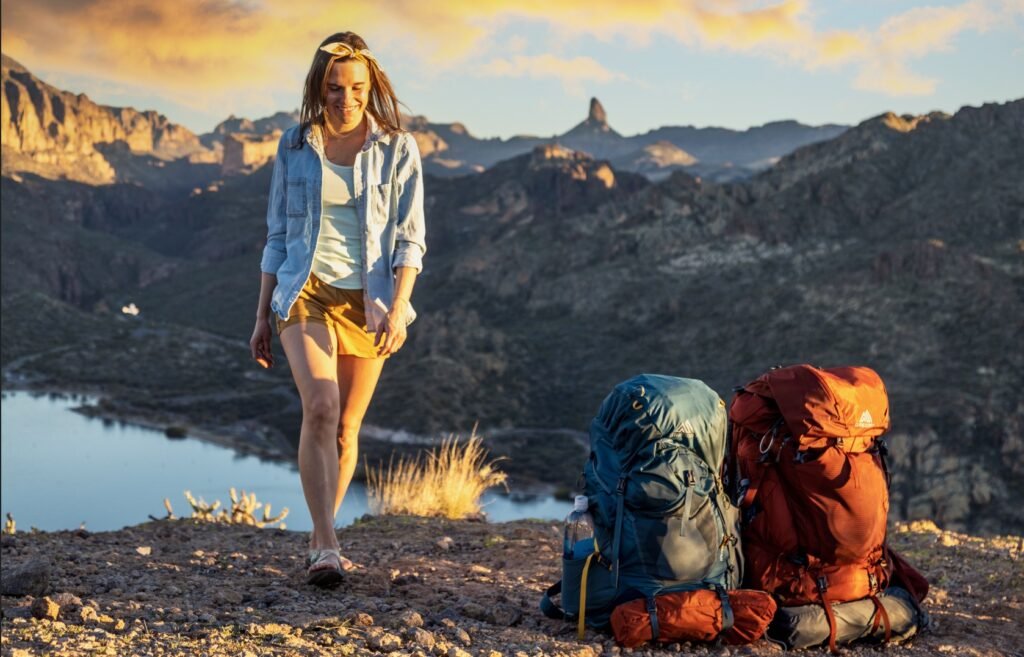
Pack Your Bags and Save Some Bucks: Gregory Backpacks
Attention all backpackers and outdoor enthusiasts! Are you ready to upgrade your gear game and save some bucks while doing it? Then listen up, because we've got the sale of the year for you! Gregory gear is offering a whopping 40% off on all their products, and we've got the exclusive discount codes you need to make the most out of it.
The Gear You Need, at a Price You Want
It's time to ditch that old and worn-out backpack and upgrade to something that's both stylish and functional. Whether you're planning a backpacking trip, a weekend getaway, or just need a new everyday bag, Gregory has got you covered. And now, you can save big on all their products, including their best-selling Baltoro and Deva backpacks, the ultralight Focal and Facet, the versatile Border, and more.
Discount Codes to Make Your Wallet Smile
Here's the best part: all you have to do to take advantage of this offer is to use the discount codes "NICK15" and "25OFF" at checkout. Yes, it's that simple! No need to jump through hoops or solve puzzles, just enter the codes and enjoy the savings.
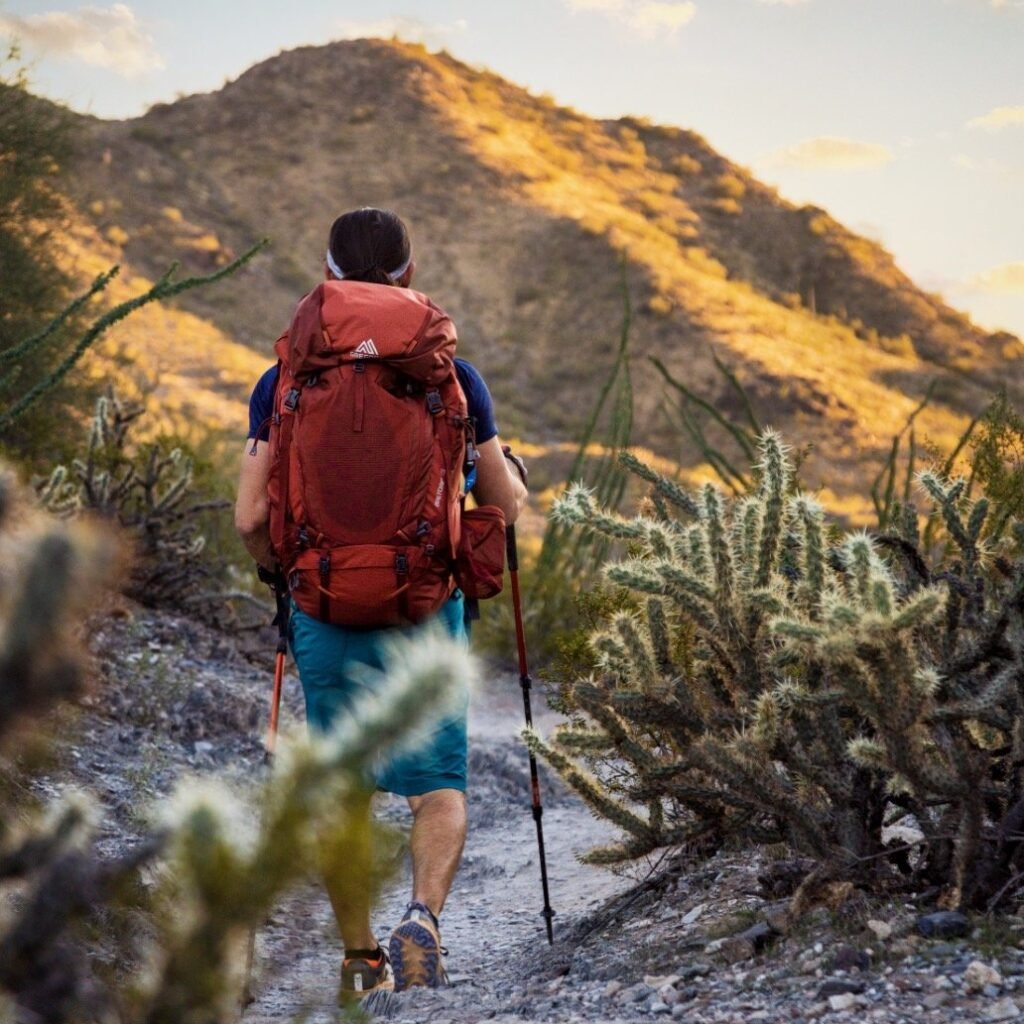
Hurry, this Gregory Deal Ends Soon!
But don't wait too long, this limited-time offer ends on February 20th, so make sure to pack your cart with all the gear you need before it's too late. Exclusions apply, but we promise, you won't regret this purchase.
So what are you waiting for? Grab your gear, save some bucks, and hit the great outdoors with confidence. And if you're not sure what to get, we've got your back! Check out our favorites, including the Supply Duffel, the Quadro and Pro travel bag, the versatile Targhee, and the alpine adventurer's must-have Alpinisto. Happy shopping!
Share to your Favorite Pinterest Board

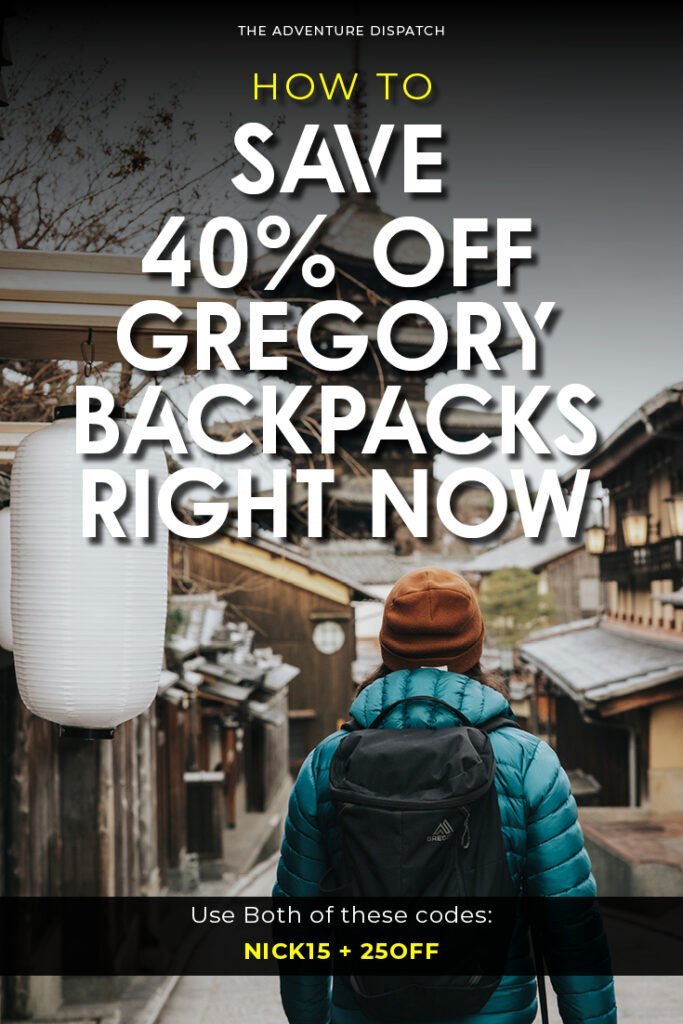

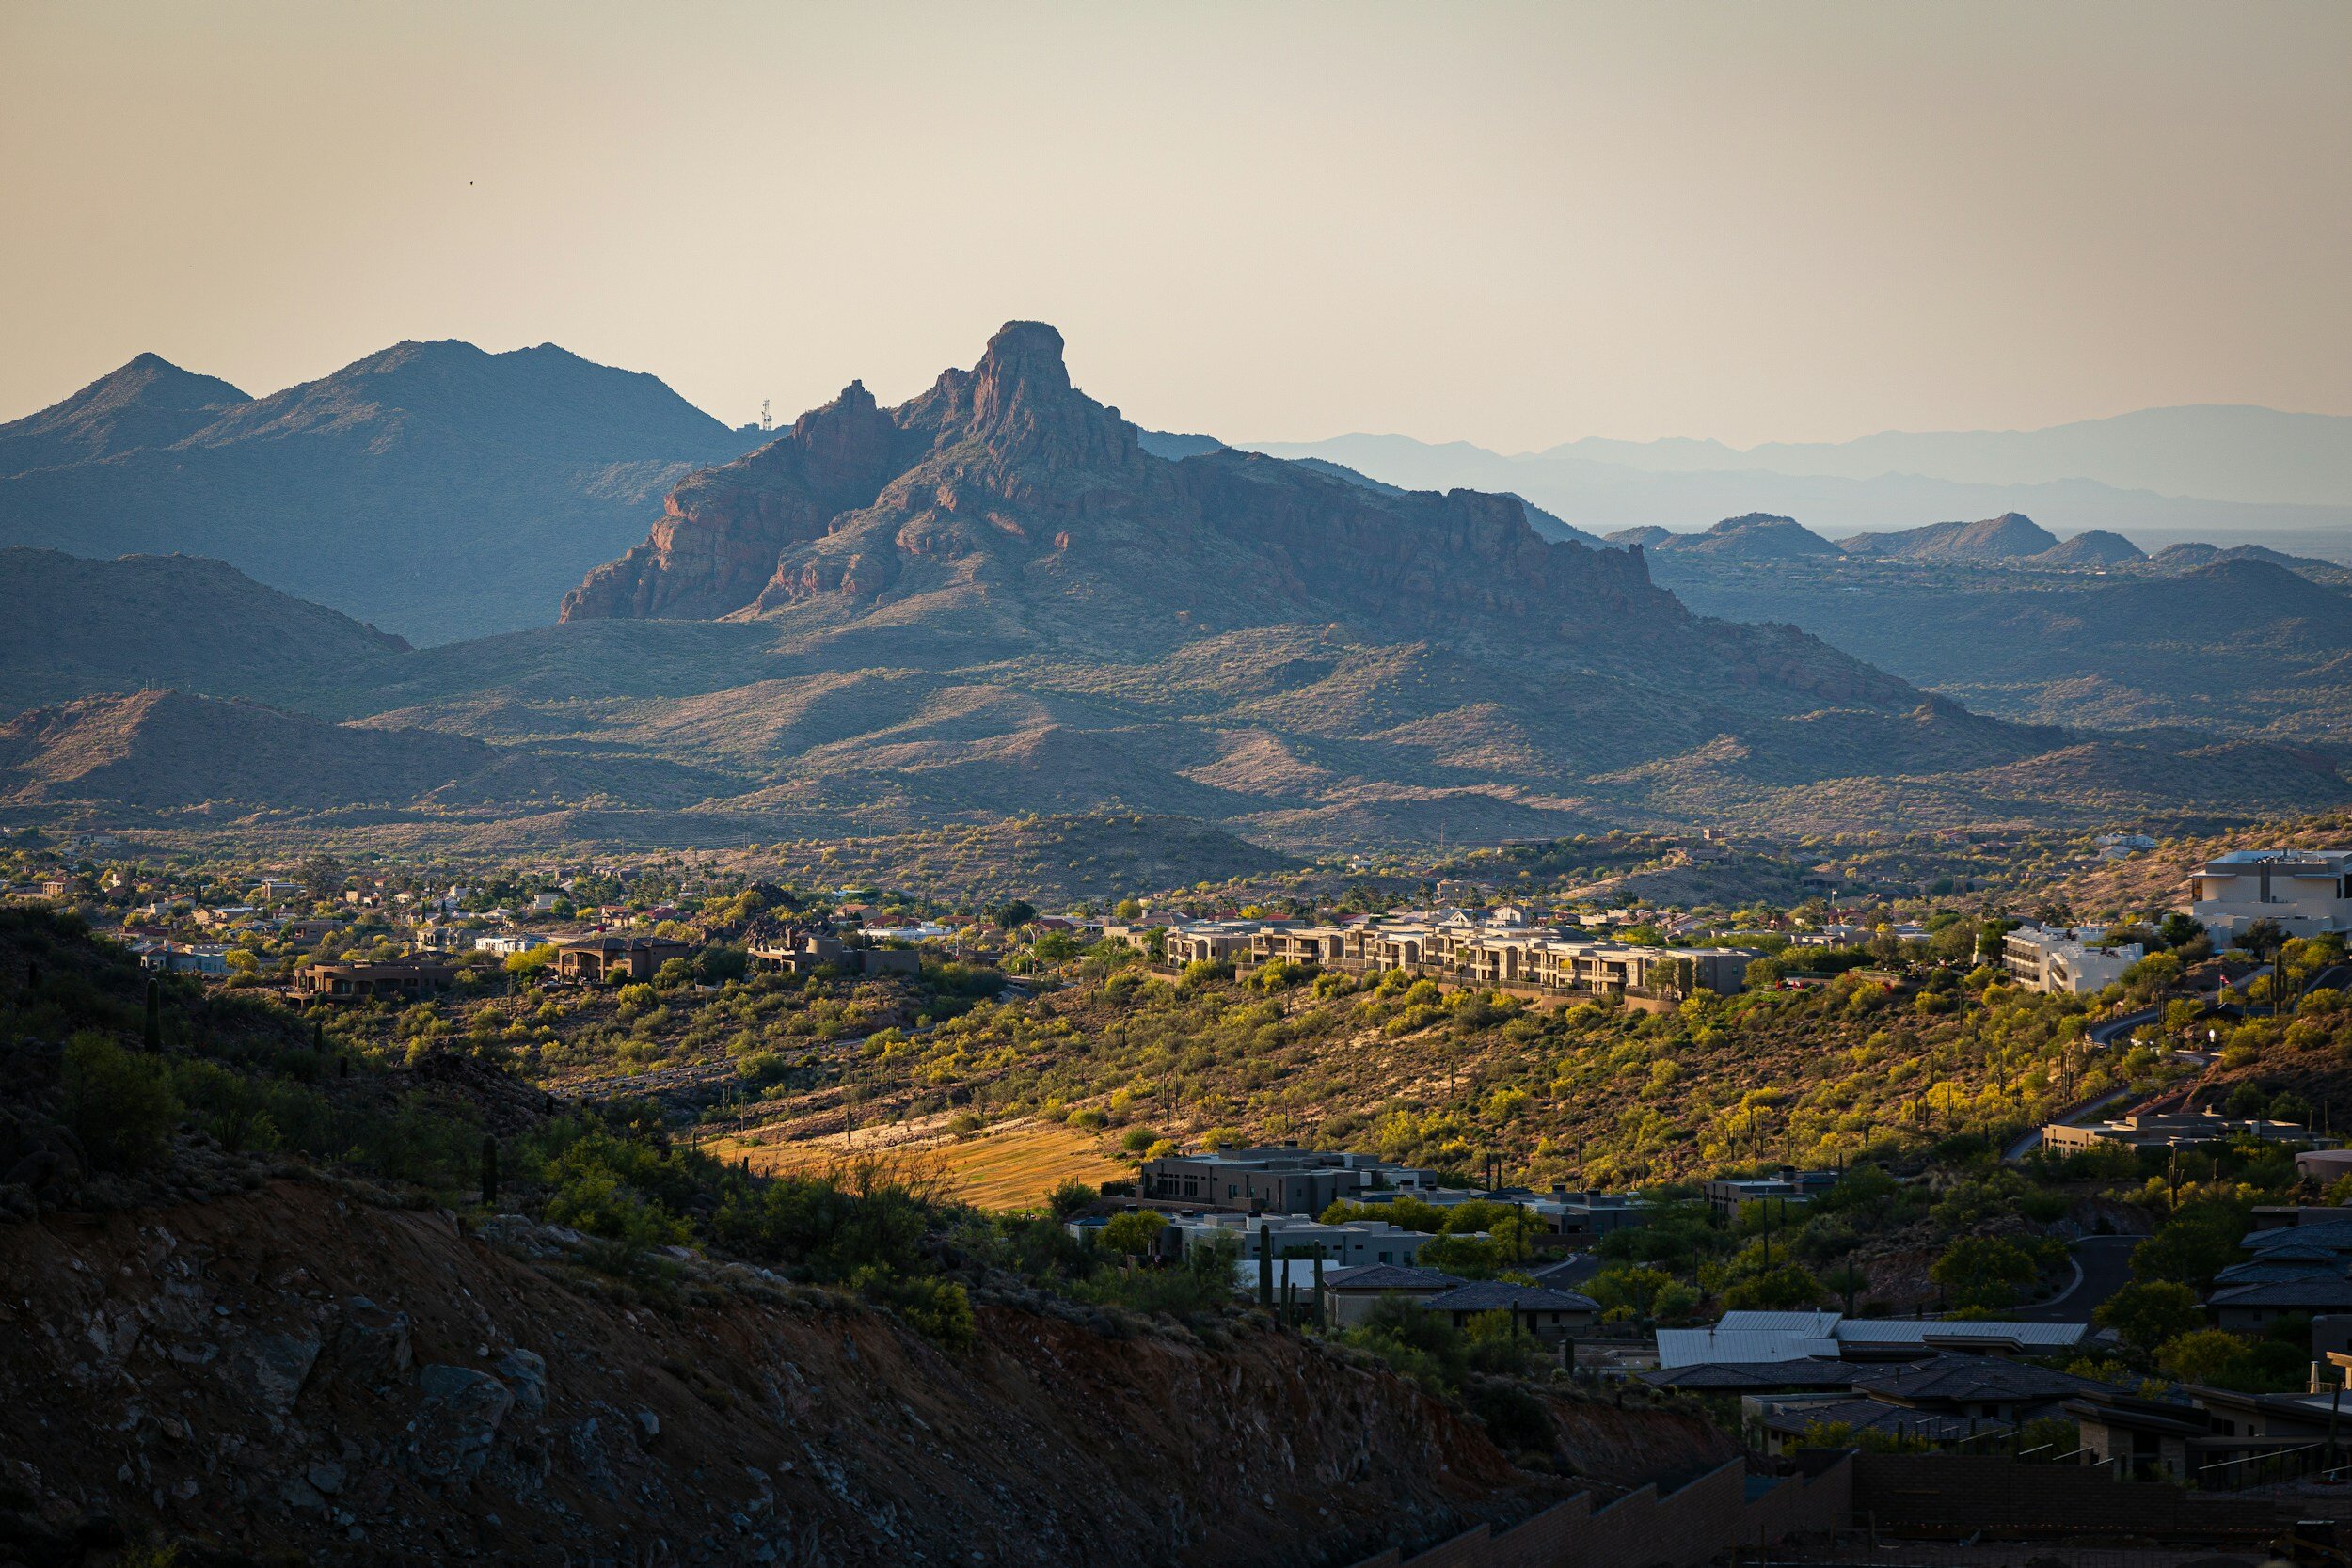
Discovering the Beauty and Adventure of Pinnacle Peak Park
Pinnacle Peak Park is a breathtaking natural park located in Scottsdale, Arizona. It offers scenic views of the surrounding desert landscape and the Sonoran Desert, making it a popular destination for outdoor enthusiasts and tourists alike. The park covers over 1,200 acres of land and features a variety of hiking trails, picnic areas, and scenic vistas.
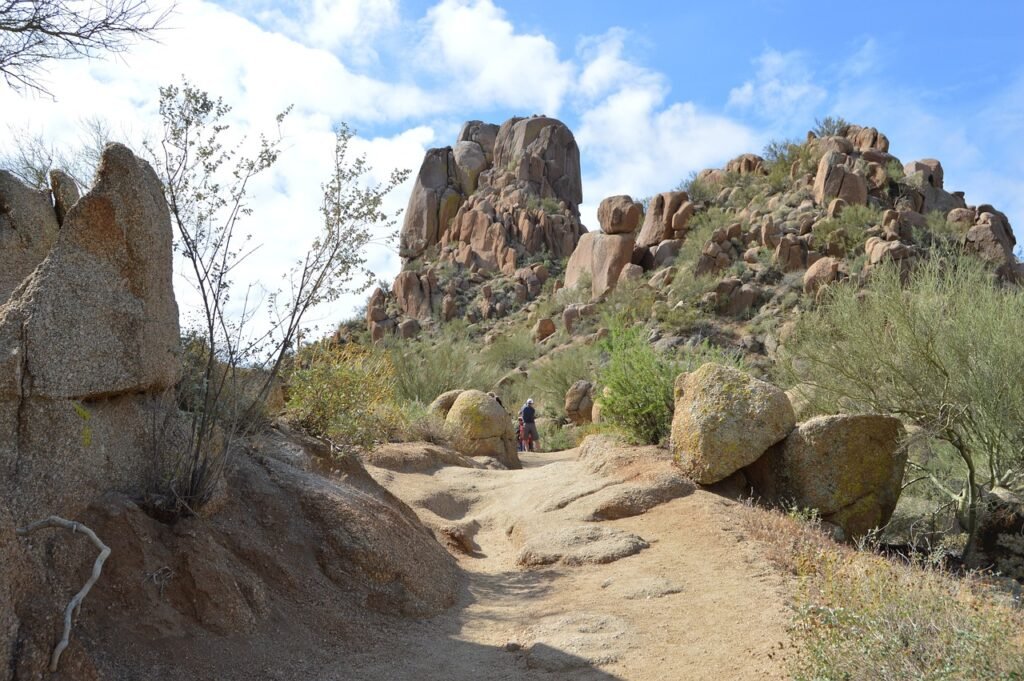
One of the most popular features of Pinnacle Peak Park is its challenging hike to the summit. The Pinnacle Peak Trail is a 2.75-mile round-trip hike that takes visitors to the top of the park's iconic peak. The trail is steep and rocky, but the views from the top are truly breathtaking. On a clear day, visitors can see for miles in every direction, including the city of Scottsdale and the McDowell Mountains. The summit is also a great spot for wildlife viewing, as a variety of animals, including coyotes, snakes, and lizards, call the park home.
In addition to hiking, Pinnacle Peak Park also offers a variety of other outdoor activities. The park is a popular destination for picnics, with several picnic areas available for visitors to use. The park also has several nature trails, including the Nature Trail and the Cactus Trail, which offer a closer look at the park's unique flora and fauna.
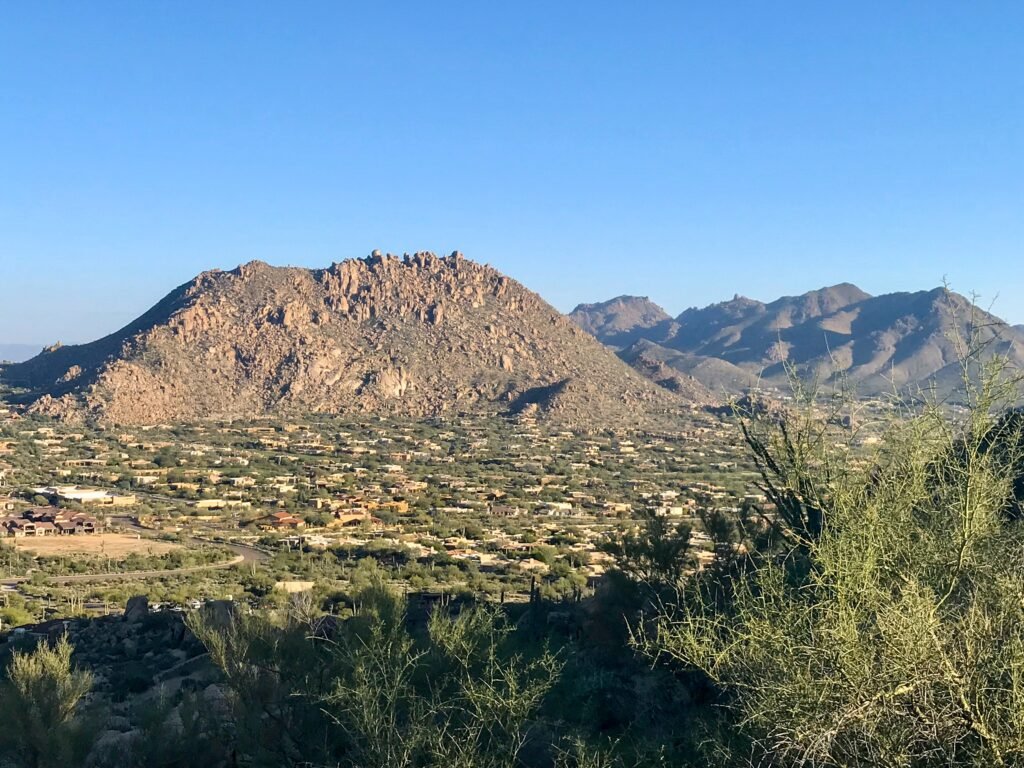
One of the most unique features of Pinnacle Peak Park is its geology. The park is home to a variety of rock formations, including large boulders and unusual rock formations. The park's geology is a result of millions of years of erosion and tectonic activity, and it provides a fascinating look into the history of the Earth. Visitors can also learn more about the park's geology by visiting the Pinnacle Peak Visitor Center, which offers educational exhibits and programs.

In conclusion, Pinnacle Peak Park is a must-visit destination for anyone looking to experience the beauty and serenity of the Sonoran Desert. Whether you're a hiker, a nature lover, or just looking for a relaxing day in the great outdoors, Pinnacle Peak Park has something to offer. With its stunning views, challenging hikes, and unique geology, the park is a true gem in the heart of Scottsdale, Arizona.
In Town for the Super Bowl LVII in Phoenix?
Phoenix, Arizona is a popular destination for tourists during the Super Bowl, and for good reason. The city is known for its warm weather and vibrant culture, making it a great place to visit during the big game. In addition to the Super Bowl festivities, there are plenty of other attractions and activities to keep visitors entertained.
If you're in town for the Super Bowl and looking for a break from the excitement, consider visiting Pinnacle Peak Park. The park is just a short drive from the city and offers a serene escape from the hustle and bustle. Take a hike to the summit of Pinnacle Peak and enjoy breathtaking views of the surrounding desert landscape, or simply relax and enjoy a picnic with friends and family. Whatever your interests, Pinnacle Peak Park is a must-visit destination for anyone visiting Phoenix during the Super Bowl.
Other Hikes to check out Nearby
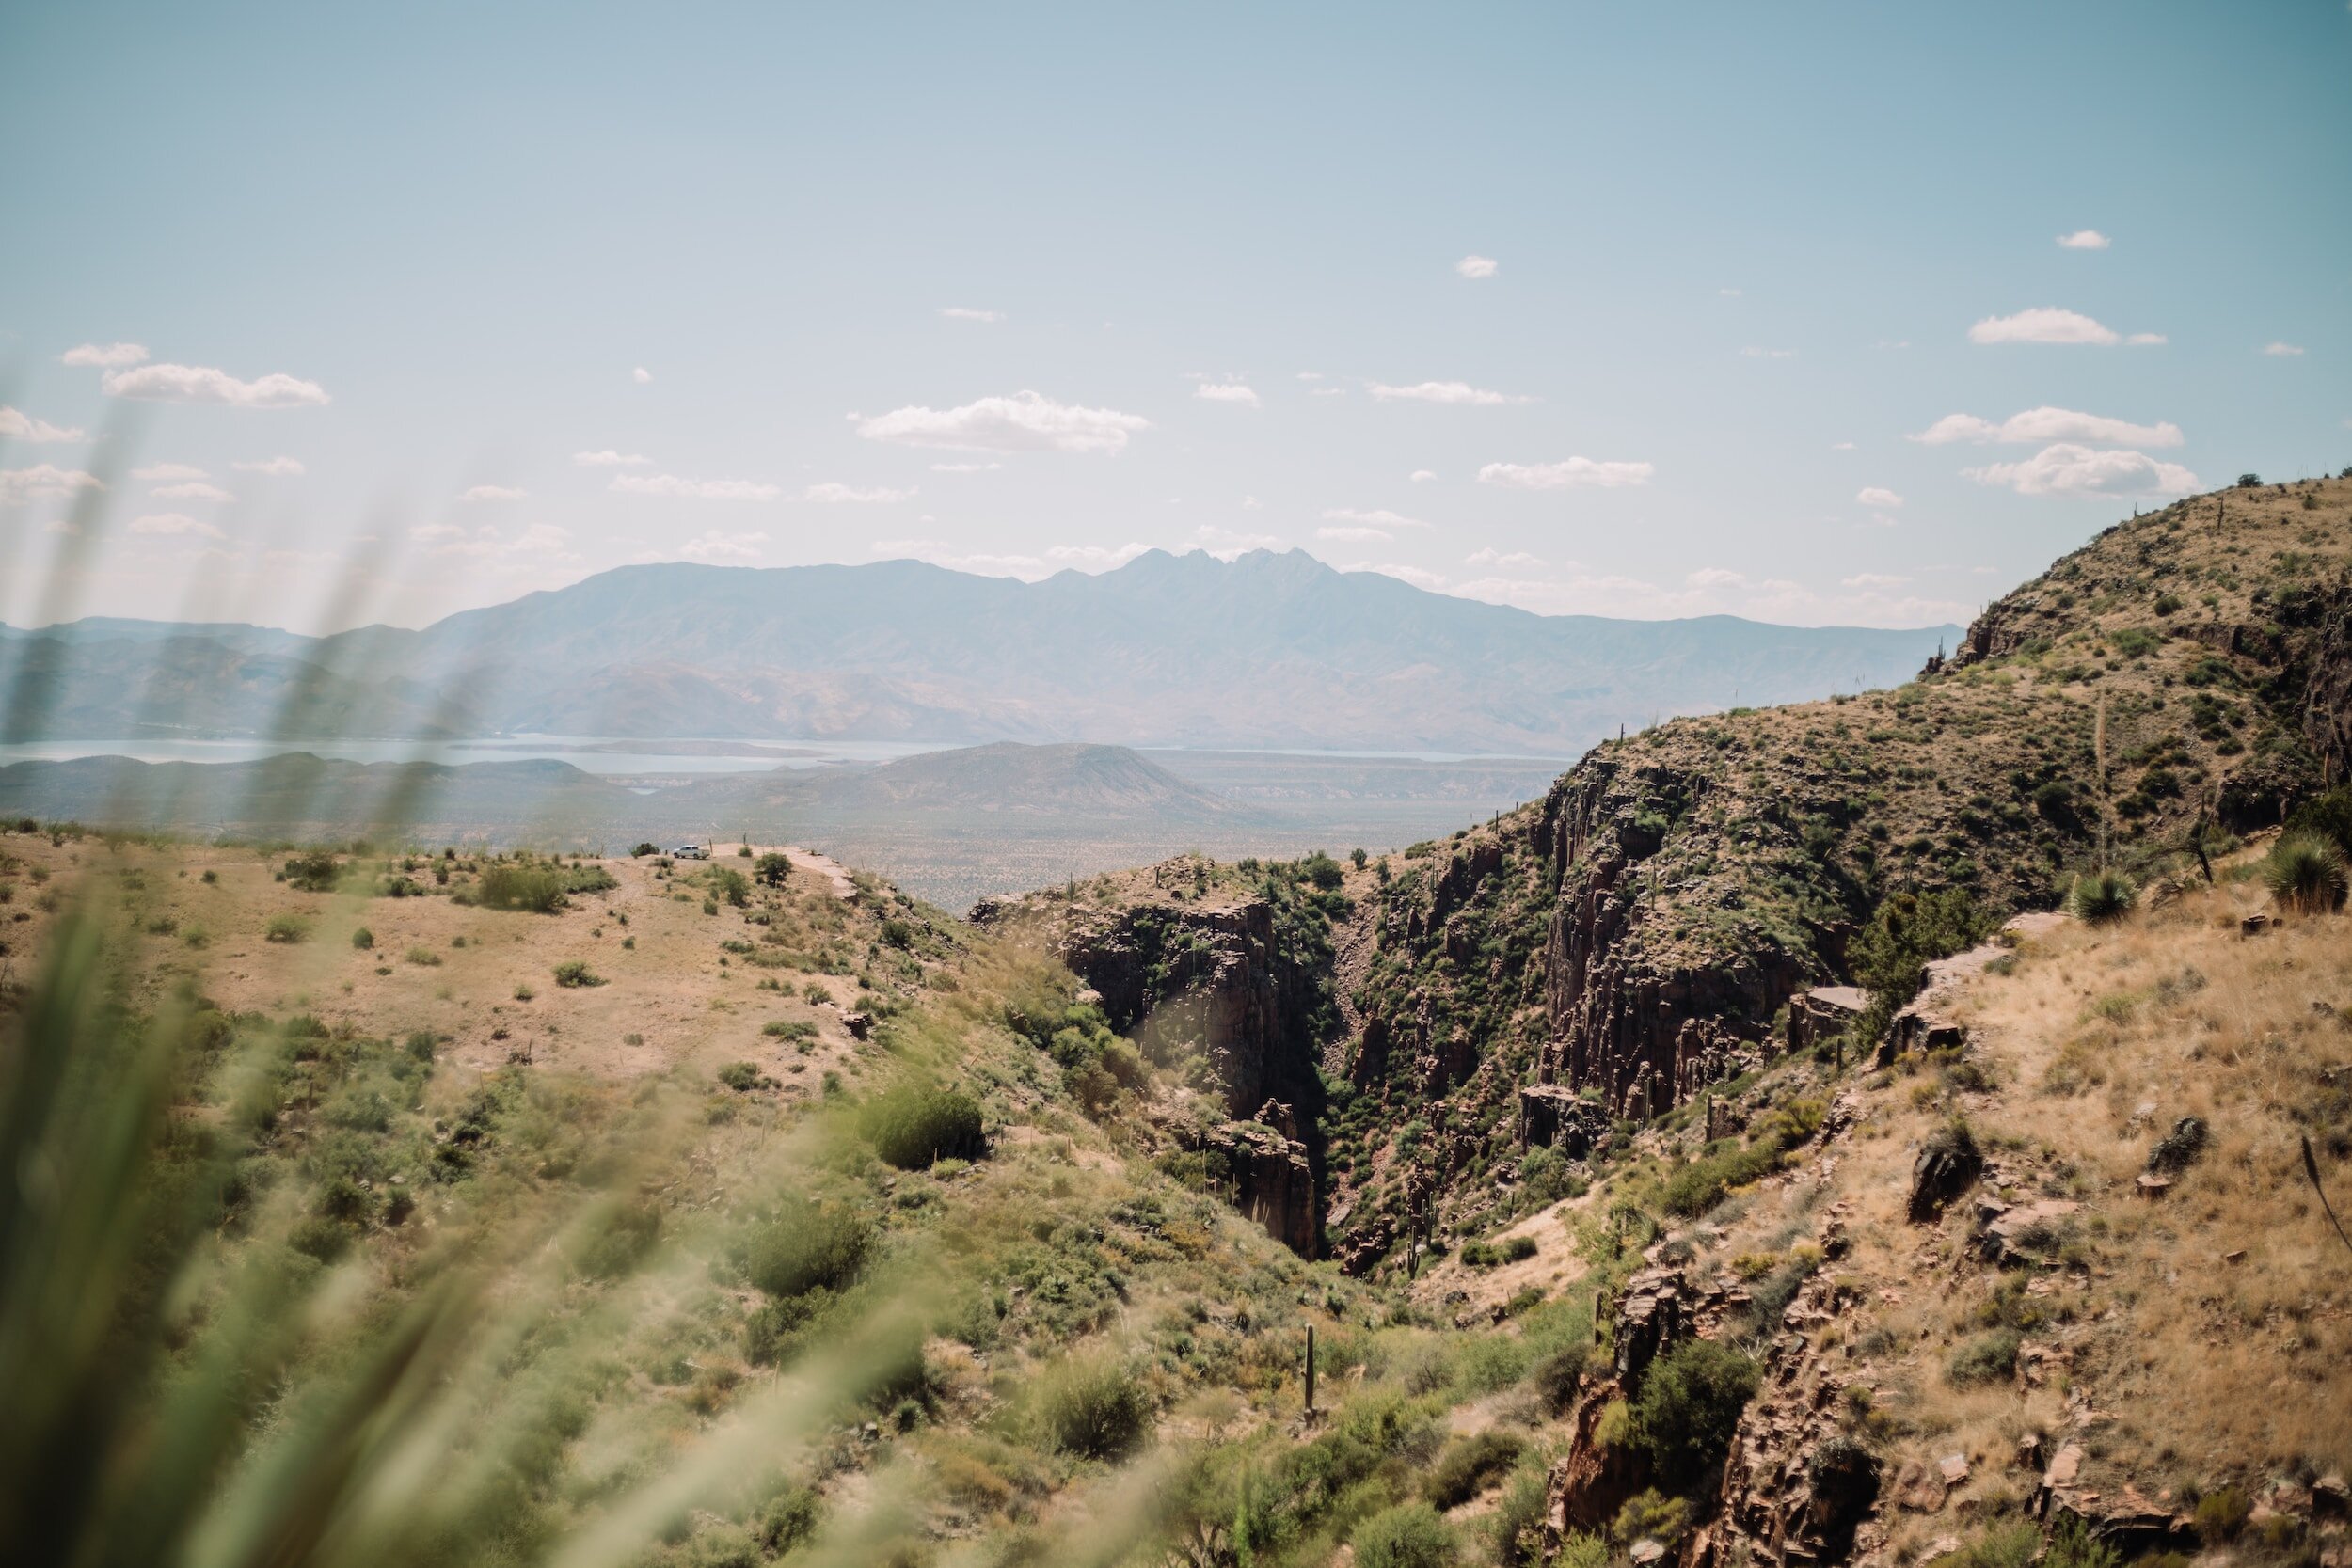
Exploring the Five Best Hikes Near the Super Bowl in Phoenix
The Super Bowl is one of the biggest events in the world, and this year it is being held in Phoenix, Arizona. If you're a fan of outdoor adventures, then you're in luck! Phoenix is home to some of the most stunning hikes in the country. Here are the top 5 hikes near the Super Bowl in Phoenix.

Top 5 Hikes Near The Super Bowl
Camelback Mountain - Camelback Mountain is a popular hike for locals and visitors alike. The hike is strenuous, but the views from the summit are breathtaking. You can see the entire Phoenix valley from the top, making it the perfect place to enjoy a sunrise or sunset. The Echo Canyon Hike is 2.5 miles round trip and takes about 1.5 hours to complete.
Pinnacle Peak Park - Pinnacle Peak Park is a great hike for families and beginners. The hike is 1.75 miles round trip and takes about 1 hour to complete. The trail is well-marked and easy to follow, making it a safe and enjoyable experience for everyone. The views from the top are stunning, and you can see the entire valley below.
South Mountain Park - South Mountain Park is the largest city park in the country, covering over 16,000 acres. The park offers many different trails, making it a great place for all skill levels. The park has trails for hiking, biking, and horseback riding, making it a great place to spend the day.
Tom's Thumb Trail - Tom's Thumb Trail is a popular hike in the McDowell Sonoran Preserve. The hike is 3.75 miles round trip and takes about 2 hours to complete. The trail is strenuous, but the views from the top are worth it and you can see for miles in all directions, making it a great place for a sunrise or sunset hike.
Papago Park - Papago Park is a great place for a scenic hike. The park offers many different trails, making it a great place for all skill levels. The park has trails for hiking, biking, and horseback riding, making it a great place to spend the day. The park also has a beautiful lake, making it a great place to relax and enjoy a picnic.

Enjoy The Super Bowl and The Desert
In conclusion, Phoenix is home to some of the most stunning hikes in the country. Whether you're a beginner or an experienced hiker, there is a trail for everyone in Phoenix. So, if you're in town for the Super Bowl, take a break from the excitement and enjoy one of these beautiful hikes!
Add To Your Pinterest Board


5 Adventures in Phoenix during the Winter
Spending winter in Phoenix, Arizona is a great experience with its warm climate and wide range of outdoor activities to do.
Here are five amazing adventures to take in Phoenix during the winter:
Hiking - Take advantage of the moderate winter temperatures and explore some of the best trails in the area. Hike through McDowell Mountain Regional Park or along the shoreline of Tempe Town Lake for beautiful views and breathtaking nature.
Horseback Riding - Hop on horseback for an unforgettable ride across one of the nearby desert trails, with stunning views all around you. Spend an afternoon exploring South Mountain Park or embark on a sunrise ride around the Apache Trail Monument Valley.
Rock Climbing - Challenge yourself to some rock climbing at Papago Park’s Sandstone Quarry or Black Canyon National Park and feel like you’re soaring high above the valley floor!
Golfing - Get some practice in before spring golf season by hitting up one of Phoenix’s premier golf courses like Encanto 18, where you can challenge your skills and work on perfecting your game!
Off-Roading - Explore Phoenix's desert terrain on a guided ATV tour! Experience sand dunes, winding trails, and stunning red rock formations all while having a wild time!

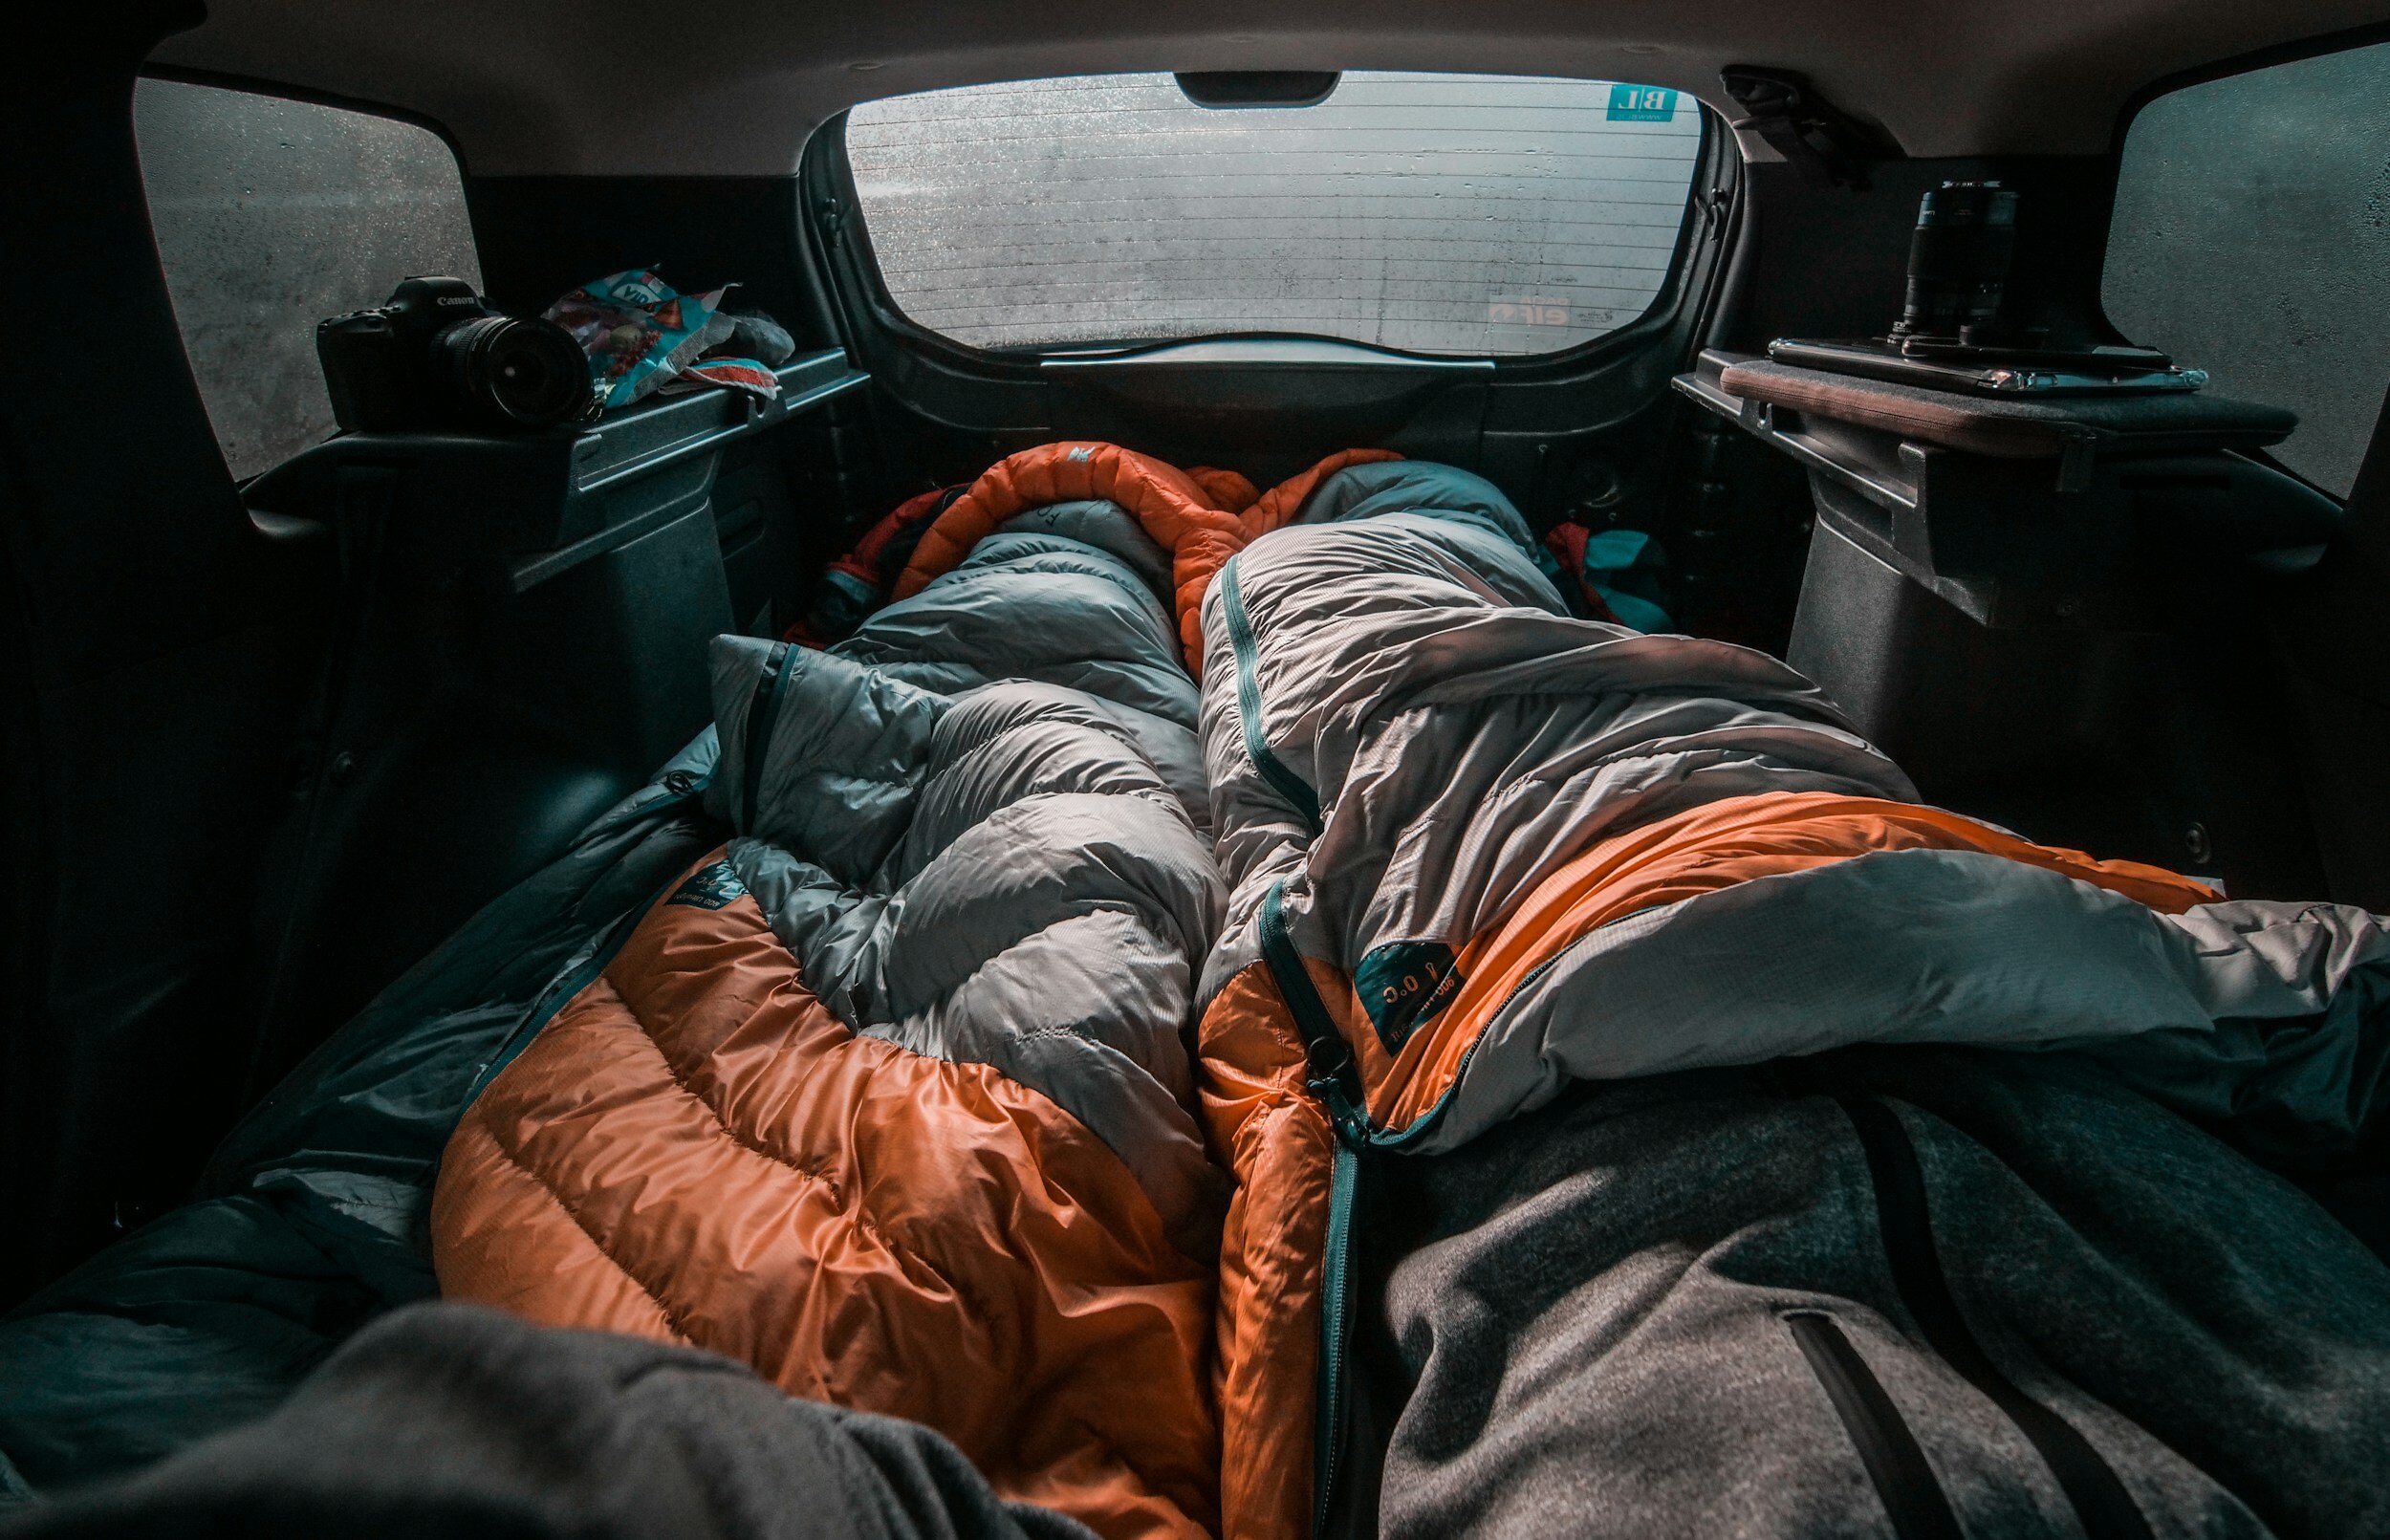
Some Not So Basic Car Camping Tips
The weekend is coming and you have an epic car camping trip lined up. Check out these car camping tips to make sure it's the best one yet!
I love car camping. You get to bring all the luxuries and still get to enjoy the best of nature. You know what I don't love - the packing, forgetting things, FOMO. We put together this list compiled of mistakes we have made in the past so that you don't have to go through the same thing. After all, we are heading out to the wilderness for some peace, quiet and relaxation, right?

Before you hit the road
1. Fill the tank
Don’t be that guy. There’s nothing worse than getting out on the Forest Service roads and watching the ominous gas light turn on. Start your trip off with a full tank of gas. You may also want to top it off before heading into the wilderness. Stay stress free, my friends. I carry a Rotopax 2 gallon tank that I fill with extra fuel on longer trips, but my Tacoma doesn’t get the best mpg.
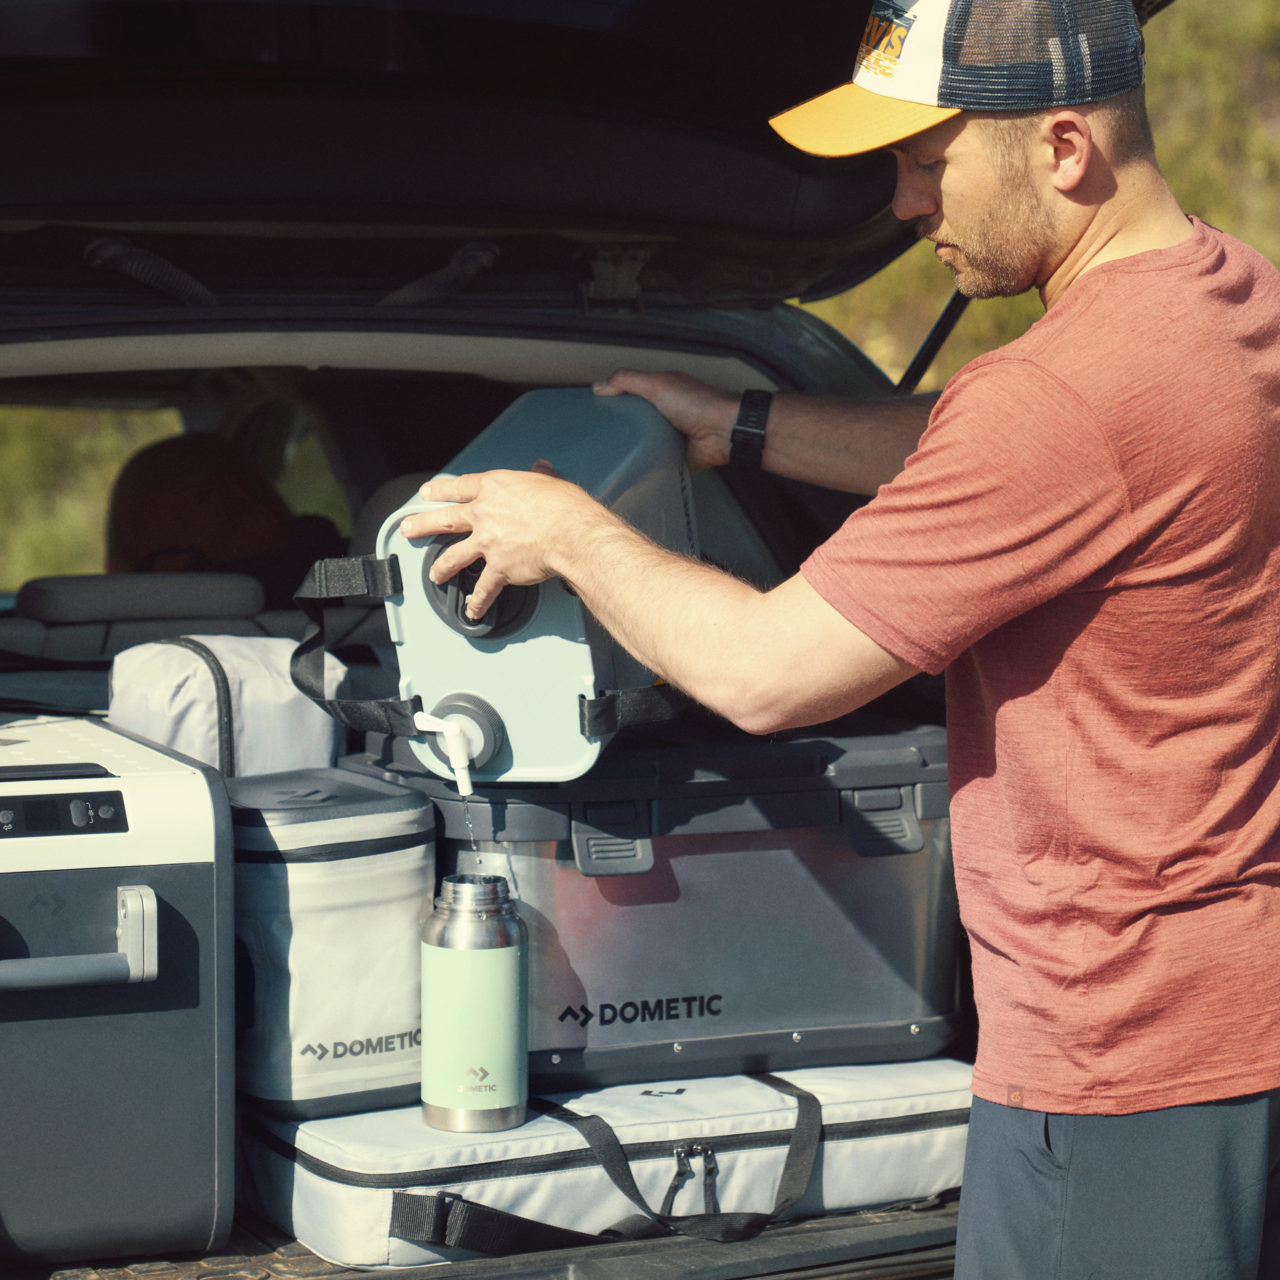
2. Bring Lots of Water
Start your weekend with as many full water bottles and bladders as possible. Weight isn’t an issue since you won’t be lugging it around on your back, and having lots of water gives you peace of mind. Use every gas station, visitor center and restroom as an opportunity to top off. Part of my road-tripping kit is a Dometic Go Hydration Water Jug paired with their Faucet. At camp, this also serves as my Hand and dishwashing station.
3. Sleep like a king or Queen
Don’t skimp on the luxuries. You’re not backpacking here! Bring a thick air mattress, or a heated blanket, and maybe your favorite pillow. Bust out your favorite book before bedtime. Heck, hang an iPad and snooze off to an episode of Ozark.

How to Pick Out the Perfect Campsite When Car Camping
4. Don’t Limit Yourself to Paid Campgrounds
The states are loaded with beautiful free campsites - you just need know where to look. One of the beauties of public land is that you can camp for free, right near your car. Follow these guidelines to choose a site, and be sure to check with the local land management agency for specific regulations.
5. Check if you need a Fire Permit
If you think you’ll want to make a fire, get a permit in advance from your local land management agency. Just because the campsite has a fire pit doesn’t necessarily mean fires are allowed. Know how to properly start, maintain and make sure your campfire is dead out.

When you get to your perfect campsite
6. Save your car battery
You’ll probably be opening the doors frequently, so save your battery by keeping the indoor lights in the “permanently off” position, and carry jumper cables in case of a dead battery. I always have a car jumper kit stowed away. This thing has saved my butt more times than I would like to admit.
7. Don’t make your campsite a yard sale
No need to unpack every last item: leave some things, like your daypack, extra food, and extra clothes, in the car. This helps you stay organized and ensures you have some reserve supplies in the rare event that critters steal your food or weather jacks up some of your gear.

Car Camping Tips for Setting Up Camp
8. Pick a Safe Spot for Your Tent
Scan the site for dead or overhanging branches and trees - you don’t want to pitch your tent underneath these things. Set up your tent in a flat, well-drained area. Bonus points if you can have your opening facing some epic scenery. Even though many tents have 2 vestibules, I usually only use one side to minimize the chance of debris or rain getting inside the tent.
9. Be The camp chef
Find a flat, sheltered spot 150 feet from your tent to pitch a tarp or canopy like the Kelly blah (if you’re expecting rain) and set up your stove. I set my kitchen under my FRO awning up against the truck. Use a proper kitchen table, chill your beer or wine in the stream (check alcohol restrictions for the land management agency), and get ready for a gourmet dinner.

Some Bomb Car Camping Tips
10. Don’t be a Litterbug
It’s important to practice Leave No Trace (LNT) by packing out all of your garbage. we started using the Litter Gitter by Kelty which helps to stay clean and organized as well as cutting down on tic garbage bags. If you’re in a place with access to waste bins, like trailheads or visitor centers, take the opportunity to chuck some in here. This will keep your car from getting stanky.
11. Store Food in the Car
Storing food and cooking equipment in the car prevents hungry critters from setting up shop on your site. Bring a cooler and sealed containers for opened foods: this keeps them fresh and lowers the stink factor. We have started using reusable storage bags and food storage containers by hydra flask. They help keep the food fresh, are super durable and come in some pimp colors for photos. If you really want to go all in, check out a portable camp freezer like the Dometic CFX45. We are big fans of outdoor cooking and having one of these is a game changer over using a traditional cooler. It is way cleaner, and cheaper in the long run - plus you never have to worry about water getting into any of your foods.
12. Tetris TF out of your car
Develop a mental map of where everything is in your car. You don’t need to be overly meticulous and annoying, but using proper bins or bags goes a long way. for soft items, I use Gregory Duffel Bags like the Supply Duffel 60 or Alpaca 60. For other items, I use the Rubbermaid Action Packer bins. A lot of people swear by this REI packing cube system but I personally haven't used them yet. Because I have a pickup truck, it’s rad that these can be locked with a quick combo master lock. Starting and staying organized as you go allows you to spend more time enjoying the outdoors and less time rummaging around for that spork that you swear is under the driver’s seat, but come to think of it, it might be in the glove compartment…

Car Camping Tips for packing up your site
13. Leave it as Clean or cleaner than you found it
Pick up all trash left behind by previous hooligans (especially in the fire pit). I agree, it’s no fun, but people will sometimes just be people. if you love the outdoors, be the better person and pick up what can. I thank you on behalf of all of the a-holes.
14. Spread some love
On your way out, stop by the visitor center or ranger station to tell the staff how much you enjoyed your visit and to thank them for all the work they do to keep these areas open and accessible. To do their jobs they sacrifice a lot. a small gesture of appreciation can go a long way!
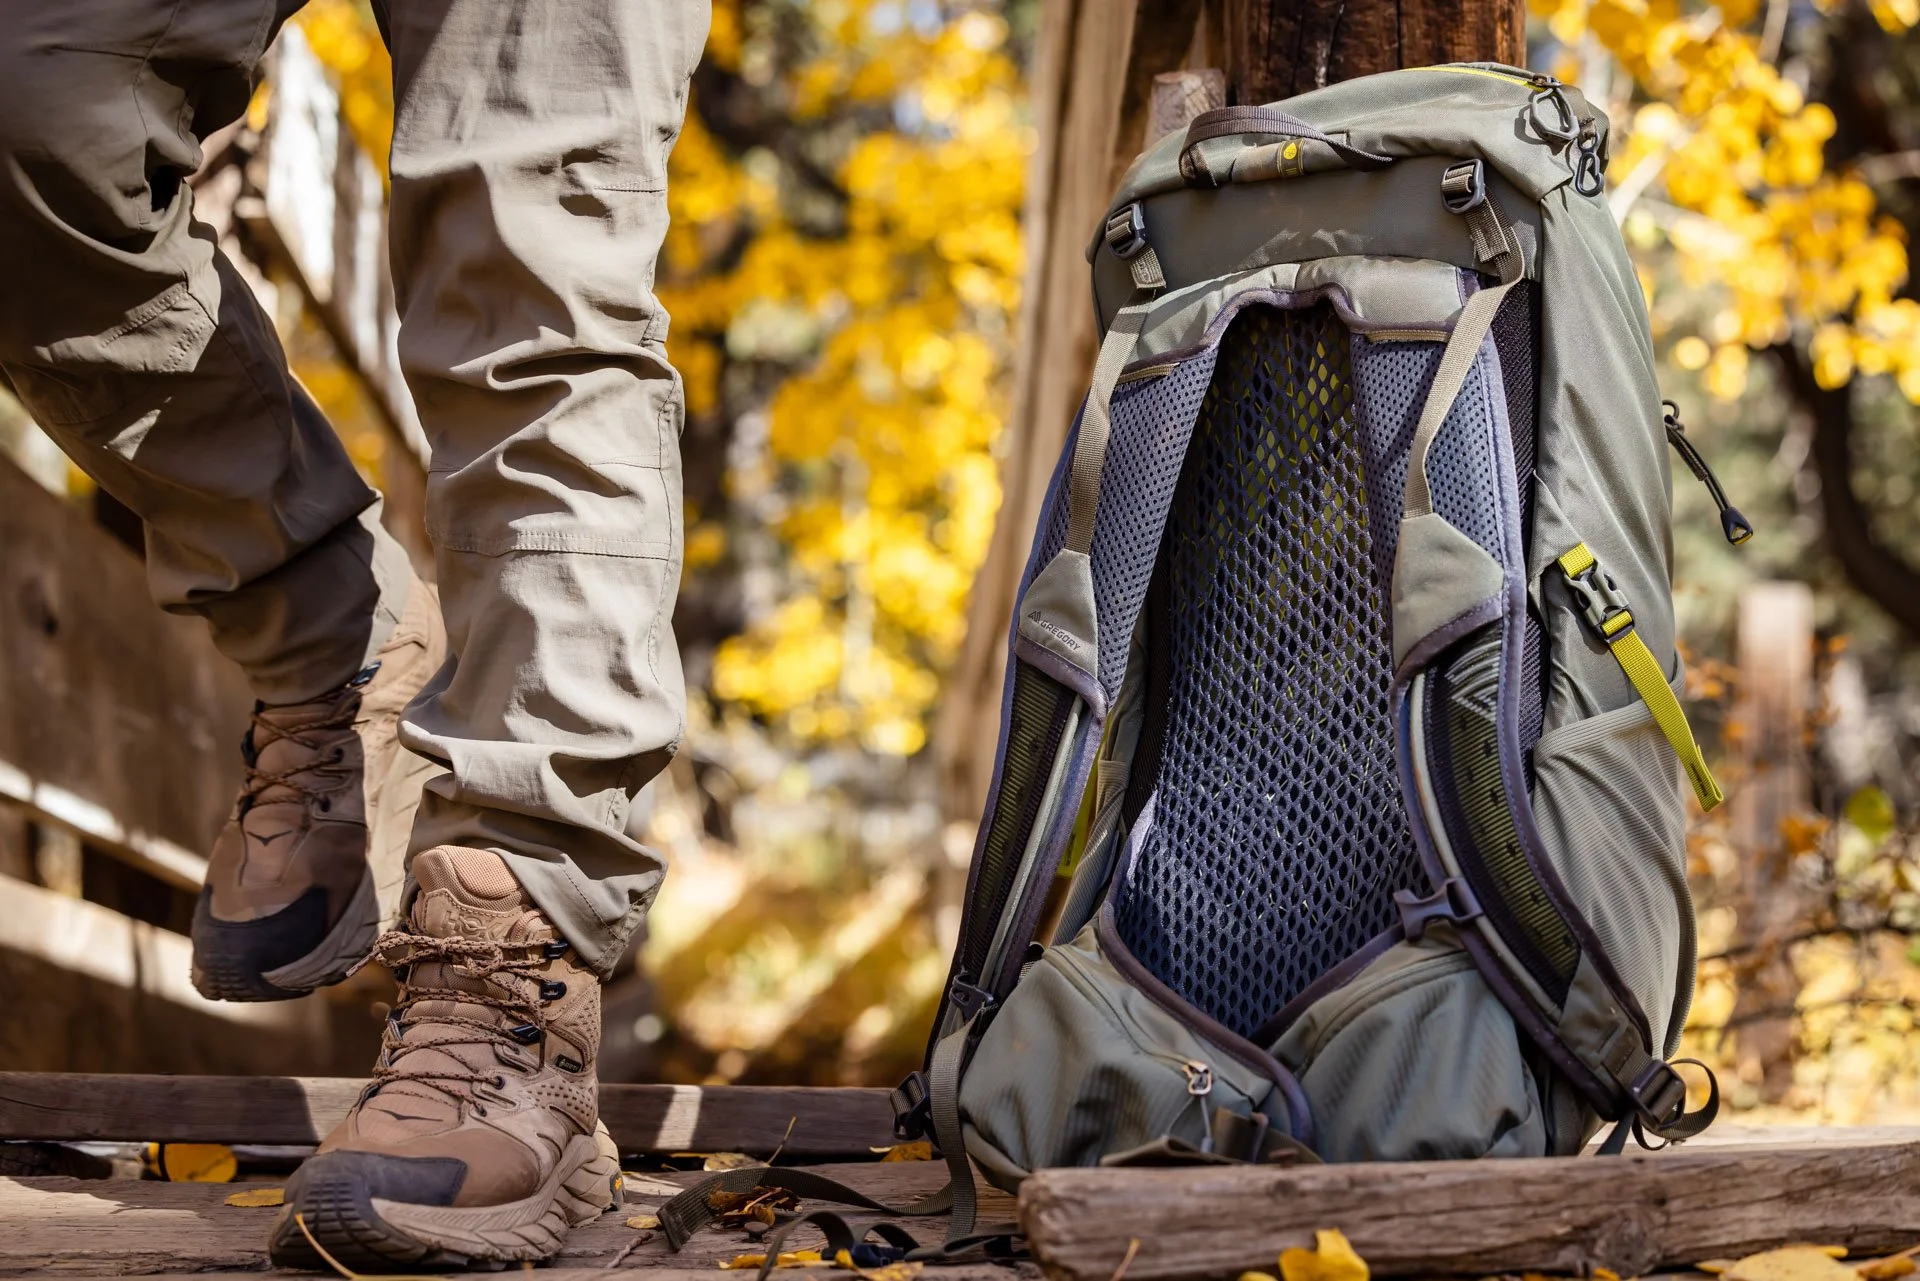
The Best Packing List For Fall Backpacking
Fall may be the best time of year for backpacking. Here is a quick list of everything you need to bring on your fall backpacking trip.
Where to go, what to wear, what to eat, and what to drink.
One of our favorite seasons to go backpacking is fall. There are less people, insects, and less heat. Plus, under the color-changing leaves, there is nothing more enjoyable than curling up in your sleeping bag after being exhausted from a long trip in the cooler temps, maybe around a campfire.
There are a few things to think about before you head out on the trail that are unique to fall backpacking. Hopefully, we have got it all covered in this article!

Fall Backpacking Equipment to Bring
- A sturdy tent. We love the NEMO Hornet 2p. It weighs only two pounds and still provides essential weather protection. It has been my go-to tent for the past 3 years. If you're traveling to higher altitudes, you might want to bring a 4-season tent. Prepare for frigid weather and winter-like conditions, especially at night.
- Count your tent stakes. Make sure you have them all because of the fall winds and weather. You will want your tent and fly to be securely staked; this will help to ensure that the wind doesn't drive you crazy all night. Plus, It will keep you dry, which is far more vital. Pro Tip: In the fall, it's even more crucial to set up your tent as soon as you arrive at the campsite (i.e., before it gets dark), and make sure to dry it out as soon as you come home (since you don't want to leave a damp tent outside to mildew for the rest of the winter). Pick up some extra tent stakes - trust me, you will eventually thank us!
- A reliable headlight. The Petzl Swift is our top choice. For nighttime use in camp, choose a headlamp with an adjustable beam, regulated output (so it doesn't decrease as batteries drain), and a red-light option. Be sure to take rechargeable headlights into consideration when you weigh your selections. Remember that the days are growing shorter, so know when the sun will set so you may have plenty of time to prepare your camp.
- Extra batteries. The longer nights require more time spent using your headlamp. Additionally, the cold drains batteries quicker so it's important to have some backups. Consider grabbing some Goal Zero AAAs which can be recharged.
- A Cozy Sleeping Pad. Keep your body heat from being sucked out by the chilly earth. Before you go, check the R-value of your pad. On a scale of 1.0 to 9.5, the greater the number, the better you can anticipate it to insulate you from cold surfaces (R3 and above is best for the fall). We love the NEMO Tensor because it combines thermal insulation with extremely light fabrics. Some people like to double up on their sleeping pads by using something like the Therm-a-Rest Z Lite Sol. This will keep you even more protected from the ground. Bonus: it functions as a seat pad.
- A warm, comfortable sleeping bag. As a rule of thumb, bring a bag rated 10 degrees lower than the anticipated evening low. Additionally, keep in mind that with time, your old sleeping bag may lose some of its insulation properties. A down bag should always be cleaned thoroughly and stored loosely. Need a warmer bag? The NEMO Riff 15 is a great bag to try if you're shopping for one. If not, you can add a mummy liner, pack two summer bags, or put your pad and bag inside of a bivy sack for added warmth.
- A hard-sided water bottle. Use a Nalgene filled with hot water inside of your sleeping bag at night. This will heat up the inside and keep it warm all night. Be careful to fully tighten the lid.
- Extra Fuel. Colder temps mean longer cooking times. You'll need some extra fuel to heat up that hot water bottle for bedtime cuddling in your sleeping bag. Keep in mind that pressurized fuel canisters—or liquid gas, for that matter—cannot be shipped or transported by air, so get extra at the outdoor store closest to your destination.
- A thermos. While your Nalgene is ideal for warming up your sleeping bag because it allows heat to escape, you'll also need a container that holds that heat in. I bring my insulated Hydro Flask so I can make hot drinks and keep them warm as long as possible.
- A Bear Canister. Did you know that many animals choose to breed during the fall? Make sure to stay away from any wildlife and use bear cans, hooks, or lockers to prevent drawing them to your campsite. Use a bear canister that is large enough to fit all of your food and smelly accesories like sunscreen, deodorant, toothpaste, etc.
- Sh*t That Actually Works! Have you used all of your equipment recently? Maybe. Maybe not - better check all of it out before hitting the trails. You'll be happy that your gear is in good working order before you arrive at your camping location miles away from civilization. Make sure that all the zippers function and that the tent fly is free of rips, etc.

What To Wear When Fall Backpacking
If you would like to see exactly what we wear on the mojsoryt of our backpakcing trips, head over to our 3 Day Backpacking Checklist and jump down to the Clothing section.
1. Layer Up. The secret to fall weather hiking is layering. To wick away moisture and keep you warm even when wet, base layers made of wool, fleece, or synthetic materials are required. (Remember: Cotton kills.) I always bring a raincoat, beanie, lightweight insulated jacket, sleep socks, additional socks, and long underwear made of wool. For fall, I add gloves, an additional fleece layer, and perhaps rain trousers. Bring layers of clothes to stay warm in a variety of weather conditions, including wind, rain, and sun.
- A Good Rain Jacket. Although fall weather might be unpredictable, rain is virtually always a given in many locations. Don't undervalue the potential of your rain jacket to maintain warmth as an additional layer in camp. Raincoats do more than just keep you dry. The Arc'teryx Beta AR is bombproof, lightweight and super packable. Yes, it is expensive, but it is aboslutely worth every penny. This is one piece of gear that I highly recommend to invest in. It will last you many, many years with proper care.
- Gaiters. The fall weather can vary greatly. The trail and vegetation may get wet after an overnight or morning rain, but since it's still nice and warm, you may not want to wear pants. I frequently wear shorts with gaiters since they keep my feet and boots dry.
- Down booties. Down booties are the go-to item for avid cold-weather backpackers, whether it's for keeping warm by the campfire or adding more warmth to your sleeping bag. Warm feet are happy feet and don't add much extra weight to your pack.
- Colorful Clothes. If you're backpacking through places where hunting is active, check your local hunting regulations for the dates of the season. Same rules apply for your dog - high-visibility means safe trails.
- Clothes that dry quickly. Quick-drying gear is a necessary even if there is a remote chance that you will become wet (which there always is). Before going to bed, hang any damp (but not drenched) items in your tent. Your clothes will dry overnight so you can start the day off nice and fresh!

What to Eat and Drink
- Simple meals. Keep it simple. You'll be glad if all you have to do is boil water and enjoy! We love boil-and-go prepared foods, such as Wild Zora or Mountain House. Vary it up every night so you have something to look forward to.
- Bring Some Apps. Consider bringing an appetizer with you to camp to keep yourself full before or while you're cooking supper. A simple favorite - homemade bars of granola.
- Oh, Sweet Dessert. Treat Yo'self!! S'mores are our go-to, but any fatty food can keep you warm as your body digests it.
- Extra food. Keeping warm when simply sitting still burns calories, so bring extra food. Good fats, including those in fish, almonds, and avocados, help to maintain a healthy internal temperature.
- Hot drinks. Your body needs fluids to control your core temperature, so stay hydrated with some hot drinks like hot cocoa, coffee or tea. Did you know that the fall is the time of year when dehydration is more prone to happen since there is less sweating and thirst? I mix my own chocolate using protein, cocoa, and coconut powder. Irish cream, peppermint schnapps, or chile peppers can be added to make Mexican-style cocoa.
- Plenty of water. Water is necessary, but it might not always be easy to find as it is in other seasons. Water sources may run dry by the end of the summer, depending on your location. Make sure you are aware of your available water sources. Bring along some electrolytes such as Ultima to get some yummy flavors and vitamins while you stay hydrated!

Where to Go Fall Backpacking
- An area with good weather. The weather starts to become less predictable in the fall. Always check the forecast before heading out, but keep in mind that circumstances can change at any time.
- Where parks are open. Make sure the roads and campgrounds are open before you go. Many parks, highways, and campgrounds close from fall until spring.
- An area where the colors are popping. Fall is the best season to look for colorful leaves. Seek out the best destinations with fall colors.
- A Safe area for camping. Choose a tent location that will protect you from the weather. Avoid low-lying regions and bodies of water because they tend to be cooler. If wind is an issue, position your tent close to stones, trees, even tall brush or grass to block it. Find a spot where the light will shine on you first thing in the morning, and stay in camp to really appreciate it.
DOWNLOAD OUR 3-DAY BACKPACKING CHECKLIST
We put together the ultimate guide to help you make sure you have everything you need for your next fall backpacking trip. Since you are probably heading out in the Fall, you may want to add some additional layers on there. Print it out, and mark it off as you go!

Review of the Nomadik Welcome Box with Hammock - Worth it?
We take a look at the Nomadik Welcome Box that includes a hammock that you receive when you subscribe and answer the question is it worth it?
Gear. We all love gear. Some of us a little more than others - maybe even to the point that it could be considered a problem, or an obsession. Is it truly even possible to have too much gear? I don't think so, and neither does anyone that has received a Nomadik Subscription Box.
If you want to subscribe, get loads of gear and save even more money while doing it, Nomadik gave an exclusive 10% discount to Adventure Dispatch Readers! Click here and use the code "Adventure10" at checkout!
Nomadik is a super take on the subscription mail idea that caters to outdoor gear lovers (Yes, I am looking at you!). When you subscribe to the Monthly Subscription, you will receive a bonus Welcome Box.
The contents change slightly, but for the most part, the items which we individually go through in this article remain the same. You also fill out a personal profile to start that they will use to cater the boxes to your interests. Though you don't get to choose exactly what you want, this helps point them in the right direction.
As is the case with many popular subscription boxes, the longer you sign up for, the less you spend per box. Prices range from $30 for one box, payable monthly, to $26 per box, billed semi-annually, for a total of $158.
Each box is has a guaranteed $50 retail value in each box. Most boxes also offer coupons for pretty hefty discounts from major (and not so major) brands. This brings up a super cool thing about what Nomadik is doing. Sure, they partner with some of the largest brands and include items from them, but they also include items from smaller companies, helping them to get more exposure for their quality items.
What is in the Nomadik Welcome Box?
Everyone that signs up for a Monthly subscription will receive the Nomadik Welcome Box. It's a great introduction to the process and a great teaser of the goodies that you will be receiving. Let's see everything that came in my Nomadik Welcome Box.

Grand Trunk Starter Hammock
This is their ultralight hammock and is a really good "starter" hammock. It packs down well and is pretty lightweight making it ideal to throw in your backpack for any adventure, or just a nap in a nearby park. Hanging straps are included so all you have to do is find the nearest pair of shaded trees to hang from!

Gear Aid Tenacious Tape Mini Patches
I love these things and should be a staple piece of gear for any backpacking adventure. In fact, I think these need to be added to our 3 Day Backpacking Checklist. These are used to repair holes and tears in down jackets, tents, rain gear. They are pre-cut patches of ultra-strong adhesive tape that permanently bond to nylon, polyester, GORE-TEX fabric, and vinyl.

UCO Hurricane Matches
These light up quickly and consistently in driving rain, heavy winds and falling snow—and will relight even after being submerged in water. Each box includes 25 matches that burn for up to 15 seconds each, plus 3 extra strikers. I default to carrying a lighter, but most of my adventures take place in normally dry conditions. I would pack these up as emergency backup if I went to more humid or wet areas.

Ursa Major Essential Face Tonic
This is a great example of Nomadik introducing some new products to even the most seasoned outdoors lover. This 4-in-1 natural face toner cleans, exfoliates, soothes and hydrates - leaving your skin feeling refreshed, firm and alive. I'm not sure it would make my longer backpacking treks where I am weighing every ounce, but for quick overnighters or car camping, why not? At home I have a nighttime routine to wash and clean my face, so why not take it to the backcountry?

Nuun Instant Electrolyte Hydration Powder Mix
I became an instant fan of Nuun a few years back when I used them during and after a few major hikes. They are relatively clean and work really well. These packets are an electrolyte powder that you add to water to rehydrate you faster than water alone. They are delicious and easy to throw in your bag for any adventure.
Wrapping up the Nomadik Welcome Box
You will also get a cool sticker to slap on your cooler and a pamphlet that talks about each item. They also have some incentives such as offering a $15 credit if you share your feedback. This means that they WANT to hear from their customers, and are actively listening. You will also find discount codes for many of the Brands that they work with.
Inside the Nomadik Welcome Box brochure, you will find the "Nomadik Challenge." Basically, if you post on IG and use the hashtag, they select 5 people to win a $50 gear bundle every month!!

Is it Worth it?
It's a bit too early to call it (sorry). This Welcome box is only a bonus gift and not the actual boxes that we will be receiving, but don't worry, there will be a follow-up! That being said, just the fact that Nomadik includes a Welcome Box with a Monthly Subscription in the first place with a value of around $50 is pretty cool. If I had paid the lowest tier amount of $30, and this was my box, I would be OK with it. I definitely received more than $30 worth of gear, so from a money standpoint, it is worth it. I am looking forward to the next box to get a true impression of what Nomadik is all about!

Ultimate 3 Day Backpacking Checklist, Everything You Need
3 Day Backpacking Checklist - the ultimate guide to make sure you have everything you need for your next backpacking trip.
This 3-day backpacking checklist includes everything you'll need for a comfortable weekend backpacking trip — nothing more, nothing less.
If you are just starting out or if you want to have your backpacking gear dialed in for your next trip, this guide will have you covered. I encourage you to make adjustments based on your specific needs but try to stick to the essentials.
In this checklist, I detail everything I bring on a three-day weekend backpacking trip in the spring, summer, or fall. I hope that this detailed packing list will ease your planning, help you figure out what you can cut out, and give you some good choices for gear to invest in that will last you for many years.

Start planning your next backpacking trip and make sure you have everything you need with this 3-day backpacking checklist.
Backpacking Pack
Starting right at the top, picking out the correct bag for your trip is the most important gear decision you are going to make. The pack will need to be big enough to hold all of your gear, comfortable enough to wear on long trekking days, and durable enough to last for many trips to come. Everything on your backpacking checklist will be housed in this bag, so choose wisely!
Ideally, for a 3-day backpacking trip during the Summer, Fall or Spring when the weather is more temperate, you can get away with a 45 to 55L pack. In colder temps, you may need to up your carrying capacity in order to pack warmer clothing and/or more layers.

We are huge fans of Gregory Backpacks because we believe they check all of the boxes that are most important to us. They are incredibly durable and dependable. They have features such as full front access on some of their bags that no other manufacturer offers. Their fit is very universal and makes for very comfortable hiking days.
For a 3-Day backpacking trip, I personally use the Gregory Baltoro 75L because I carry a ton of camera gear. It has the best weight support, and having a lot of extra space allows me to move the gear around the pack to make it very comfortable. If I didn't carry so much gear, my go-to bag would be the newly released, ultralight Gregory 58L Focal.
The equivalent bags for women would be the Gregory Deva 60 or 70L and the Maven 55L. The brand new ultralight Facet 55L would be another great option.

Backpacking Tent
Your tent will always be one of the heaviest items in your pack, so make sure you choose one that is big enough to accommodate you (and your partner) comfortable, but not too big that your back is screaming at you. There are a lot of options that greatly range in price, but I highly recommend two tents above all the others.
My personal tent of choice is the Nemo Hornet 2p Ultralight Backpacking Tent. It is incredibly light, packs up super easily, and is spacious (enough) for two people. It also has two pretty big vestibule areas that keep your backpack and dirty gear outside of the tent while keeping it safe from the weather.
If you want a bit more space, the Big Agnes Copper Spur HV UL 2 is an amazing tent! It is almost as light as the Nemo, but it is completely freestanding and has a lot more interior space.

Sleeping Bag
The temperature rating of your bag is going to be dependent upon a few different factors: the weather and climate, time of year, type of sleeper, etc. I good rule of thumb is to plan for the temperature to be 10° colder than what the report says the low will be. So if the nighttime low is 45° I would bring a bag that is rated for 35°.
To be honest, I normally bring a very warm bag. In fact, my go-to bag is the Nemo Kayu Ultralight 15° Sleeping Bag. It's overkill, I know. But I can always unzip to sleep with half of my body exposed. I would rather be over-prepared than under.

Sleeping Pad
I can't stress the importance of having a proper sleeping pad. It may be the most misunderstood or overlooked piece of gear when it comes to sleep systems. You can have the warmest sleeping bag in the world, but if you don't have a properly rated sleeping pad, say goodbye to your body temps. This is especially true when you are using down-insulated bags. Down loses almost all of its insulating properties when compressed. This means there is very little warmth being held in by your bag underneath you - that is taken care of by your sleeping pad.
I use the Nemo Tensor Regular Wide Sleeping Pad because it is insanely light, very comfortable, and has a true 3 season insulation rating. It also doesn't make any annoying sounds as you move around, which I do (a lot). It comes with the Nemo Vortex pump sack making inflating a breeze.

Trekking Poles
I admit I was pretty anti hiking poles for a long time. I thought they were more of a nuisance than an aid. Keep in mind, much of my dismay came from hikers using them on day hikes and swinging them around - basically using them improperly in places where they weren't necessary. Then, I got older. LOL
I won't backpack without trekking poles. They are a required part of my kit. My packs tend to be heavy due to camera gear and copious amounts of chocolate. Though I don't mind the extra help poles give by allowing you to use your upper body a bit when climbing, it is the downhill that gets me.
Do yourself a favor, and use poles when descending with any kind of weight on your back. Your knees will thank you. The Black Diamond Trail Ergo Cork Trekking Poles are a solid set that has all the bells and whistles I need. They are super stable, fold down reasonably small, and are fairly lightweight.
Headlamp / Torch
I have used the Petzl Tactikka Core Headlamp for many years and it has worked flawlessly. It is unique in that it has a self-regulating brightness adapter mode that helps to conserve battery life. It also has a hybrid charging system allowing you to use AAA batteries in a pinch. The red light also helps to save your night vision and avoid that awkward moment when you blind people trying to have a conversation.
GPS / Communication Device(s)
The Garmin inReach Mini allows for two-way custom texting and also has GPS that you can use for navigating. It just may save your life one day. It also helps keep your loved ones at ease when you're off the grid by letting you send updates.
I also bring along a pair of Rocky Talkies for communication amongst the group. These are crucial for nailing poses when your subjects are far away, or when using a drone. They also allow the group to be more versatile allowing individuals to break off due to interests, speed, energy, etc, but stay in safe contact with everyone.
First Aid Kit
You should always have a first aid kit on your backpakcng checklist and whenever you are adventuring or traveling off-grid. Accidents happen - just check my scar count. Adventure Medical Kits Ultralight & Watertight Medical Kit come in an assortment of sizes that you can choose from depending on your and/or the groups' needs.
I usually go through the kit and customize it with items that I am more familiar with - otherwise, I'm just carrying useless weight. I also add in my own leuko blister tape strips that I make. I use this leuko tape and this paper backing.
Backpacking Checklist: Cooking & Kitchen Gear
There are loads of options for cooking food when backpacking, but I tend to keep it very simple. I want to spend my time enjoying the outdoors, taking photos and being wild in the wild. The last thing I want to be concerned with is wrestling with prepping or cooking my food.
Backpacking Stove and Fuel
There is no easier, more convenient, and reliable option than a Jetboil Zip Cooking System. It is super simple, fairly small, and very reliable. For my cooking needs, I only need to heat up water for my meals and coffee. Carry a long handle spoon/spork to make digging into your backpacking meals less messy.
Pro Tip: Divide the carrying weight by having one person carry the Jetboil and someone carrying the fuel.
Water Filtration System
I recently tested and am in love with the Grayl Ultrapress Water Purifier. Yes, it is heavy, but you have to keep in mind that it is a filter AND a water bottle. So that perceived extra weight negates itself when you compare it against a filter plus a water bottle. Also, this is one of the only purifying systems that filter viruses.
I also carry Water purifying tablets for emergencies. They are very small and you can easily stow them with your first aid kit and not even know they are there.
Camp Mug
You will need something that you can keep in your hand when it's filled with piping hot coffee or tea, as well as keep your beverage nice and cool on warmer evenings. A backpacker's favorite, including me, is the GSI Outdoors Infinity Backpackers Mug. It's insulated and only weighs 3.2oz. Plus, it is spill-resistant and has a little handle making your java sipping just delightful.
Knife or Multi-Tool
I use the Gerber Dime for backpacking & Mountain biking. The spring-loaded pliers work well, the tiny scissors are strong, and the knife blade is sharp. It even has tiny tweezers for the unexpected splinter. All of the tools lock securely into place when you’re using them, and the unit feels solid and durable.
Spyderco Delica 4 Lightweight 7.15" Signature Folding Knife is the best knife out there for backpacking. This knife combines a lightweight of only 2.5 oz with a razor sharp blade and a remarkably comfortable, solid grip.
Bear Canister or Bag
This is a requirement in some parks, but not necessarily everywhere you go. Make sure you check before you head out. For shorter trips or when only carrying food for yourself, the Medium Bear Vault is a good, inexpensive option. For longer trips, or when carrying for two people, go for the larger version.
Backpacking Checklist: Toiletries
Let's just be open and honest about what we doing out in the wild. We are being free. It's okay to be grimey and stinky. In fact, it's kind of expected. When it comes to figuring out what to put in your toiletry kit, think about hygiene. The rest of the fluff will be waiting for you when you return home.
Toothpaste and Toothbrush
Do you know that travel aisle that has all the super cute, tiny bottles of things that are supposedly for travel use? Well, this is the one time you might actually use them! The toothbrush is up to you. As for the toothpaste, go with a travel-size version. Our favorite is the Dr Bronners because it is all-natural, fair trade certified, and the packaging is completely recyclable.
Let's Talk About Your Poop Kit
We all do it. It's a natural thing. For some, what is unnatural is the idea of doing it outside of a bathroom. Please read about proper Leave No Trace practices and poop the right way in the wild. When done correctly, you are actually helping Mother Earth.
Despite the dry or frozen soil, the Duece Ultralight Trowel ensures that you can deposit your own brand of fertilizer into the Earth’s natural garden. Digging a personal latrine is more than a cosmetic camping practice because, when buried, your waste is quickly decomposed and absorbed as nutrients instead of running into the local watershed.
Have an extra Ziploc or stuff sack with you that you designate for the dirty TP, and pack it out. Use some hand sanitizer to clean your hands. If you use wet wipes, just remember that they also get packed out with you.
Sunscreen
When you're backpacking, especially in higher elevations, your skin is constantly being exposed to harmful UV rays. Sun Bum Orginal SPF 50 is a reef-safe sunscreen that is made with clean ingredients.
Lip Balm
Nobody likes chapped lips, being exposed to the elements can bring them on in a jiffy. We always stash some Dr Bronners Organic Lip Balm to protect our kissers. As a side note, lip balm can be indirectly applied elsewhere in emergencies. (wink)
Quick Dry Towel
A lightweight quick dry towel is always handy, whether it’s for drying your hands, doing dishes, or being used after a shower or swim. They come in a variety of sizes so you can pack what you need.
Backpacking Checklist: Clothing
This is the part of the list that most people get wrong. It took me many trips before I trusted my clothing setup. No matter how many times I heard others say it, I still needed to go through it to learn on my own. It is safe to say that you only NEED about half of what you THINK you need.
Since we are sticking to a 3-day trip, the truth is you only need 1 full hiking outfit and 1 camp outfit. Obviously, there are a couple of things you can bring extras of, but after a couple of hours on the trail, you will be happy you decided to leave the fashion show back at home.
Though comfort is king, steer clear of cotton fabrics. Cotton holds moisture and collects odor, both of which won't make you comfortable on the trail. Stick to moisture-wicking fabrics that pull the sweat away from your skin, dries quickly and resist odor.
Rain Shell or Shell
Even though many of my backcountry trips take place in the desert with super low chances of rain, I ALWAYS pack a rain jacket. It is a crucial part of The Adventure Dispatch backpacking checklist. A wet backpacker is not a happy backpacker. Plus these jackets are also windproof, so even if it doesn't rain, a shell will protect you from other elements.
This is the piece of gear that I absolutely recommend spending money to get the best quality you can afford. When you purchase a quality piece of gear you should expect it to last years. I have used the same jacket, the Arc'teyx Beta LT Jacket, for the last 8 years and it works just like the day I bought it. The LT hits the perfect spot for me when it comes to weight and waterproofness.
Insulated Jacket or Vest
Probably one of my favorite and most worn pieces of gear is my mid-layer. The North Face Ventrix Hooded Jacket goes on every single adventure I do. It is incredibly comfortable, super warm, very breathable, and ultralight (13.4 oz).
By far, the most popular jacket in this space is the Arc'teryx Atom LT Hoody (13.2 oz) which is also a fantastic jacket. I don't have personal experience with the hoody, but I do have and use the Arc'teryx Atom LT Vest on warmer excursions.
Top Base Layer
For colder weather, the Patagonia Capilene Midweight Crew Top is a great choice for a base layer. It's 100% recycled, only weighs 6.5 oz and is more durable than merino. The fit is great - not too tight or loose, and resists odors.
For warmer treks, I always bring my Outdoor Research Echo Hoody. It is ultralight, quick-drying, odor-resistant and comes in rad vibrant colors. My only qualm with it is that they tend to run just a hair short in length.
Moisture Wicking T-Shirt
On my backpacking checklist, I usually account for 2 Outdoor Research Echo Tees because they are so incredibly lightweight and I know I am going to sweat when wearing a pack. It's nice to have a tee to switch out after taking a break while the other one dries.
Hiking Pants
I am a big fan of the Eddie Bauer Guide Pro Pants. They also come in a slim version if you prefer a more tailored fit. These have lasted me for years, don't loosen up to much on multiday trips, dry quick and don't restrict movement. The only downside is the lack of breathability on warmer days.
In warmer weather, the Outdoor Research Ferrosi pant are the ultimate hiking pant. These are the most breathable hiking pants on the market are still incredibly durable with decent moisture wicking capabilities.
Hiking Shorts
I admit, I mostly hike in shorts. I run very hot which means I sweat. A lot. The more air I can get on my skin the better. Keep in mind, most of my adventures happen in warmer, dry climates. The most important factors to me are fit, breathability and durability.
I go with one of two setups. It is either a pair of Vuori Trail Shorts with a liner or the Outdoor Research Ferrosi 7 in Short. The Vuori are insanely comfortable and move with you like a second layer of skin, but won't hold up in harsher conditions like thick brush. The Ferrosi shorts on the other hand are ready for anything you can dish out. As a bonus, they have an integrated hip belt so you can adjust on the fly.
Quick Dry Undies
No backpacking checklist would be complete without talking about the under skivvies. I bring two pairs of quick drying underwear that I alternate, so breathability and odor control are 2 of the most important features I look for. I usually bring an ultralight and super quick-drying pair of Outdoor Research Echo Boxer Briefs and an Icebreaker Anatomica Boxer that has better odor control, but are a bit of a heavier fabric.
Hiking Socks
Sometimes overlooked, your sock choice if one of the most important sections on your backpacking checklist. When it comes to sock shopping, I am looking for a couple of keypoints that need to be hit.
As a hot hiker and usually in warmer weather, having lightweight sock with great breathability is paramount, but it can't come at the sacrifice of proper padding for long treks. I've tried many socks, but the Smartwpol PHD Pro Light Crew sock have been the best for my needs.

Hiking Boots
Now I need to be 100 here. My go-to adventure footwear of choice are a solid pair of Chacos. I have backpacked with heavy gear through super rough terrain wearing Chacos. They work for me, but that doesn't mean they work for everyone. Recently, I have found boots that may have changed the game for me.
With a bummer knee injury thanks to trail running in "minimalist" shoes, I went in search of more padded footwear to keep these old bones from getting older. Every runner that I know and trust all pointed to Hoka One One for trail runners. I gave them a try and instantly converted.
I had a backpacking trip coming up, so I gave the Hoka One One Anacapa Hiking Boots a try and fell in love. They are very lightweight, have enough padding to dampen the footfalls, but not so much so that you feel squishy, and don't feel restrictive like many boots do.
Camp Sandals
It blows my mind when I hear backpackers not bringing camp sandals or when they try to tell me I don't need the extra weight. You. Are. Crazy. Backpacking is an exercise in simplicity, and what it more simple than the pure joy of pulling off your ragged, tired hiking boots and slipping into nice, cozy camp slippers to enjoy the evening?
I have had a pair of Sanuk Vagabond Sidewalk Surfer that have come on every backpacking trip I've been on unless it involves snow or heavy chances of rain. They weigh 6 oz, pack flat and are super comfy, not to mention stylish!
A ton of backpackers love their Crocs. They are durable, have decent protection and ultralight, but I don't like the bulk they add, and find them to be slippery when wet. Others go with a hybrid water shoe like the Vivobarefoot Ultra 3 or a camp sandal like the Xero Shoes Z-Trail Sandals.
For cold weather camping, the North Face Thermoball Traction Booties are the jam! They keep you feet toasty warm and dry even on the coldest of nights.
Backpacking Checklist: Accesories
When backpacking, you'll want to bring a hat and sunglasses to protect yourself from the sun. I frequently wear a trucker hat while backpacking, but sometimes go with the Outdoor Research Sombriolet Hat when I want more coverage.
I also recommend a Buff, which may be worn over your neck for sun protection, across your face and ears for wind protection, and even as a headband. You should also bring gloves and a beanie if it's going to be cold.
Is there anything on our backpacking checklist that we missed or do you have any questions about an upcoming backpacking trip? Please let us know in the comments section below.

Ultimate Guide to Backpacking Santa Cruz Island in the Channel Islands
Printable Santa Cruz Island Backpacking Guide. Everything you need to know to do the ultimate backpack on Santa Cruz Island.
This is the most comprehensive Santa Cruz Island Backpacking Guide. It contains everything you need to know to do the ultimate backpack on Santa Cruz Island in the Channel Islands National Park.
The Channel Islands National Park consists of five islands located just off the coast of sunny California. On these islands, you will find loads of hiking, camping, kayaking, snorkeling, and other recreational activities.
The islands are well-protected, and the National Park Service does an excellent job of minimizing human impact. Due to the fragile ecosystem, if you plan on visiting this National Park, you'll need to plan ahead.

IN THIS GUIDE, WE SHARE ALL THE LOGISTICS FOR PLANNING A BACKPACKING TRIP ON SANTA CRUZ ISLAND LOCATED 25 MILES OFF OF THE COAST OF CALIFORNIA.
You should practice good trail etiquette at all of our shared destinations and remember to Leave No Trace. That means packing out your garbage, being respectful of others on busy trails, and following the established rules.

Getting To The Santa Cruz Islands
From Ventura Harbor, Island Packers offers regular boat ferries and cruises to Santa Cruz and the other islands in Channel Islands National Park.


The trip to Prisoners Harbor or Scorpion Anchorage on Santa Cruz Island takes slightly over an hour. Be aware that the boat ride can be cold and rough, so dress accordingly with layers. If you get seasick, consider taking preventive steps before the ride, such as purchasing anti-nausea bands or packing Dramamine. If you start to feel sick while on the boat, head to the back for fresh air and keep your eyes on the horizon.
[ninja_tables id="7330"]

You must check in at the Channel Islands office at least one hour prior to your departure to pick up your ticket. Before you put your bags on board they will ask you to remove any water containers and gas/fuel. These will be held in a separate, fire-safe container and collected once you get to the island. Be sure to mark your fuel canisters with your initials or name so it is easy to identify.
It's a good idea to call Island Packers at (805) 642-1393 prior to your boat ride to ensure your trip has not been canceled due to rough seas.

Santa Cruz Island Map
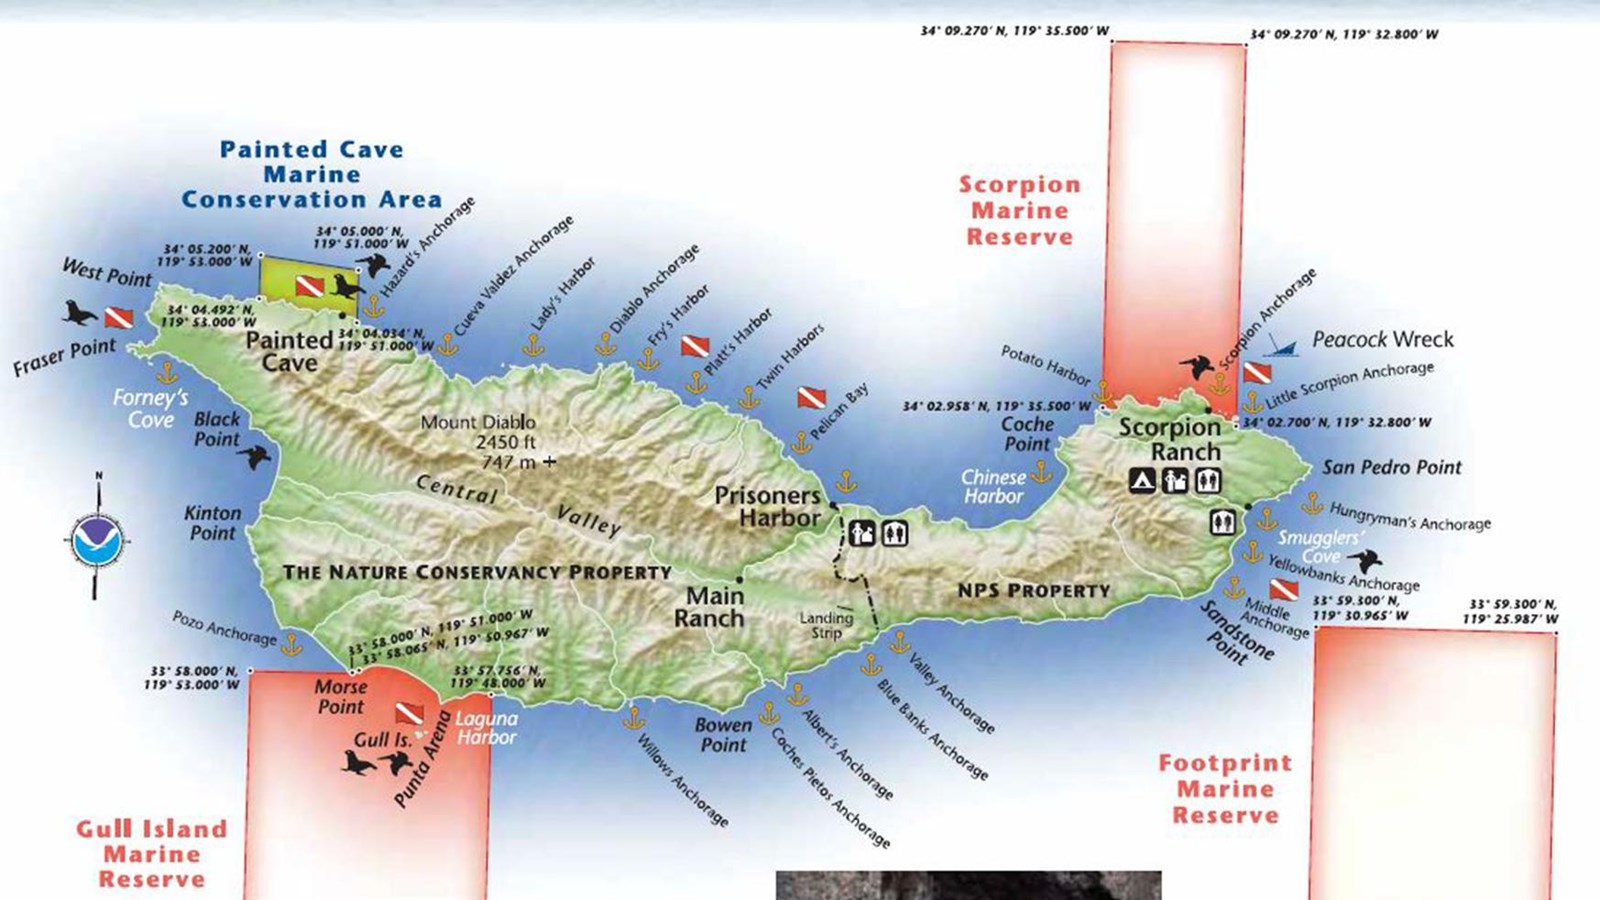
Santa Cruz Island Weather
The best time to visit Santa Cruz is from September to November when the summer tourists have left and the beaches, hiking trails, and other attractions are less crowded.
The warmest month of the year in Santa Cruz is September, where the average temperature gets to around 23℃ (73℉), but temperatures can reach as high as 25℃ (78℉) on the hottest days in summer. The weather in the winter, especially around December, can reach a minimum of 6℃ (43℉).
Here is a link to check the Current Weather and forecast.
Camping Reservations
Del Norte Campground : To camp at the Del Norte Campground, you must have both a boat reservation and a campground reservation. The Del Norte campground, SCI is the smallest campground in the park. There are only four sites each with a four-person capacity for a maximum of 16 total campers at one time. Located 3.5 uphill miles from the pier where you disembark the boat. This is a “backcountry” campground. Rustic and charming with beautiful views of the island coast, this campground is frequented by backpackers and hearty hikers.
Picnic tables and small food storage boxes are in each site. NO fresh/potable water is available at this location and most years no streams or creeks flow to allow for water filtration by campers.


Most Scenic Campsite: Site 1 give you gorgeous views of the water but you are very exposed
Most Private Site: Site 4 gives you some privacy and shelter from the winds.
Scorpion Canyon Campground: To camp here, you must have both a boat reservation and a campground reservation. Scorpion Anchorage offers the most numerous and most-visited campsites in the Park. The campground area has shade in most sites provided by old-growth eucalyptus trees.
There are two campgrounds - Upper and Lower. Lower is closer to the harbor and therefore a bit more exposed to the elements and humidity. If you plan on doing more water activities, stay in Lower Scorpion Campground for quicker pier access. If you plan on doing more inland hiking, Upper Scorpion Campground is the spot for you.


The placement of the campground in Scorpion Canyon provides shelter from the prevailing NW winds. There are no trash cans for the public on the island, so you must pack out all trash when you leave.
You may reserve up to 7 consecutive nights.
Santa Cruz Island Backpacking Trail Map

Water Availability (IMPORTANT)
Drinkable water is VERY scarce on the island. Be prepared to carry extra water, especially in warmer weather. Potable water is ONLY available at the Scorpion Ranch campground on Santa Cruz Island.
Santa Cruz Island Backpacking Itinerary
- Day 1: Hike Prisoners Harbor to Del norte Campground | 4.8 miles
- Day 2: Hike Del Norte Campground to Scorpion Anchorage Campground | 9.5 miles
- Day 3: Optional Exploratory Hike (optional) | Smugglers Road, Scorpion Canyon, Potato Harbor | ~8 miles
- Day 4: Kayak Tour at Scorpion Anchorage | Hike to Scorpion Canyon Ferry | .5 miles
There are a few variations that you could do to this itinerary. We chose to designated Day 3 as a full exploratory day in order to really kick back and enjoy the island. This gave us enough time to explore all the parts we wanted to see. We also like to spice up our trips, so we allotted time on Day 4 to take a guided kayaking tour.
Trip Report
Day 1: Hike Prisoners Harbor to Del norte Campground (3.2 miles, 1182 elevation gain)
- Potable Water Availability: None available
- Best Campsite at Del Norte Campground: #1 (most scenic) | #4 (most private)
I would recommend getting the earliest ferry out of Ventura so that you can get to the island with plenty of time to explore and, if possible, do the Pelican Bay Hike. You will need to fill out a form and submit this to the rangers before doing the hike. Only passengers of Island Packers are permitted to hike on this land, so take advantage of this unique opportunity.
The Pelican Bay Hike is a 4-mile out-and-back trail that gives offers some insanely beautiful views and gives you access to the sandy shores at Tinker Harbor. Do not miss this hike if you are comfortable with tacking on 4 additional miles to your first day. You can leave your big packs in the fox boxes at Prisoners Harbor and just take a day pack with snacks and water.

If you do the entire Pelican Bay Hike, expect to spend about 3 hours exploring. Once you are back at Prisoners Harbor, grab a quick lunch or snack, pack it up, and head out to your first leg of the backpack.


Although the trail does snuggle up against the coastline to give you ocean views at every turn, the majority of the hike is along a road. And it is pretty dang steep. Once you get your boots dug into the actual trail, guess what, it gets even steeper! The trail drops you down into a valley and then straight up the other side a couple of times. However, the rolling hills, blue skies (hopefully) and water views make the hike fly by.

The turnoff for the campground is well marked at a Y intersection, and the sites are only a few hundred feet up the trail. While at camp, make sure to place all of your food, or anything scented inside the fox boxes. The Island foxes are definitely not shy and will start inspecting the new visitors as soon as you arrive. It is recommended to keep all of your gear, socks, bags off the ground and tabletop as these little dudes just may be curious enough to rustle through your goods to try to find some snackies.


Day 2: Hike Del Norte Campground to Lower Scorpion Campground (9.7 miles, 2322 elev gain)
- Potable Water Availability: Water available at both Upper and Lower Scorpion Campground
- Best Campsite at Lower Scorpion Campground: #3 (most private & best access)
Get an early start to give yourself plenty of time to enjoy the views. It is possible to add a side trip down to Chinese Harbor (adds 3.6 miles roundtrip). The average time to hike from Del Norte Campground to Lower Scorpion is about 5-6.5 hours, but trust me, you will want to stop to take some photos. Many, many, many photos.

It is pretty incredible how often and vastly the landscape changes along this trail. Some of the hike cuts its way between high grass valleys, over wide-open hilltops, down into deep, rocky valleys, and around some sketchy edges up to a spine that overlooks the west side of the island.


The turnoff for Chinese Harbor is about 2.3 miles from the Del Norte Campground. You should note that this will take you to an overlook of Chinese Harbor, and not down to the beach. The hike is 1.8 miles each way.
This hike really rakes a turn for the awesome the moment you link up with Montañon Trail at about the 5.2-mile mark. The massive peaks in the distance seem impassable, making you question where in the heck you are even headed. You can make out parts of the trail, but it seems to disappear around a very steep corner. And that's because it does!


What started out as a relatively passive hike, gets gnarly with the quickness as you take a quick ascent up to Montañon Ridge. The terrain gets pretty chunky and narrow as it curves its way around a lower ridge, followed by an incredibly scenic 360-viewpoint on top of the ridgeline. Being that this junction is very close to the highest point on the island, you get massive views of the western coastline on one side and Scorpion Harbor on the other. On clear days, you can see Anacapa Island!

This is the part where someone (there's always that guy) starts saying "It's all down here from here." But, for once, he won't be lying. The next 4 miles wind their way down to Scorpion Harbor. There are two trails you could take to get to the campgrounds. We went for the slightly longer one that drops you into the valley, passing through Upper Scorpion Campground and then into Lower Scorpion. Just passed that is the harbor.
There is a fantastic short hike that will lead you to an overlook of the harbor. Here, you will get sweeping views of the giant kelp forest floating below and the massive rock formations in the distance: Scorpion Rock. This is a killer location to photograph sunset or sunrise.


Day 3: Optional Exploratory Hike | Smugglers Road, Scorpion Canyon, Potato Harbor | ~8 miles
There are many ways to spend the day hiking and exploring all the goods on this side of the island. We compiled an 8-mile loop that hits all of the hot spots. You will cover a couple of miles that you did on the way into Scorpion Canyon on Day 2. If you would like to spend more time along the amazing North Bluff Trail instead, do this shorter loop that starts from the Upper Scorpion Campground.


To do the full loop, start off by heading out of camp towards the harbor and turn right onto Smugglers Road. This will take you right up to the top of the cliffs and over to Scorpion Bluffs. The trail will then lead you back inland on the island, circling back around to the campgrounds.


From Upper Scorpion Campground, turn left onto Potato Harbor Road. This climbs its way up to intersect with the North Bluff Trail. Head west on the North Bluff Trail until you reach the most beautiful part of the island: Potato Harbor Overlook.

Day 4: Kayak Tour at Scorpion Anchorage | Hike to Scorpion Canyon Ferry | .5 miles
We scheduled our return ferry for 4 pm so that we could sleep in and enjoy a group breakfast. In the early afternoon, we headed out on a kickass guided kayak tour to see the island from the water!

The Adventure Sea Cave Kayaking experience was incredible! TBH, we tend to stay away from guided tours. We like the freedom to roam freely and get our own take on the experience. But, that's not an option here because it is a protected preserve.


Now, I will be the first to admit - we were dead wrong! The $169 price tag was well worth it! We were shown a lot of really rad sea caves, paddled through tunnels, and got soaked by explosive blow spouts. Our guide kept us entertained and talked about the super interesting history of the island. We learned the names of the birds that live exclusively on the island and tasted kelp fresh from the ocean. Yes, that is correct. We ate kelp.
You can book your adventure in advance here - which is highly recommended during the busier seasons.
Cell Phone Reception
Don't expect really any cell phone service on your Santa Cruz Island backpacking trip. The reception will be very sporadic and unreliable. It's a good idea to turn off or put your phone on airplane mode. Otherwise, your phone will roam about looking for a signal, draining your battery. How else are you going to get those banger IG boomerangs?!
We found that the only place we reliably had any reception at all was on the pier at Scorpion Anchorage.
Santa Cruz Backpacking: What Gear Do You Need?
Make sure to Download our 3 Day Backpacking Checklist. By adding in a couple more meals, snacks and a little more clothing, you could easily adapt this to 4 days.

Below you will find a list of the gear that we took on this trip. It includes almost every piece that we had with us in our backpacks. This was the first time we used the Gregory Backpack Combo, and it worked out perfectly. I would argue that this combo may be the perfect backpacking duo for the adventurous couple.
His
- Backpack: Gregory Baltoro 75
- Tent: Nemo Hornet 2p
- Sleeping Bag: Nemo Kayu 15
- Sleeping Pad: Nemo Tensor Wide
- Shoes: Hoka One One Anacapa Mid GTX and Chacos
- Headlamp: Petzl Reactik
- Sunglasses: Rheos Coopers
- Hiking Poles: Black Diamond Trail Ergo
- Clothing: Marmot Knife Edge | Eddie Bauer Guide Pro Pant | Vuori Trail Shorts | Outdoor Research Echo Hoodie | Arcteryx Atom LT Hoody | Smartwool Performance Hike Light Socks
- Food Stuffs: Jetboil Zip | Fatty Meat Sticks | Ultima Electrolytes | Mountain House Meals | Starbucks VIA | Nalgene 32oz Water Bottle
- Camera Gear: Canon R, Canon 24-105 lens, GoPro Hero 9
Hers
- Backpack: Gregory Maven 55
- Sleeping Pad: Nemo Tensor Regular
- Sleeping Bag: Marmot Trestles 15
- Sleeping Bag Liner: Cocoon Silk Mummy
- Pillow: Klymit Pillow X
- Shoes: Hoka One One Tennine GTX
- Sunglasses: Rheos Wyecreeks
- Clothing: Marmot Knife Edge
- Food Stuffs: Wild Zora Paleo Meals | Wild Zora Snacks | Wild Zora Grain Free Hot Cereal | Four Sigmatic Mushroom Coffee Mix |
A note about Ticks
Ticks are present on the islands and can carry bacteria and viruses that can cause diseases in humans, including Lyme disease. Now, you see this sign oftentimes at trailheads and they advise you to check yourself. I never take it too seriously, but the ticks on this island are aggressive! Seriously, if you literally step a foot off the trail to snap a quick photo, there's a good chance one of these suckers will get on you.
Periodically check yourself throughout the hike and again when you get to camp. They are harmless if you swat them off before they dig in. If they have latched on, make sure you know how to remove them safely and completely. The Clever Hiker wrote a fantastic article covering ticks that I suggest you check out.

Best Gear for Mountain Biking in the Desert
Mountain biking in the desert comes with its own set of gnar-gnar and awesomeness, but also with its own collection of ouches and oh-shits.
Mountain biking in the desert comes with its own set of gnar-gnar and awesomeness, but also with its own collection of ouches and oh-shits. Being that I live in Phoenix, I rock many battle scars courtesy of saguaro and sharp rocks. Over the years, I have tested out different gear options to lock in the perfect set up and I wanted to share that.
Here is a current list of the gear I use when Mountain Biking in the Desert.
Protect Ya Noggin - Helmet
Let's start with the most basic, a helmet. It's kind of an important part of your body, holding the thinking noodles and eyeballs, so it's a good idea to keep it protected. When it comes to mountain biking in the desert, it's also vital to have great ventilation.
Smith Forefront 2 MIPS Helmet
Why We love it: The most breathable, best looking, and comfortable helmet on the market
The Specs:
- Smith's premiere helmet for trail and all-mountain
- MIPS low-friction liner disperses rotational forces
- Aerocore In-Mold design is light, breathable, rugged
- 20 large vents with Koroyd for increased breathability
- Three-position visor is compatible with enduro goggles
- VaporFit adjustable fit system for a customized fit
- X-Static anti-odor lining with Reflective Cooling
Check the latest price:
Smith Optics | Backcountry | Amazon
Sweet Eye Protection with Style
I cringe when I see someone riding without sunglasses. I can't tell you how many times an unseen branch or pebble pops up and tags the sunglasses which would've otherwise been in my eye. Plus, it's also pretty important to see where you're going, amiright? Why not protect your eyes, while killing the fashion game?
Smith Optics Ruckus ChromaPop Sunglasses

Why We love it: Matches the Smith helmet look, fits like a glove, looks badass, and comes with two lenses for when the light drops
The Specs:
- Performance sunglasses for running, cycling, and training
- Chromapop lens enhances clarity and natural color
- Interchangeable lens system with included bonus lens
- Rimless frame features nose and temple pads for a solid fit
Check the latest price:
Backcountry | Amazon | Smith Optics
Gore Wear C3 Trail Short

Why We love it: Insanely durable, comfortable, and the perfect length
The Specs:
- A versatile short that pairs well with our favorite padded liners
- Durable, quick-drying fabric for full freedom of movement
- Polyester mesh lining improves breathability
- Two front and two side zippered pockets for small items
- Reflective detailing helps keep us seen in low-light conditions
Check the latest price:
Backcountry | Amazon
POC Joint VPD 2.0 Knee Pads
Why We love it: Great for long rides because they breathe and don’t move around. Just enough protection without being overkill
The Specs:
- Knee pads for trail, enduro, and downhill riding
- 3D-molded VPD foam stiffens upon impact to disperse force
- Perforated design offers plenty of airflow
- Elasticized hook-and-loop strap customizes the fit
- Slim fit easily slides under your shorts
Check the latest price:
Backcountry | Amazon
FiveTen Kestral Lace MTB Shoes
Why We Love these: I dig these because when the inevitable hike-a-bike section comes, these feel like regular (but stiff) shoes.
The Specs:
- A durable and comfortable off-road shoe
- Soft, tacky outsole for confident pedal grip
- Nylon shank balances stiffness and walkability
- Synthetic toe box provides extra protection
- Lace closure with hook-and-loop strap for a customized fit
Check the latest price:
Backcountry | Amazon
Evoc Pro 3L Hip Pack

Why We Love this: It keeps the sweat off the back and lugs my water around for me. Enough room for Al of the essentials and none of the fluff.
The Specs:
- STAY HYDRATED - Stores the included 1.5L Bladder with space for your belongings in the 3L bag
- QUALITY MATERIALS - Made with 3D air mesh, Airo Flex, and 210D nylon ripstop, the Airflow Contact system offers cooling back ventilation
- VENTIFLAP TECHNOLOGY - The hydration waist pack adjusts quickly for uphill and downhill riding and built-in ventilation to keep you cool
- EXTRA STORAGE - 2 bottle carriers with extra safety fixation are easy to reach, 2 hip pockets for storing essentials
Check the latest price:
| Amazon
Tasco Ridgeline Gloves

Why We Love these: Incredible grip. Super comfy. Durable AF. Sweet designs.
The Specs:
- Pull On closure
- Velcro Free Slip on Minimalist Glove
- Vented Fourchettes (sides of the fingers) to allow for maximum venting
- MicroFiber Sweat wipe on thumb panel - wiping your nose never felt better!
- Conductive threads on the index finger and thumb to ensure you don't miss that trail-side photo
Check the latest price:
| Amazon
Bonus | Some random goodness
Quadlock Case for Iphone 12 Pro – I have the entire set made by Quadlock: car mount, bike mount, armband, motorcycle mount. It’s the most versatile and substantial system out there.
Garmin Edge 830 - My guiding star. Keeps me pedaling without stopping to look at my phone. Makes sure I get home to the ol lady. Great battery life. Gives you bonus chirps when you jump!
GoPro Hero 10 - The best way to capture MTB goodness - high quality. Super cool hyper-lapse features. Durable af. The leader for the pack.
Fattys - Packed with protein. Freaking delicious. Keto friendly. I re commend the Original and Jalapeno flavors.
Ultima Electrolytes - The cleanest and healthiest electrolyte mix on the market. Super small footprint. Delicious. Keto friendly. My favorite is the watermelon flavor.
WANT TO REMEMBER THIS FOR LATER?
PIN THIS TO YOUR FAVORITE BOARD!


Backpacking the Trans-Catalina Trail (TCT) - Everything You Need to Know
The Trans-Catalina Trail is a 32-mile trail that runs from end-to-end of Catalina Island. This is the essential guide to hiking this epic trail.
Catalina Island is an inhabited island located 22 miles off the coast of Southern California. There are amazing hiking, camping, and backpacking adventures along the Trans-Catalina Trail. The island also offers fantastic kelp forest diving and a diverse wildlife population, including Bison!
The Trans-Catalina Trail is a 40-mile trail (commonly referred to as the TCT Trail) that runs the length of the island. The hiking has its fair share of tough climbs complimented by never-ending views at every turn. There are some of the most amazing beachside campsites that offer unbeatable seclusion, and get this - there are even a few restaurants along the trail!
We would highly recommend doing this adventure in the fashionable way that we like to call Backpack-to-Bourgeois. WTF is that? Simple: do an epic grind of a backpack, and end it with a pampering hotel stay where you treat yourself like the king or queen you are.

Backpacker on the Trans-Catalina Trail
All smiles on the TCT Trail
In this Trans-Catalina Trail Guide, we share all the logistics for planning a backpacking trip on the Trans-Catalina Island Trail.
You should practice good trail etiquette at any destination you visit and remember to Leave No Trace. That means packing out your garbage, being respectful of others on busy trails, and following the established rules.
Get a Free PDF of This Guide!
We'll send you a PDF of this guide for offline reading along with future backpacking, camping, hiking, and photography tips to support all of your outdoor adventures.
[wpforms id="7102" title="false"]
Trans-Catalina Trail Stats
Total Distance: 37.5 miles
Total Elevation Gain Loss: +/-7950 feet
Difficulty: Moderatly Challenging
Dogs Allowed: On the trail and at camp, yes (except for Two Harbors Campground)
Advanced Reservations Required: Yes (see CampgroundsReservations section)
Number of Recommended Nights: 4 nights / 5 days
Cell Service: Sporadic.

Getting to Catalina Island
One of the things that makes this one of the most unique backpacks in the world has a lot to do with just getting there. In order to get to the island, you have to take a 60-90 minute boat ride via the Catalina Express. If you’re lucky you might spot some marine wildlife on this gorgeous ferry ride across the Pacific Ocean.
Be aware that the boat ride can be cold and rough, so dress accordingly with layers. If you get seasick, consider taking preventive steps before the ride, such as purchasing anti-nausea bands or packing Dramamine. If you start to feel sick while on the boat, head to the back for fresh air and keep your eyes on the horizon.


You must check in at the Catalina Express office at least one hour prior to your departure to pick up your ticket.
It’s a good idea to call Catalina Express at (800) 613-1212 prior to your boat ride to ensure your trip has not been canceled due to rough seas.

TCT Backpacking Overview
The Trans-Catalina Trail runs east-west along Catalina Island which is part of the Channel Islands Archipelago.
Now to be Uncle Frank, this hike should not be underestimated. Even though you are in Southern California under a beautiful sunny sky surrounded by gorgeous blue waters, rolling hills, and fuzzy Bison, this hike is a bit of a beast. There is actually considerable elevation gain (about 8k feet), a lot of very exposed sections which can be downright brutal in the hotter months, and minimal water sources. This means you will need to carry more water weight than you would probably like to. This is actually a common scenario when hiking the Channel Islands - see Santa Cruz Island Backpacking.
Unlike most backpacking adventures, you are able to get your fill of civilization/humanity every single day. That means actual bathrooms, cooked food (pizza!), and even a general store. Parts of the hike follow a dirt road where are you will encounter the occasional vehicle or guided jeep tour. But come on, being able to be in the middle of a backpack and stop off to have a slice of pizza and a cold beer before you continue on is pretty f*cking epic.

Catalina Island Weather
On average, Catalina Island receives more than 260 days of sunshine every year. For the most comfortable weather and the best chance of seeing the sun, it is recommended to plan your backpack from September to early November. Just note that the landscape and foliage may not be as vibrant green this time of year. If you prefer the greenery and are willing to chance rain, late winter, early spring would be the best.
Check the current weather conditions for Catalina island here.
Campground Reservations
Each campsite requires its own reservation and they may be booked up to a year in advance. Visit Catalina Island is a great source of information about each campsite, so I would recommend looking through this page before reserving. This is a very popular destination for backpackers, day hikers, bird watchers, and more so make sure to Book Early - the spaces fill up quickly!
Here are links for each of the campgrounds on the Trans-Catalina Trail:
BlackJack Campground | Little Harbor Campground | Two Harbors Campground | Parson’s Landing Campground

Permits for Backpackers
Carry a copy of your camping reservations with you when hiking the Trans-Catalina Trail. I recommend having them downloaded to your phone because the cell reception is very unreliable. If you plan on doing some day hiking on the island, you will need to apply for a free permit.
Trans-Catalina Backpacking Trail Map
After you pop off the ferry in Avalon, stop by the Catalina Island Conservancy shop to pick up a detailed Trans-Catalina Island Trail map (free). Even though it is extra weight, it's always recommended to have a hard copy map on hand just in case when backpacking. This map shows the location of water sources, restrooms, food, and other services are located along the trail.
Trans-Catalina Trail Backpacking Itinerary
Day 1: Avalon toBlack Jack Campground | 8.75 miles
Day 2: Black Jack to Little Harbor Campground | 8.35 miles
Day 3: Little Harbor toTwo Harbors Campground | 7.2 miles
Day 4: Two Harbors to Parson’s Landing Campground via the TCT | 7.24 miles
Day 5: Parson’s Landing to Two Harbors via the road and Lion’s Head | 7.2 miles
There are many variations that can be done to this itinerary. Many people opt to cut the last portion of the hike off and finish up with a kayak rental after some pizza and beer at Two Harbors. Well maybe not many people, but we did! It's your adventure, so make sure you make it yours!
Here is a very detailed trail map on Alltrails:
Water Availability
Water is accessible in Black Jack, Little Harbor, and Two Harbors, but there is no potable water on the route between the campgrounds. Your campground reservation at Parsons includes 2.5 liters of water for the final night which will be waiting for you at your site.
Try to get your gear weight down so that you can manage to carry at least 3 liters of water each day. We love using the 4L MSR Dromedary Bag for water hauls like this. Though it can add a bit of a flavor to the water, the bag is incredibly tough and trustworthy.


Cell Phone Reception
Don't expect really any cell phone service on your Trans-Catalina Island backpacking trip. The reception will be very sporadic and unreliable. It's a good idea to turn off or put your phone on airplane mode. Otherwise, your phone will roam about looking for a signal, draining your battery. How else are you going to get those banger IG boomerangs?!
Leave No Trace
Due to its sensitive ecosystem, backpacking the Trans-Catalina Trail comes with its own set of guidelines to keep in mind on top of practicing Leave No Trace.
Catalina Island is home to a variety of species, including the island fox, bison, and some aggressive ravens. Always keep an eye on your meal. The majority of campgrounds feature fox boxes (also known as bear bins) where you may store your food and drink safely.
Please read this twice: Bison are really dangerous! They have a top speed of 35 mph and can change behavior very rapidly of they feel threatened. Do not approach them for photos or any other reason. You will find them right on the trail and in the campgrounds. It's common to have to wait until the herd moves on before continuing your hike. Always be on the lookout for any signs of aggression if they are present.
We were stopped for a mid-trail snack for about an hour because the bison had decided that was the perfect place to graze. While waiting, we were joined by 2 other groups who also took the opportunity to take a rest.
At the campsites, in town, or at the airport, there are restrooms available so please take advantage of them! If you have to go when not near a bathroom, make sure to observe Leave No Trace guidelines and pack out your toilet paper.

Trans-Catalina Backpacking Gear
Make sure to Download our 3 Day Backpacking Checklist. By adding in a couple more meals, snacks, and a little more clothing, you could easily adapt this to 4-5 days. Below you will find a list of the gear that we took on this trip. It includes almost every piece that we had with us in our backpacks.
Note that in the late fall, winter, and early spring, evenings can be quite cold. Make sure to pack a beanie, long pants, and a warm jacket for the evenings.
HIS
Backpack: Gregory Baltoro 75
Tent: Nemo Hornet 2p
Sleeping Bag: Nemo Kayu 15
Sleeping Pad: Nemo Tensor Wide
Shoes: Hoka One One Anacapa Mid GTX and Chacos
Headlamp: Petzl Reactik
Sunglasses: Roka
Hiking Poles: Black Diamond Trail Ergo
Clothing: Arcteryx Beta SL | Eddie Bauer Guide Pro Pant | Outdoor Research Echo Hoodie | Arcteryx Atom LT Hoody | Smartwool Performance Hike Light Socks
Food Stuffs:Jetboil Zip | Fatty Meat Sticks | Ultima Electrolytes | Mountain House Meals | Starbucks VIA | Nalgene 32oz Water Bottle
Camera Gear: Canon R, Canon 24-105 lens, GoPro Hero 9
HERS
Backpack: REI Traverse 65
Sleeping Pad: Nemo Tensor Regular
Sleeping Bag: Marmot Trestles 15
Sleeping Bag Liner: Cocoon Silk Mummy
Pillow: Klymit Pillow X
Shoes: Hoka One One Tennine GTX
Clothing:
Food Stuffs:Wild Zora Paleo Meals | Wild Zora Snacks | Wild Zora Grain Free Hot Cereal | Four Sigmatic Mushroom Coffee Mix |
Share on Pinterest


Hikers Will Need a Permit To Hike Angels Landing
Starting in April, Zion National Park will require hikers to win a permit lottery to climb the Angels Landing trail.
Want to hike to Angels Landing in Zion National Park?
You’ll have to be a little bit brave, and a little bit lucky.
As of April 1, hikers will need a permit to make the strenuous 5-mile trek, which climbs 1,488 feet and is definitely not for anyone with a fear of heights.
The new policy comes in response to a rise in visitors to the park in recent years. June was the busiest month ever for Zion, which opened its doors in 1919, and the park is on course to have its busiest year ever, surpassing 2019′s 4.5 million visitors.
The Angels Landing trail, in particular, has become increasingly crowded — and dangerous. At least 13 people have died on the trail since 2000.


“Angels Landing is one of the most iconic destinations in Zion National Park and issuing permits will make going there fair for everyone.” Jeff Bradybaugh, park superintendent, said in a statement. “The system we’ve put in place will reduce crowding on the trail, address safety concerns and make it easy for visitors to plan ahead.”

How to Get a Permit for Angels Landing
People will be allowed to enter the lottery for a permit online beginning Jan. 3, 2022. It'll cost $6 to enter the lottery and $3 per person among lottery winners of a group. The initial lottery will close on Jan. 20, 2022, for permits between April 1 and May 31, 2022.
Another lottery window will begin April 1, 2022, for permits between June 1 and Aug. 31, 2022. On July 1, the window will open for permits between Sept. 1 and Oct. 31, 2022. Permits for Dec. 1, 2022, through Feb. 28, 2023, will first go on sale on Oct. 1, 2022.
The $6 application fee is nonrefundable, according to park officials. Lottery winners can receive a refund for the $3 per person if they cancel two days before their permit date.
Park officials say people will need to print or download their permits before they get to the Angels Landing trailhead. A ranger may ask for a permit at the Grotto, Scout Lookout or along the trail. They may turn a hiker around if they do not have their permit with them.
Why did this happen?
The new permit program is in response to safety concerns and congestions along the hike that have risen in recent years. Last month, preliminary visitation data shows Zion National Park, at over 4.5 million, has already broken its visitation record this year.

The figure, through October, is about a 60% increase from visitation numbers reported in 2011. With 2021 trends at Angels Landing mirroring 2019 trends, when the park began counting people going up Angels Landing, officials said they knew it meant they needed to do something to address overcrowding on the trail.
Rangers started testing out the system during the summer holiday season in an effort to manage the number of hikers especially along the chain section of the hike, which posed safety concerns. Park officials then proposed the concept as a mainstay in August.
The plan received close to 1,000 responses during the public comment period and enough support that they moved forward with the idea. A spokesperson for the park said that since the permit lottery is a pilot program, the National Park Service will monitor it and make adjustments “as needed.” Officials also plan to seek feedback on the plan after it is implemented to see what does and doesn’t work.

OUTDOOR
ADVENTURE
Featured Posts


HIKING
|
FLY FISHING
|
CAMPING
|
BACKPACKING
|
GEAR REVIEWS
|
HIKING | FLY FISHING | CAMPING | BACKPACKING | GEAR REVIEWS |
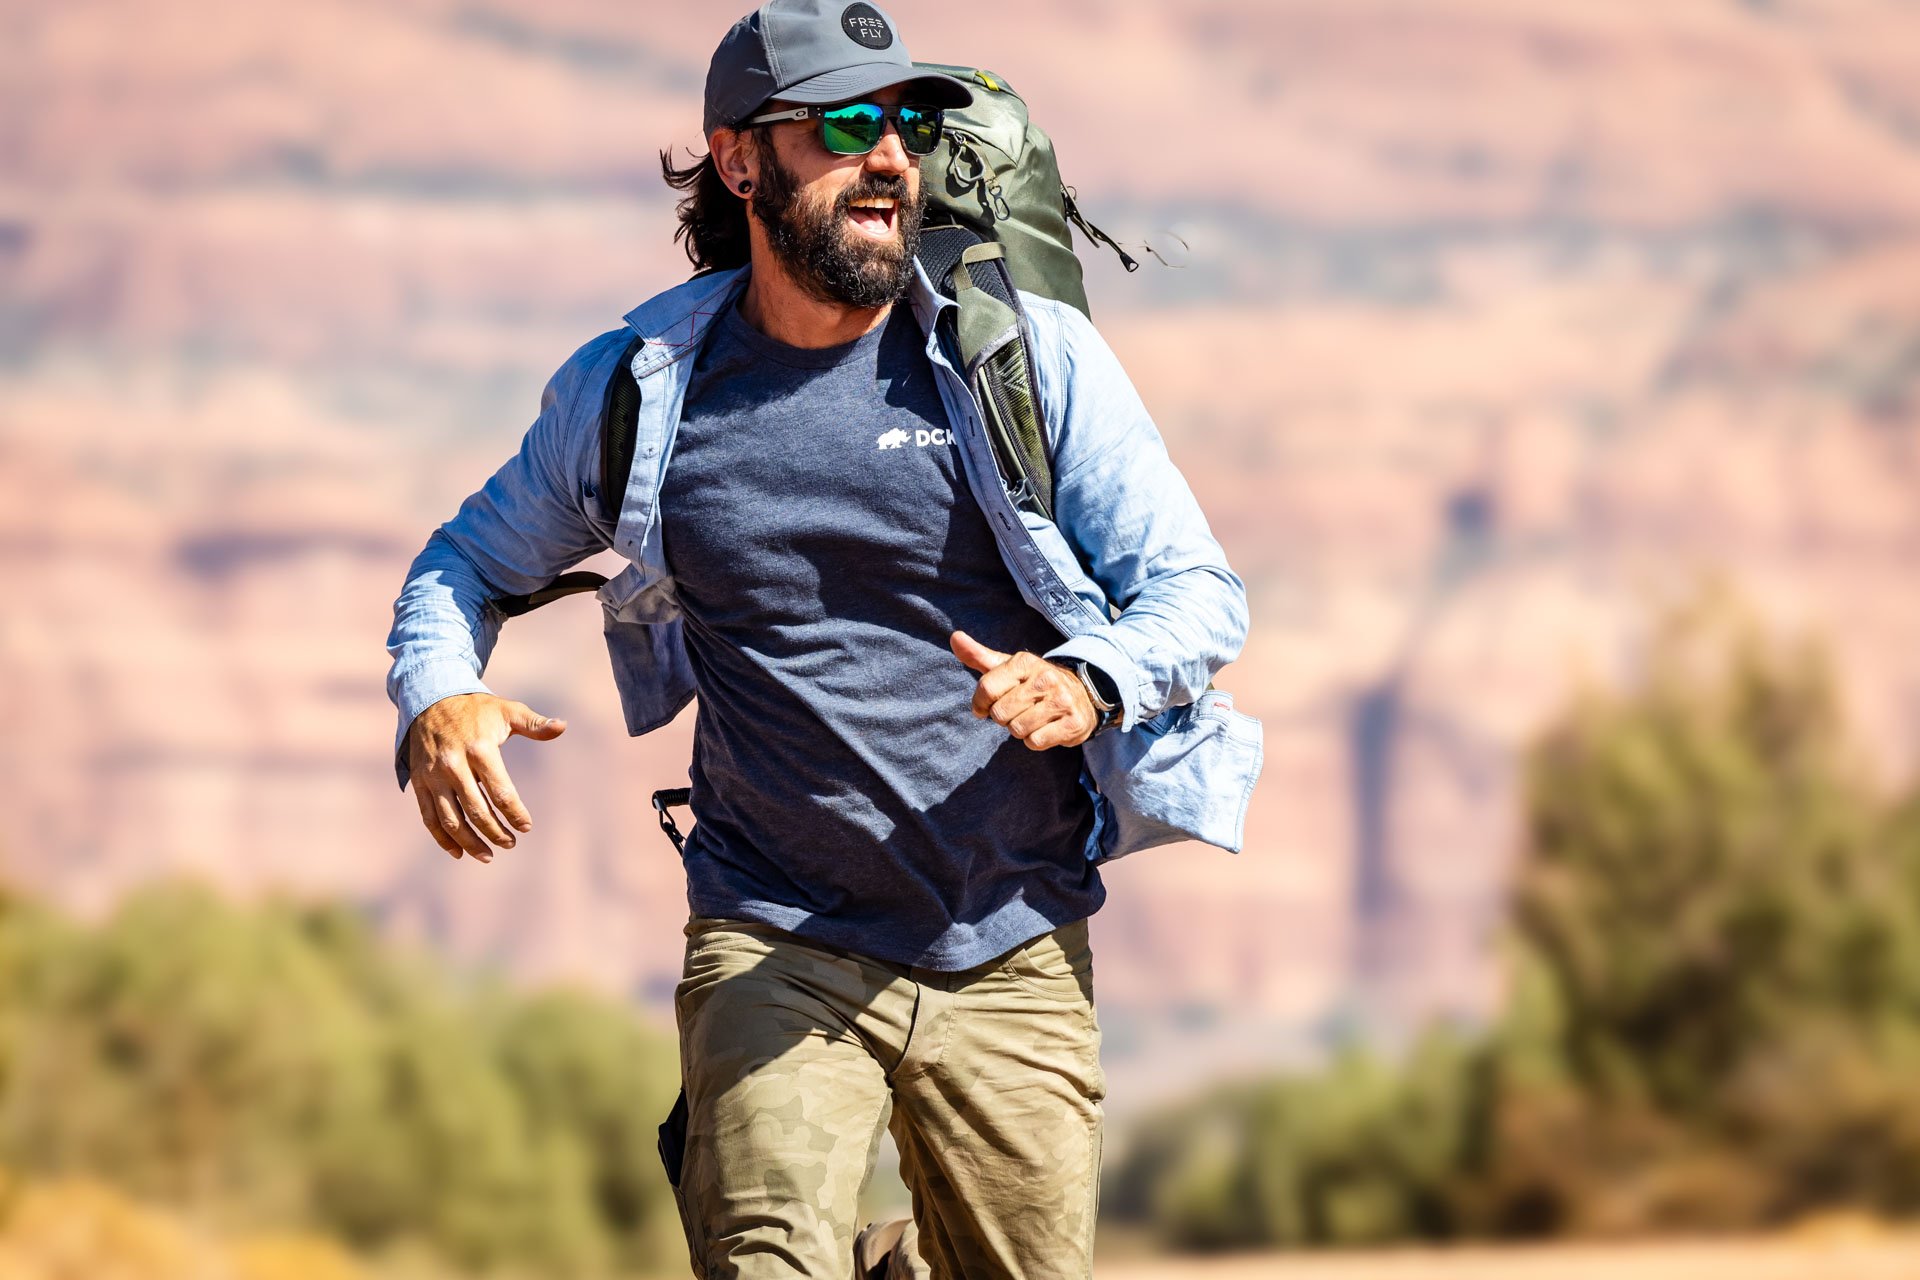
Best of
Top Clothing Brands of 2023
Discover unbeatable deals on Patagonia winter essentials at the REI Outlet sale! Get up to 40% off on jackets, parkas, and more.
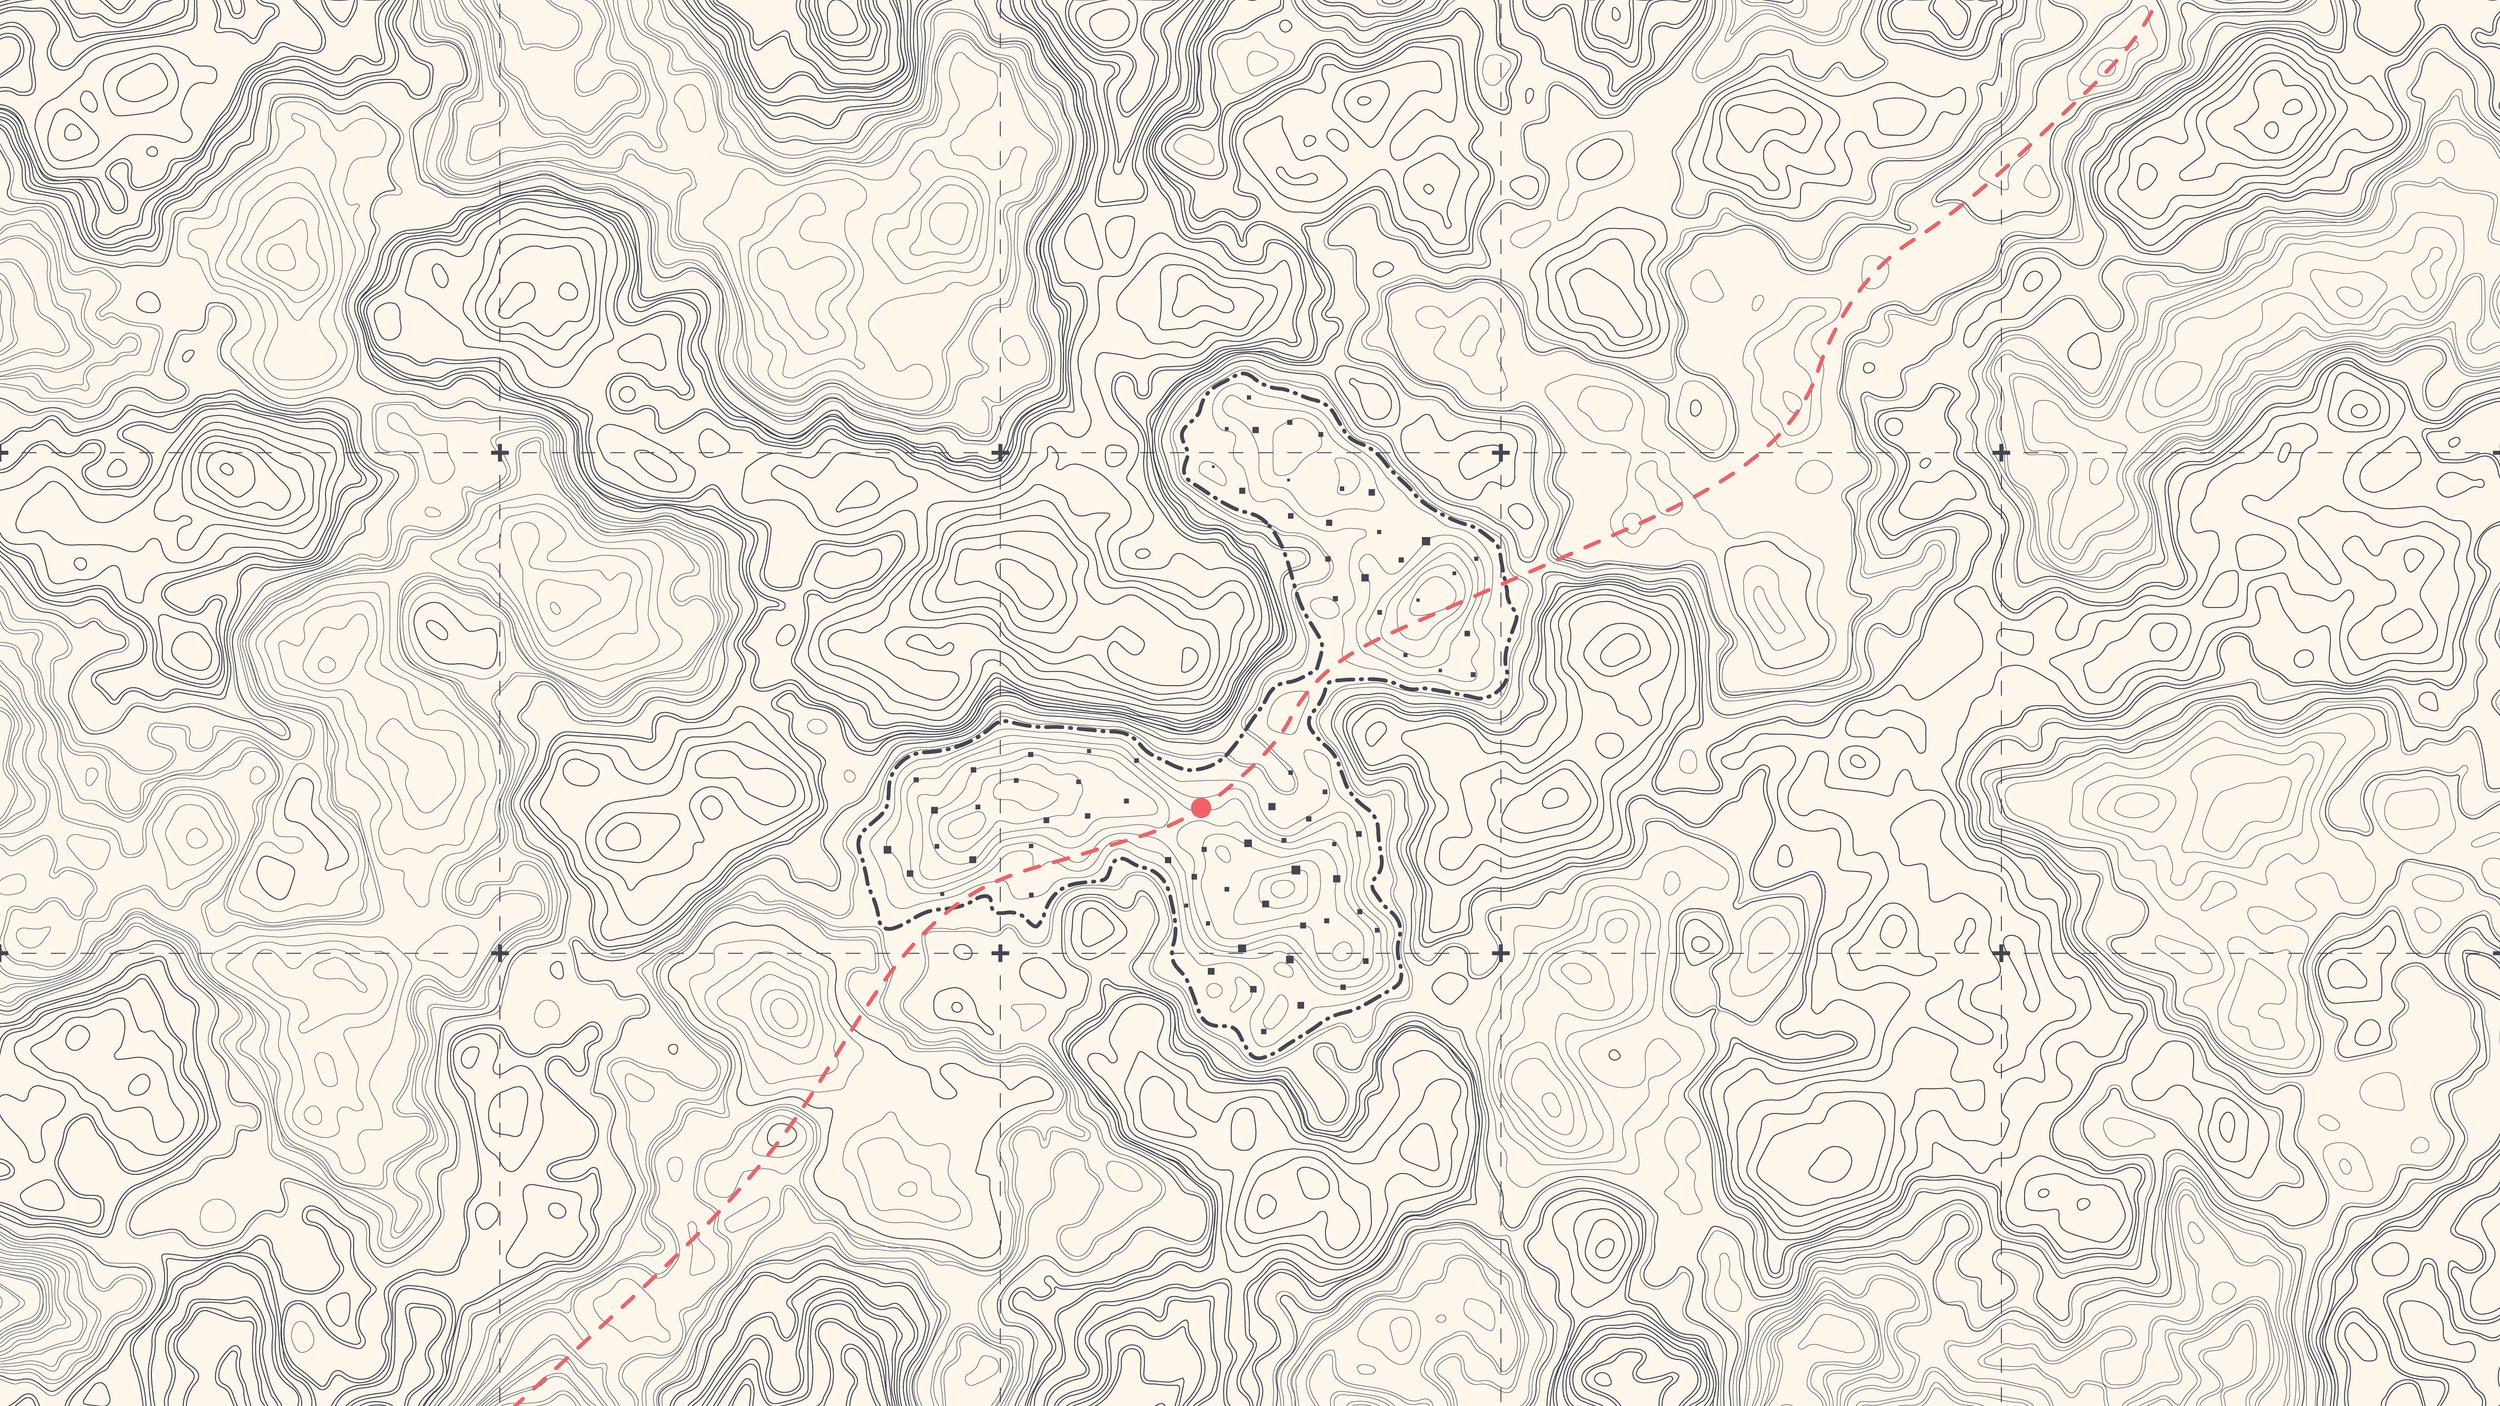
Subscribe to Our Newsletter
Sign up with your email address to receive news and updates.
Get in touch.
Just like in a hardcore round of intense pickleball, communication is key! Reach out with any questions, comments, beer recommendations, inquiries, critiques and jokes.
Master the art of fly fishing for carp with essential flies and techniques. Catch these elusive freshwater giants with precision and skill.